| Contents | |||||||
 |
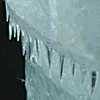
Icicles Adding icicles to a model. |
 |
Signs How to make removable signs for buildings. |
 |
Tapestries Making tapestries to add to a model. |
 |
Plastering
Walls Adding areas of plaster to model walls. |
 |
Damaged
Plaster How to make areas of damaged plasterwork. |
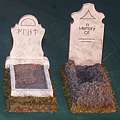 |
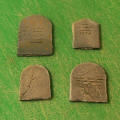
Graves How to make a variety of graves. |
 |
Gravestones Using old plant labels to make gravestones. |
||

|
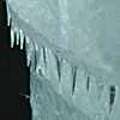
Icicles (Click thumbnails for larger images) |
|||||
|
|
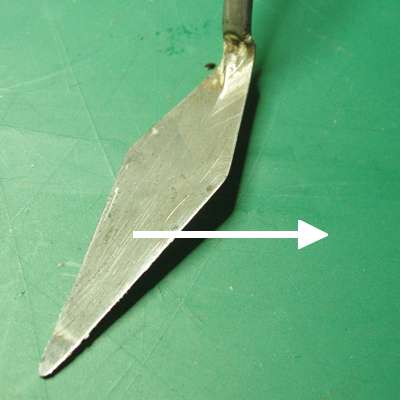
Stage 1 Cut strips from transparent plastic (acetate or blister pack) leaving a sawtooth edge. |
|
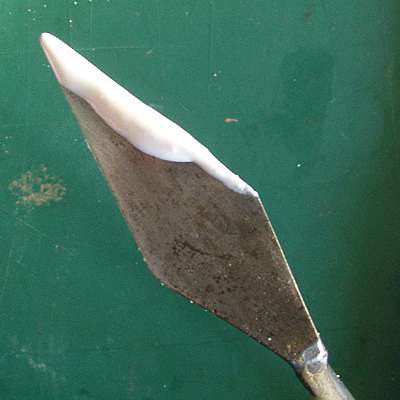
Stage 2 Attach in place with clear epoxy resin adhesive. |
|
Stage 3 Cover with more epoxy to build 3D icicles. |


|
Removable Signs (Click thumbnails for larger images) |
|||||
|
|
Removable Signs (Click thumbnails for larger images) |
||||
|
|
Materials: Blister Pack Plastic Card / Basswood (Printer) (Spray Glue) Superglue |
|
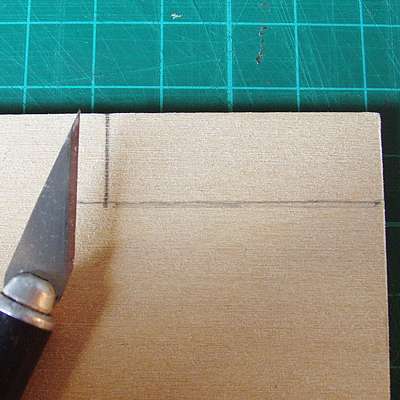
Stage 1 Decide how big your sign will be and draw the shape onto some thick card or thin basswood. Carefully cut the outline with a sharp craft knife. |
|
Stage 2 You can paint the design onto the sign if you like. I made a design on the computer, printed it, and stuck it onto the basswood using spray glue. This prevents the paper wrinkling up. |
|
|
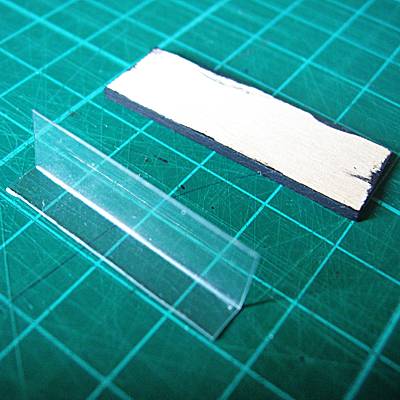
Stage 3 Cut a piece of clear plastic from a blister pack. This should be just less than the width of the sign. Score a line with the back of the knife, and bend the plastic into an L-shape. |
|
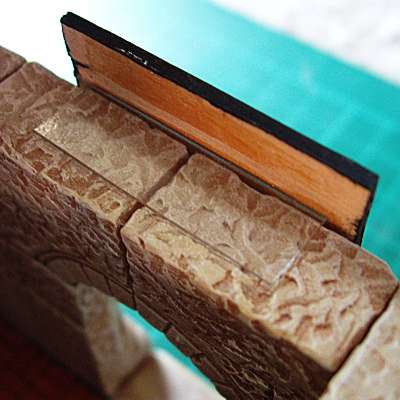
Stage 4 Fix the plastic bracket to the back of the sign with superglue, and trim any excess length with the craft knife. The sign should now sit on the lower wall of a building with separate storeys. |
|
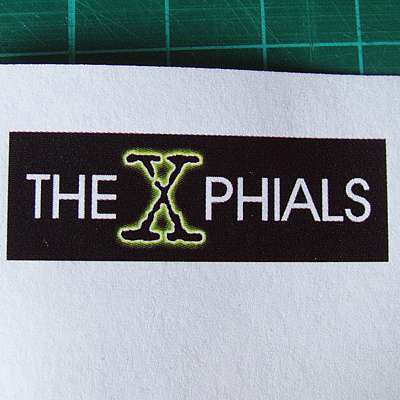
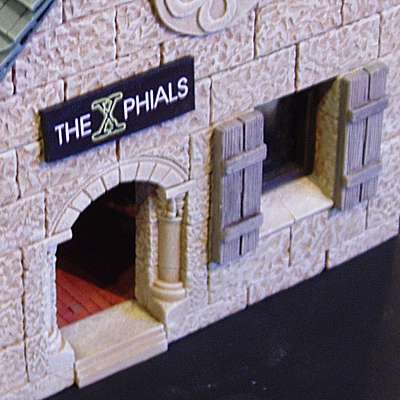
Stage 5 The finished sign in position over the door of my alchemist's shop. The sign can now be removed for transportation or storage, or replaced with a different sign to represent a different shop. |

|
Tapestries (Click thumbnails for larger images) |
|||||
|
|
Tapestries (Click thumbnails for larger images) |
||||
|
|
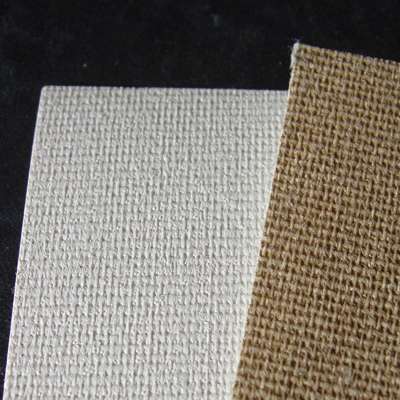
Materials: Inkjet Printer Art Canvas Paper (shown front and back) Cocktail Stick 3mm Metal Crimp Beads PVA (White Glue) |
|
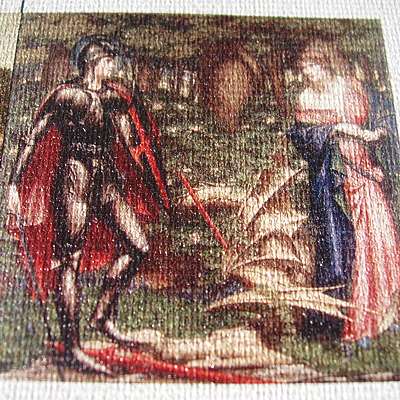
Stage 1 Find or create suitable images for your tapestries. Import them into a layout program like Corel Draw, or MS Word. I printed a complete row at a time to avoid wasting the paper, which isn't cheap. |
|
Stage 2 Cut the images out with a sharp craft knife or scissors. |
|
|
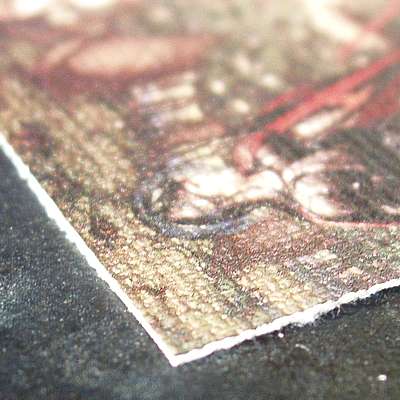
Stage 3 The cut edges will be white, which looks odd if the image has a dark edge. I used a permanent black pen to cover these. |
|
Stage 4 The pole is made from a cocktail stick and 2 of the crimp beads. Push a bead as far as it will go onto one end of the stick, and trim to length. |
|
Stage 5 Cut the other end so it overhangs, and sand down the end until the bead fits snugly. Fix the beads with a small dab of PVA, and paint or stain the stick. |
 |
Stage 6 Using PVA, glue the pole to the top edge of the tapestry, and it is ready to be fixed onto the wall. |
 |
Stage 7 As an alternative, I cut a thin strip of coloured paper, and made tabs to attach this tapestry to the pole. |
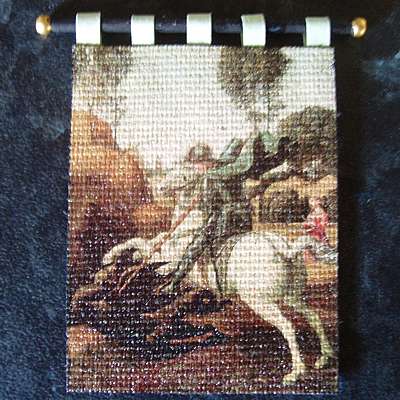 |
Stage 8 The second tapestry complete with tabs. |


|
Plastering Walls (Click thumbnails for larger images) |
|||||
|
|
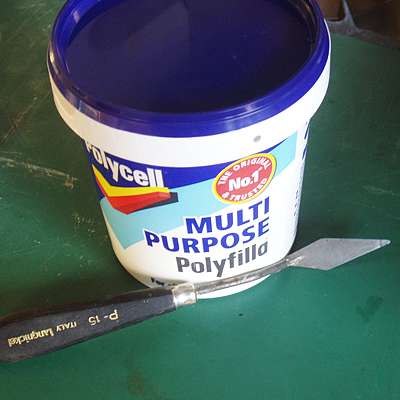
Materials Ready-mixed filler Emery Board Palette Knife (You can use other tools for spreading the filler, but I find a palette knife is ideal for getting into corners) |
|
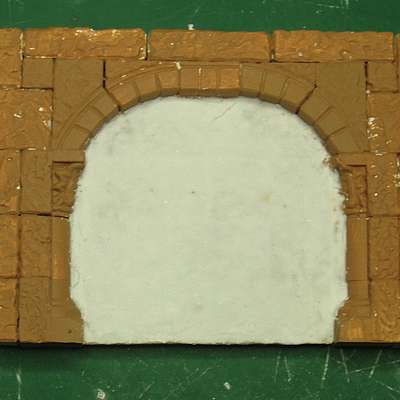
Step 1 Undercoat the area you are going to "plaster". This will seal the blocks and prevent the filler drying on contact. This is a good use for any blocks you may have with large air bubbles. |
|
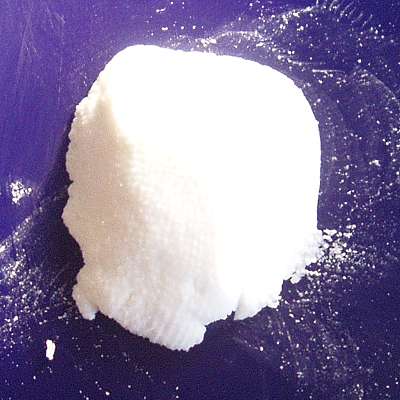
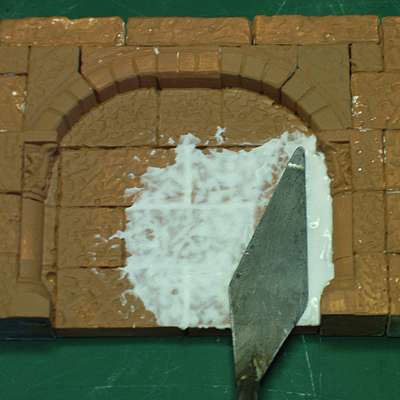
Step 2 Place a quantity of filler on a smooth plastic surface, add a drop of water, and mix thoroughly. The filler should be just wet enough to stick to the palette knife. |
|
|
Step 3 "Cut" a small amount of filler onto one edge of the palette knife. |
|
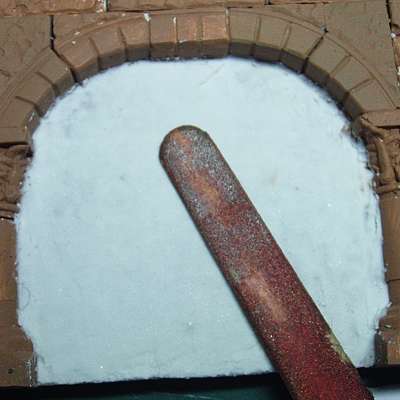
Step 4 When applying the filler, try to keep the blade of the knife at a slight angle to the surface. Drag the knife slowly across the blocks away from the edge containing the filler. |
|
Step 5 Start at the edges of the piece, and gradually work your way to the middle, building up the thickness as you go. |
 |
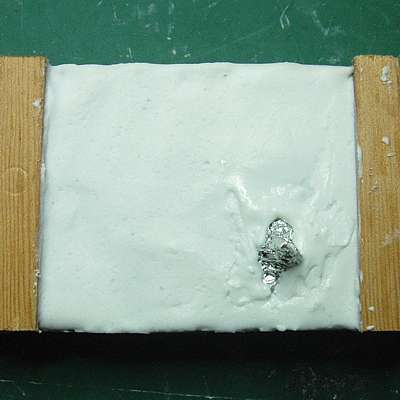
Step 6 Allow the filler to set for about 30 minutes, then use the palette knife to smooth out any obvious irregularities. |
 |
Step 7 When the filler is completely dry, you can smooth the area further with an emery board. |
 |
Step 8 The wall section finished and painted. Should you wish, you could now paint a mural on the "plastered" section. |

|
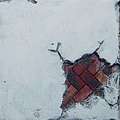
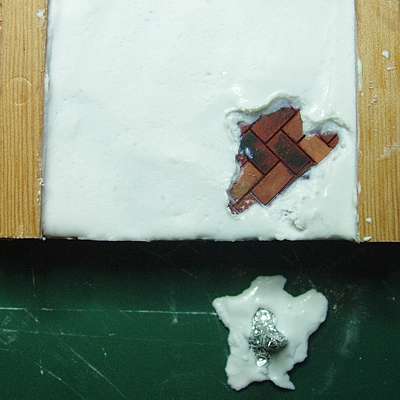
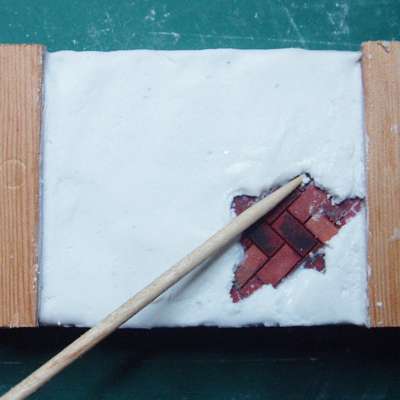
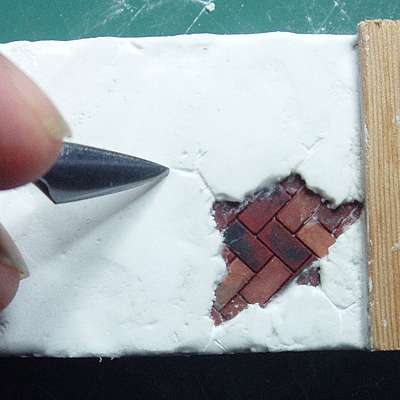
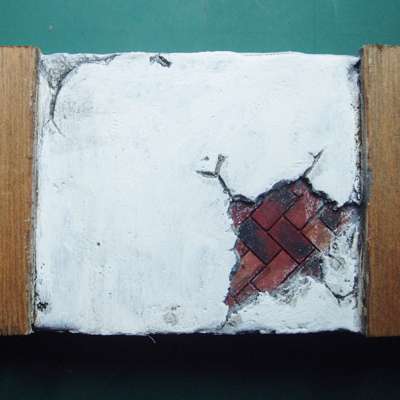
Damaged Plaster Walls (Click thumbnails for larger images) |
|||||
|
|
Step 1 Undercoat the model, and finish painting the area which will be exposed by the damage. Pinch a piece of kitchen foil, making a suitable random shape with a handle to hold it. |
|
Step 2 Spread the filler as described above, holding the "handle" of the foil to keep it in place. |
|
Step 3 Leave the filler to set for about 10 minutes, then carefully remove the foil. |
|
|
Step 4 If you aren't happy with the shape of the hole, use a cocktail stick to remove some more of the filler. |
|
Step 5 Once the filler is dry, use a dental pick or other sharp tool to make some cracks around the edges of the hole. |
|
Step 6 Paint the wall plaster in the colour of your choice. Finish by painting the cracks and edges of the hole in a grey colour. |

|
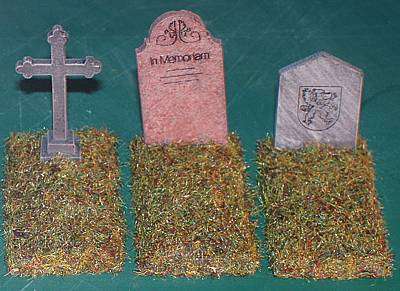
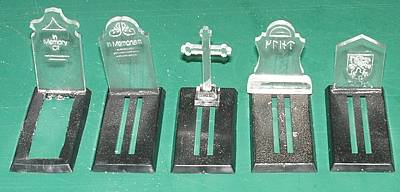
Graves (Click thumbnails for larger images) |
|||||
|
|
Materials: Cavalry Bases Plaster A&K Studios Gravestones Static Grass PVA / White Glue Superglue |
|
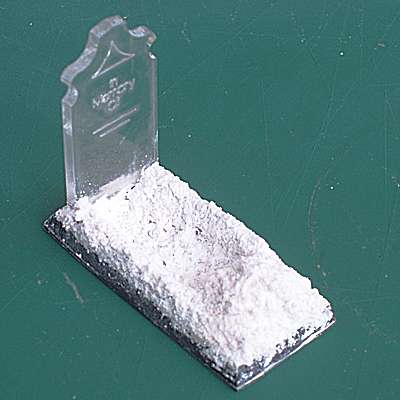
Stage 1 Use superglue to stick the gravestones to one end of a cavalry base. You can see that I cut a hole in one of the bases to represent an unfinished grave. I then stuck this on top of a piece of thin plastic. |
|
Stage 2 Paint the base with PVA, and let it dry. Mix up some plaster, and pour this on top of the graves. Build up the sides of the open grave, and make a heap of plaster at the opposite end from the gravestone. |
|
|
Stage 3 Second thoughts - I decided the dwarf grave should look a bit different. I glued the ribs that I cut from the open grave to form an enclosure, and then used PVA to stick sand inside it. |
|
Stage 4 Once the plaster on the open grave had set well, I soaked it with water, and sprinkled fresh dry plaster on the top using a teaspoon. This gives a rough, earth-like texture. Let it dry well, before continuing. |
|
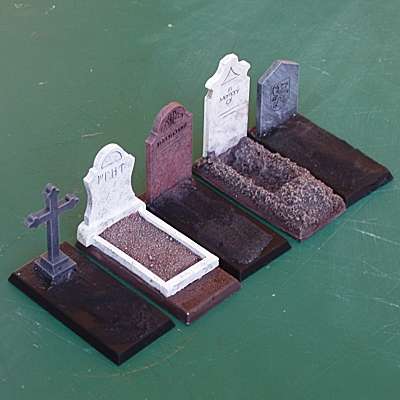
Stage 5 Next, undercoat the models: I did two in white, and three in black. Base coat the earth brown, and drybrush the loose earth of the open grave. Paint different marble and granite textures on the stones. |
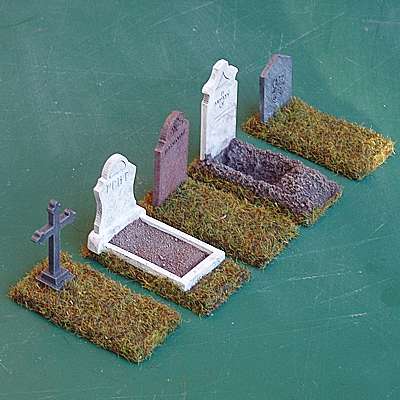 |
Stage 6 Apply static grass to any appropriate areas of the models, using watered-down PVA. |
 |
Close-up of the dark stones For the red granite I used the same colours as the red marble. The right-hand stone was painted by streaking different greys using a splayed (ruined) soft brush. |
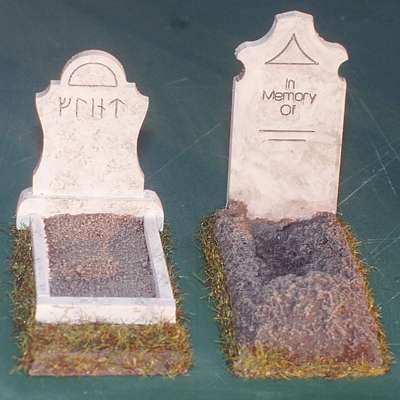 |
Close-up of the light stones This shows the earth mounded up around the open grave, and the enclosure on the dwarf grave. I kept this shorter than the base, for obvious reasons. |


|
Gravestones from Plant Labels (Click thumbnails for larger images) |
|||||
|
|
Materials & Equipment Plastic plant labels Craft knife Primer Paint & brushes |
|
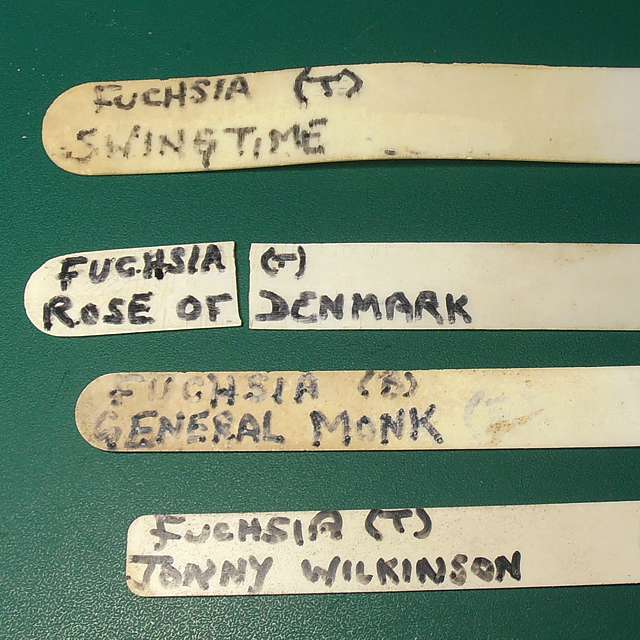
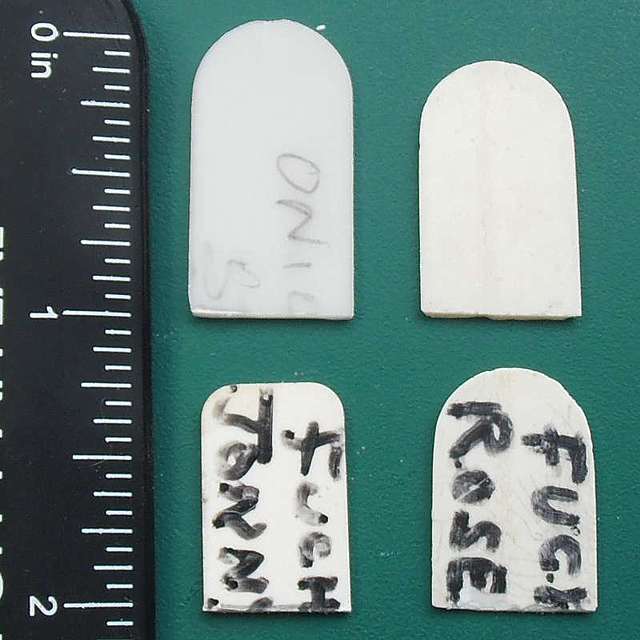
Stage 1 Plastic plant labels degenerate with exposure to UV light. Here is an easy way to reuse them when they no longer function in the garden. Wash and dry the labels. Cut the top off each label with a craft knife. Lengths from around 19mm (3/4") to 25mm (1") look about right. |
|
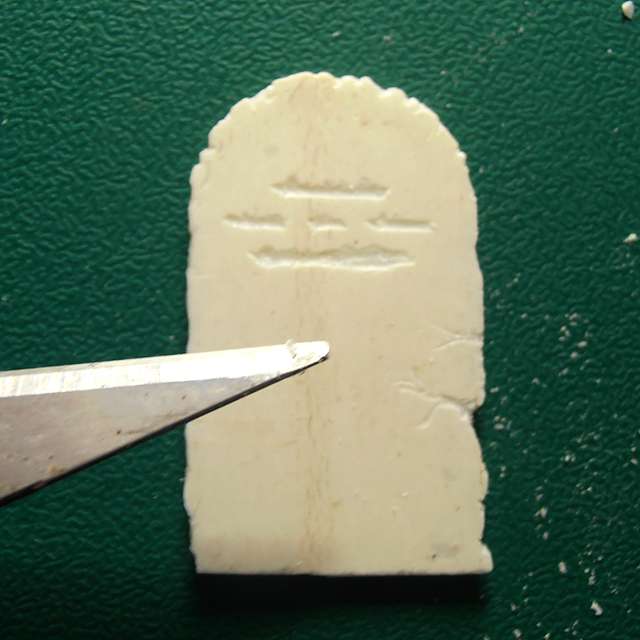
Stage 2 Scratch some lines with the point of the knife to represent text on the stone. You can also add small chips and cracks to the edges to make the stones look old and worn. |
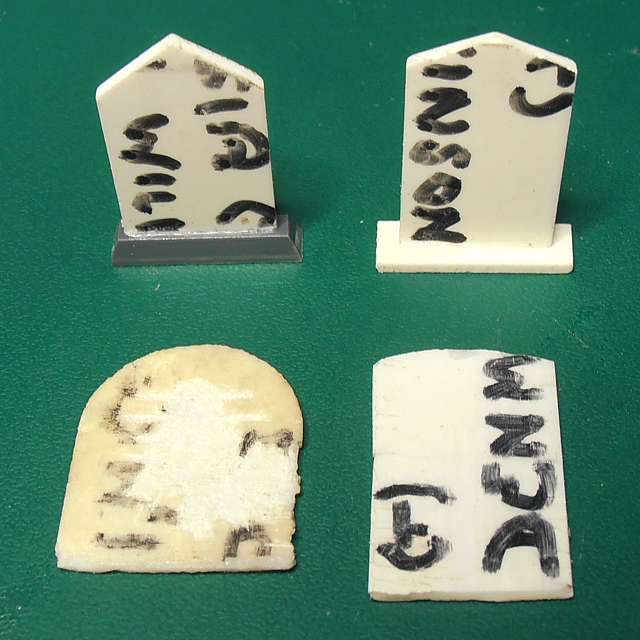 |
Stage 3 Cut more lengths from the remaining label to make more stones. Trim the tops to make a variety of different designs. You can also add plinths made from more pieces of the label, spare sprue or other materials. |
 |
Stage 4 Prime the pieces and paint in your choice of stone colours. |
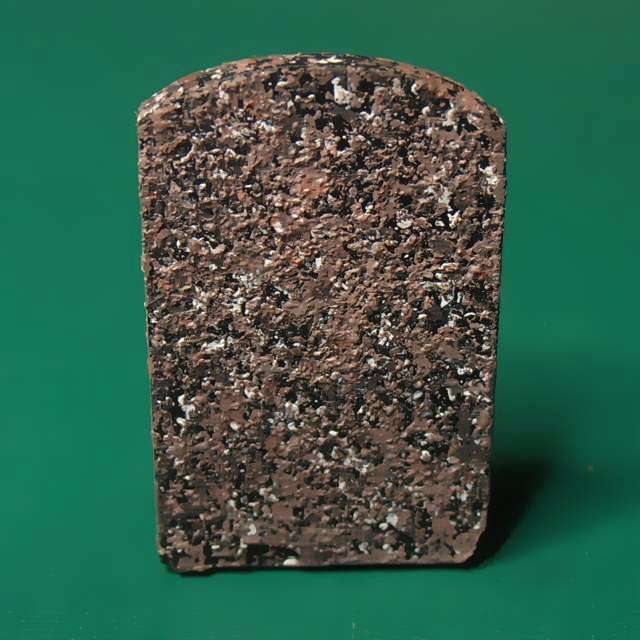 |
Options Gravestones are often made from marble or granite, and are a great subject to try faux stone paint effects. |
|
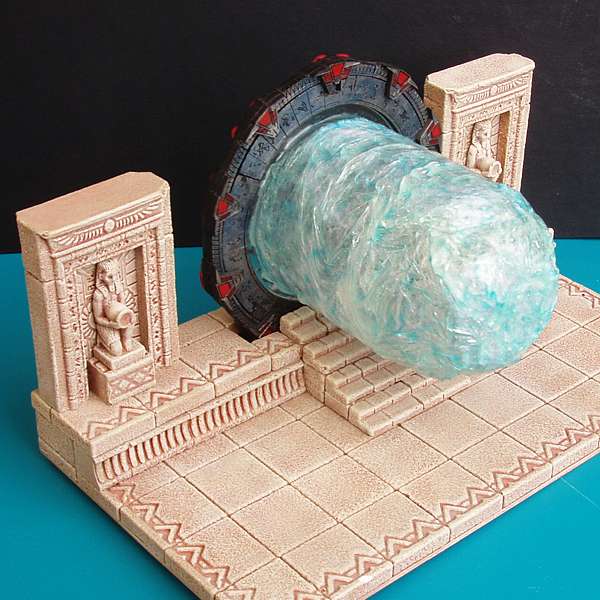
Stargate Kawoosh (Click thumbnails for larger images) |
|||||
|
|
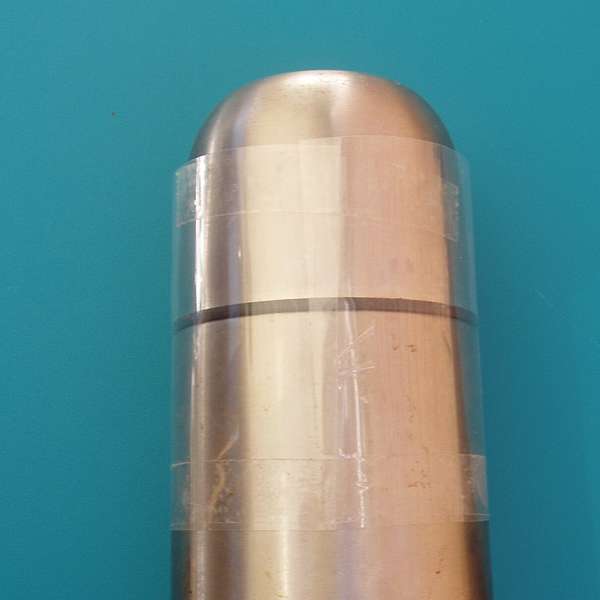
Materials: Suitable former Acetate Cling film Clear adhesive tape Clear epoxy adhesive Gloss varnish & blue ink |
|
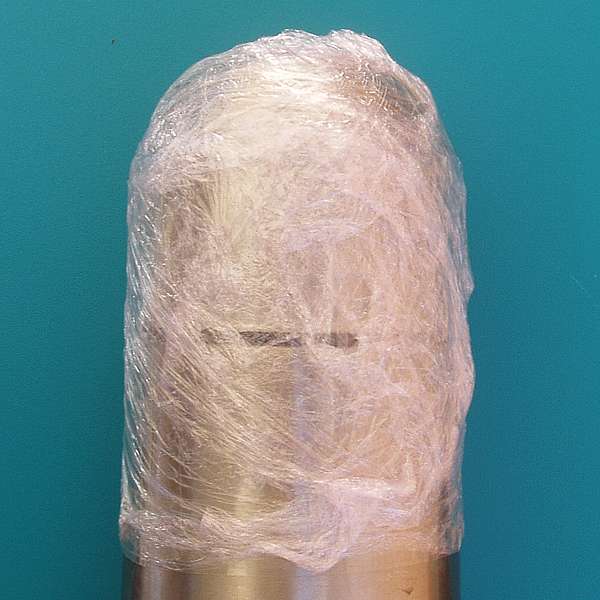
Stage 1 Wrap a strip of acetate around a cylindrical former with a rounded top. Secure the acetate with clear tape. This is a small vacuum flask, but a standard aerosol cap could be modified with the addition of a dome made from modelling clay or foam. |
|
Stage 2 Wrap a couple of layers of cling film over the top of the former and covering the acetate. |
|
|
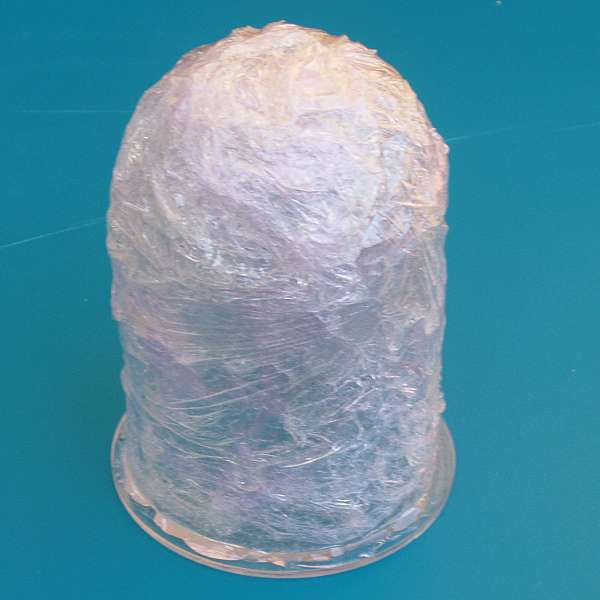
Stage 3 Smear clear epoxy adhesive over the cling film, working your way down from the top. Once you get close to the base, remove the piece from the former. |
|
Stage 4 Attach the piece to the base with more clear epoxy, and finish off any areas which were not covered before. |
|
Stage 5 Paint the whole surface with a mixture of gloss varnish with a little blue ink added to tint it. |

Contact me with suggestions, comments or questions.
These articles are provided under this Creative Commons Licence:
![]()