|
Making Flat Floors
(Click thumbnails for
larger images) |
|
|
Materials
Glass sheet (either a glass worktop saver or a glass
bathroom shelf is ideal, since they are made from safety glass)
The backing can be easily removed from a cheap worktop
saver after dishwashing on a hot setting. |
 |
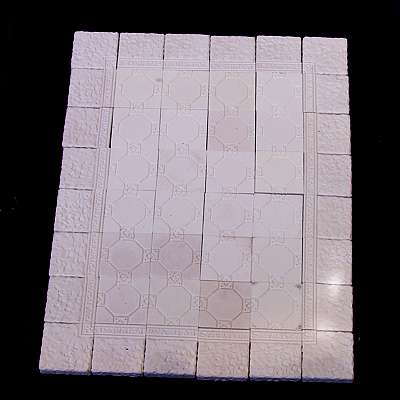
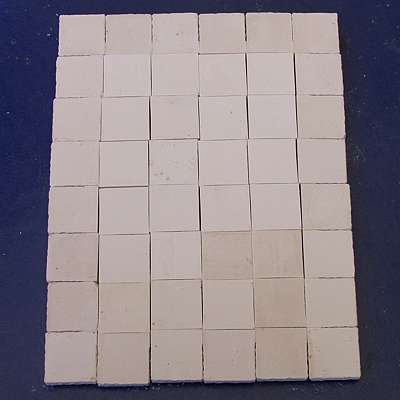
Step 1
Make a dry layout the floor design on a suitable board. |
 |
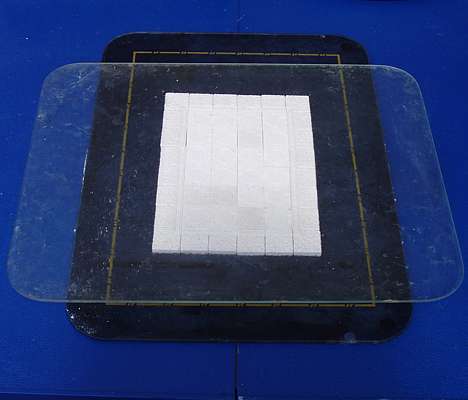
Step 2
Place the
glass sheet on top and carefully turn the whole lot upside down. |
|
 |
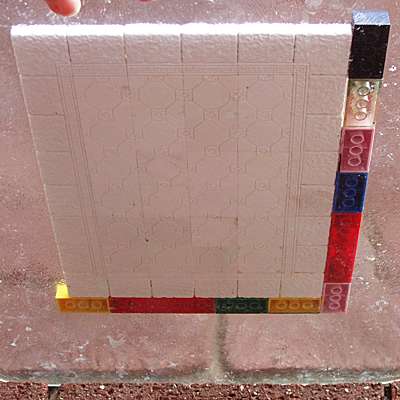
Step 3
The reason for using this method becomes obvious, since
the tiles look almost identical from beneath. |
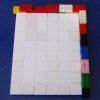 |
Step 4
Put together some lego blocks to use as a set square, and
glue the tiles together. Use the glue sparingly, and try to keep it on
the upper edge of the tiles to prevent it seeping down onto the front
faces. |
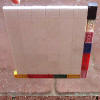 |
Step 5
Hold up the glass sheet and look from underneath to check
that the pattern is correct. Once dry, the upper surface of the floor
should be dead level, although protruding blocks on the underside may
need to be sanded before gluing it to a base. |
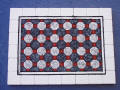 |
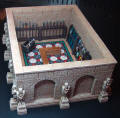
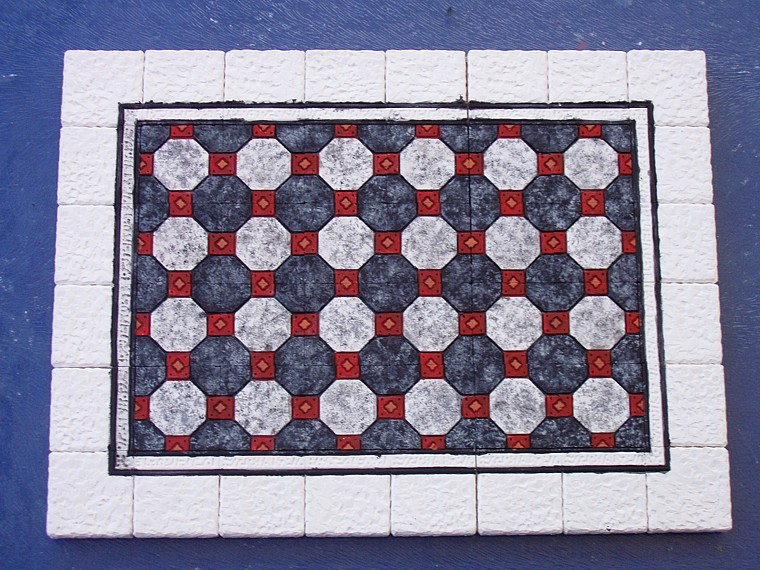
Example
The floor part-way through the painting process. |
|
|
|
|
|
Buildings with Flat Walls
(Images to follow) |
|
|
Materials and Equipment
Flat work surface - a glass worktop saver is ideal
Lego to keep blocks square
Clamps
Blocks
PVA (white glue)
|
|
Step 1
Make a strip of Lego blocks as long as your wall and
clamp to one edge of your board. Make 2 "L" shapes from Lego to act as
set-squares.
|
|
Step 2
Lay out your wall blocks dry (without gluing). If you
have any variation in size, try to select blocks so as to minimize any
unevenness. Build the wall upside-down, with the top against the Lego
straight-edge. |
|
|
Step 3
Place packing blocks in any spaces like window or door
openings. I usually leave the untextured side facing upward to remind me
not to glue these, but you could mark them with a blob of paint.
|
|
Step 4
Create finger joints at each end of the wall and add
packers in the spaces.
|
|
Step 5
Build the wall upside-down, with the top against the Lego
straight-edge. Glue the blocks together with PVA, taking care not to glue
the packers. Use the Lego set-squares to keep the ends perpendicular.
Leave to dry for an hour or so. |
|
|
Step 6
Whilst the first wall dries, you can begin to dry-stack
the blocks for the other walls on another board. |
|
Step 7
When dry, carefully remove the packing from the finger
joints of the first wall. Set the blocks of the second wall beside the
first, and change the blocks for the second finger-joints if the fit is
too slack or too tight. |
|
Step 8
Glue these blocks in place ensuring you do not glue the
two walls together. Use a set-square once again to ensure the end is
perpendicular. |
|
|
Step 9
Add the third wall at the other side of the first, dry
wall. Leave the new sections to dry for an hour or so. |
|
Step 10
Mark the joints then carefully separate the three walls
at the joints. Now put the two side walls on the board with the unmarked
ends closest, and stack the blocks for the final wall between them. |
|
Step 11
Glue the final wall and leave everything to dry for
several hours - preferably overnight. |
|
|
Step 12
Stand the wall on its upper face. Slightly separate the
joints, and carefully twist the side walls into rough position. |
|
Step 13
Slide the final wall into position, add glue and close up
all the joints. Use the Lego blocks once again to ensure the corners are
square. |
|
Step 14
If the new building is a section of a larger structure,
set the finished section in position on the existing model to ensure all
the walls align nicely. Allow the glue in the joints to dry. |
|
|
Step 15
Once the joints are thoroughly dry, you can sand the
bottom edge of the new piece if needed. |
|
|
|
|
|
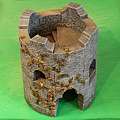
Buildings with Round Walls
(Images to follow) |
|
|
Materials and Equipment
Flat work surface - a glass worktop saver is ideal
Former (see Step 1)
Elastic Bands
Blocks
PVA (white glue)
|
|
Step 1
To make circular towers, you need some kind of former to
build the blocks around. Food and drink tins and bottles can be a good
starting point for these, and you can wrap card and tape around them
till you get a former with the right diameter.
|
|
Step 2
I think the easiest way to keep this kind of model neat
and square is to split it into a series of layers. I make rings of two
or three courses of blocks around a former and leave them to set before
continuing. This way you can easily add internal details like stairs
before gluing the sections together. |
|
|
Step 3
Lay out your wall blocks dry (without gluing). If you
have any variation in size, try to select blocks so as to minimize any
unevenness. Build the wall upside-down, with the top against the work
board.
|
|
Step 4
Place packing blocks in any spaces like window or door
openings. I usually leave the untextured side facing upward to remind me
not to glue these, but you could mark them with a blob of paint.
|
|
Step 5
Glue each layer together and place an elastic band around
it to hold everything in place. Allow the glue to dry for an hour or so.
|
|
|
Step 6
Remove the elastic bands first, then slide the
completed section off the former. For all layers after the first, place
the section in situ on the previous piece to ensure that everything
lines up correctly. Leave overnight before continuing.
|
|
Step 7
Add any internal details to the rings - stairs, floors,
decorations etc. and leave to dry. Once again, leave the sections
upside-down so that the upper surface is nice and flat.
|
|
Step 8
If you will be able to see the inside of the model, paint
the inside of each ring now, whilst it is easy to access.
Leave to dry. |
|
|
Step 9
Before gluing the sections together, dry-stack them. If
needed, you can now sand the bottom of any ring which doesn't fit
nicely.
|
|
Step 10
Glue the
sections together and leave to dry. If you have parapets or other
features which stick out from the building, add them at this stage. |
|
Step 11
Paint the exterior. |