| Contents | |||||||
 |
Ice Pond Building a small diorama of an icy pond, with step-by-step instructions. |
 |
Telescope Building a steampunk telescope with annotated steps. |
||||

| Concept to Completion |
| Contents | |||||||
|
|
Ice Pond Building a small diorama of an icy pond, with step-by-step instructions. |
|
Telescope Building a steampunk telescope with annotated steps. |
||||
|
Ice Pond (Click thumbnails for larger images) |
|||||
|
|
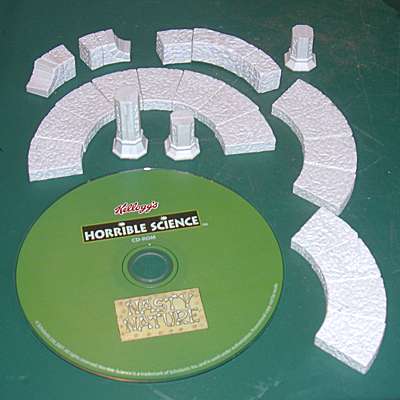
Materials: HA Ruined Tower mould pieces Snow Flock & Autumn Leaves CD PVA / White Glue Superglue Basswood Acetate & Blister Packs |
|
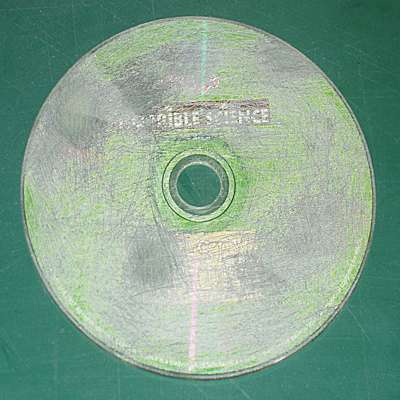
Stage 1 Roughen up the surface of the CD. I used a coarse grade sandpaper to do this, but a lot of scoring with a sharp knife will achieve a similar result. This provides a key for the glue to adhere to - if you leave it dead smooth, there is a tendency for things to peel off. |
|
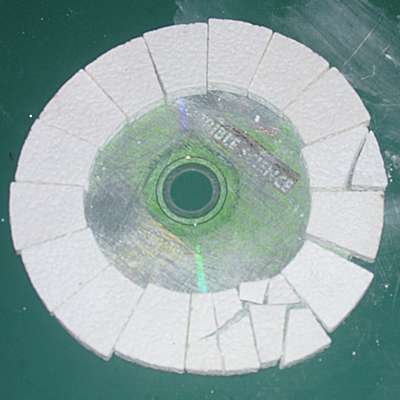
Stage 2 Take each of the floor tiles, and sand the back to make them sit unevenly on the CD. This gives the illusion that they have sunk into the ground over time. Break a few tiles, and do the same to the separate pieces. |
|
|
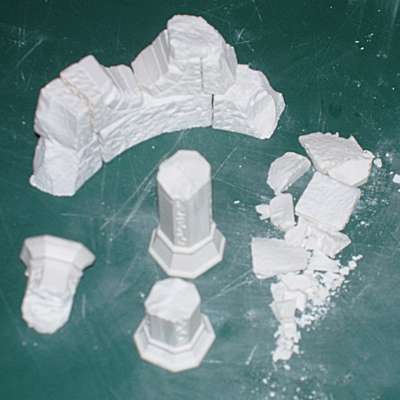
Stage 3 Glue the pillar halves together, and let them dry thoroughly before "ruining" them. I did this using the back (blunt) edge of a kitchen knife, striking the blocks with a firm, sharp blow. This should give you a nice clean break. Save the pieces of "rubble". |
|
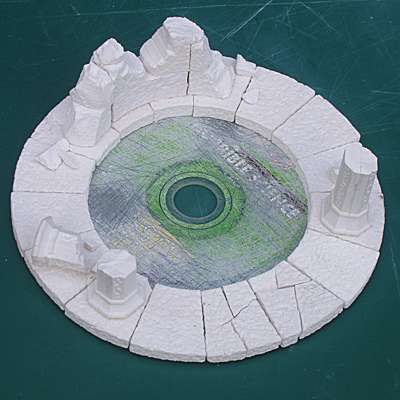
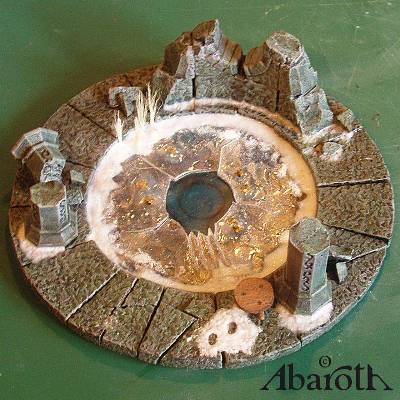
Stage 4 Glue the floor tiles to the CD using PVA - they should still be pretty neatly arranged, but not perfect. Once you are happy, stick the walls and pillars on top. Add some of the larger bits of rubble around the broken walls & pillars, and leave the model to dry. |
|
Stage 5 (sorry for the poor picture) Paint all the stone work. Cut a circle of acetate sheet to fit the central hole, and paint it in a watery colour. Cut the same shape from some thicker blister pack material, and add scratches to both sides with sandpaper and a knife. Cut the fishing-hole in the centre and cracks running away from it. |
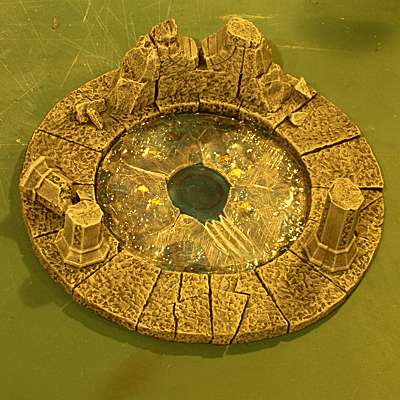 |
Stage 6 Fix the acetate pieces into position using PVA. Add a few autumn leaves to the ice, and cover them liberally with acrylic gloss varnish to seal them in. I also added a "dirty" wash to the stonework as I thought it looked too new. |
 |
Stage 7 Place some of the snow flock in a suitable shallow mixing container. Add a roughly equal amount of PVA and the same again of water. The flock material is very absorbent. |
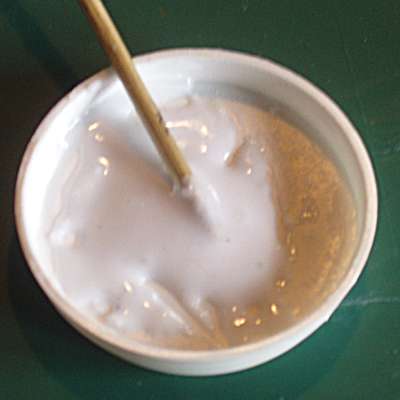 |
Stage 8 Mix the flock/water/glue thoroughly to form a paste. It should slowly run to form a raised puddle - if it stays in a lump, you need to add another drop or two of water to the mixture. |
 |
Stage 9 Using a cocktail stick or toothpick, apply the mixture to the areas of the model where you want the snow to be. I started by filling the edges of the pond, where there were small gaps between the blocks and the acetate. |
 |
Stage 10 As the snow mixture dries, a couple of things will happen. Firstly it will shrink down somewhat, and secondly it will become more transparent, so you will probably want to add a second layer in certain places. |
 |
Stage 11 (sorry for the poor picture) I wanted a stool to show where the fisherman had been sitting. I cut a small circle of basswood, and drilled 3 small holes into it. I then glued the pointed ends of cocktail sticks into the holes before trimming the legs to size. |
 |
Stage 12 I added more snow, and then fixed the stool into position. The footprints were made using a puddle of the snow paste on a spare piece of acetate. Remove footprint shapes using a clean cocktail stick whilst the paste is wet, and simply peel it off once it is dry. |
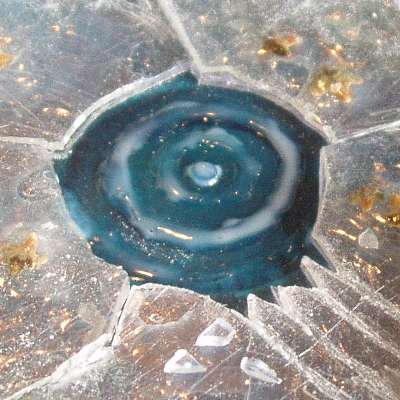 |
Stage 13 Cut some of the blister pack material to make some tiny broken pieces of ice, and scatter them around the hole. Add some ripples to the water using neat acrylic varnish. Once dry, add a few bits of broken ice to the water. |
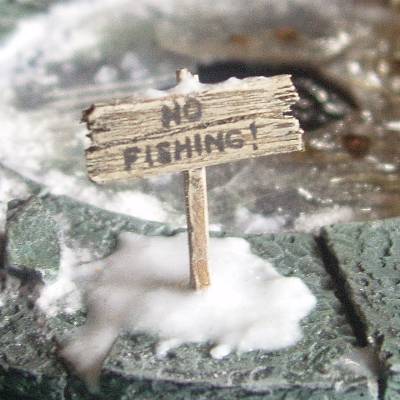 |
Stage 14 Cut a sign from basswood. Paint it and leave it to dry. Drill a small hole in one of the floor tiles to accept the signpost, and glue it into position. Add some snow paste around the base of the sign to cover the hole, and a little on the top. |
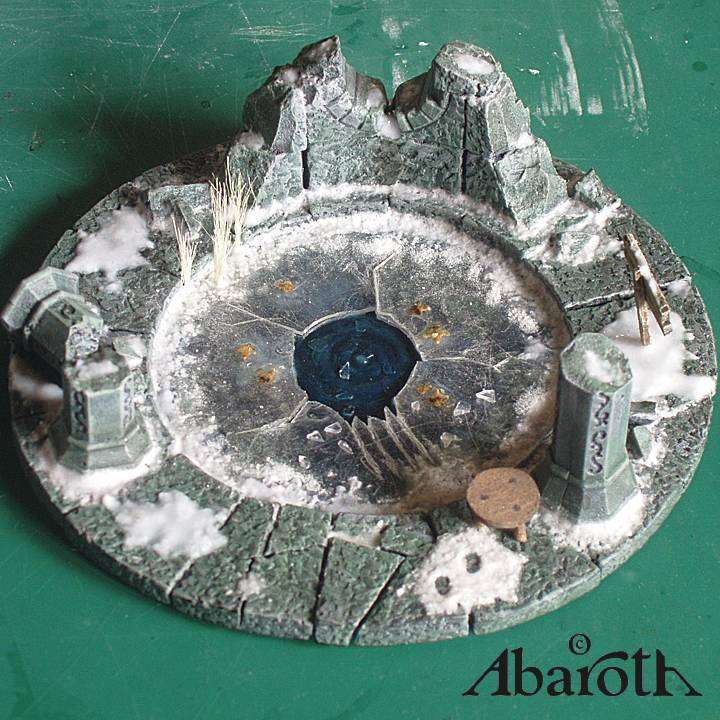 |
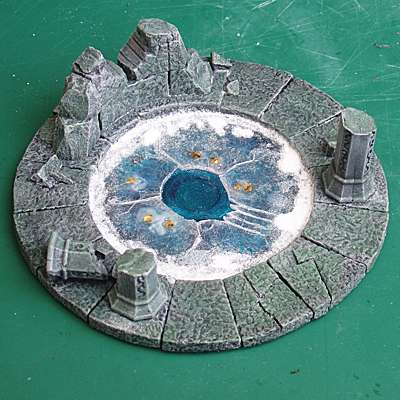
The (almost) finished model. I still have a few more details to add, before the story is complete.... |
 |
Stage 15 Final details added - a tackle box, fishing rod made from plastic rod, and the hat of the unfortunate victim made from greenstuff. |
 |
Left View The complete diorama seen from the left side. This shot shows the finishing touches. |
 |
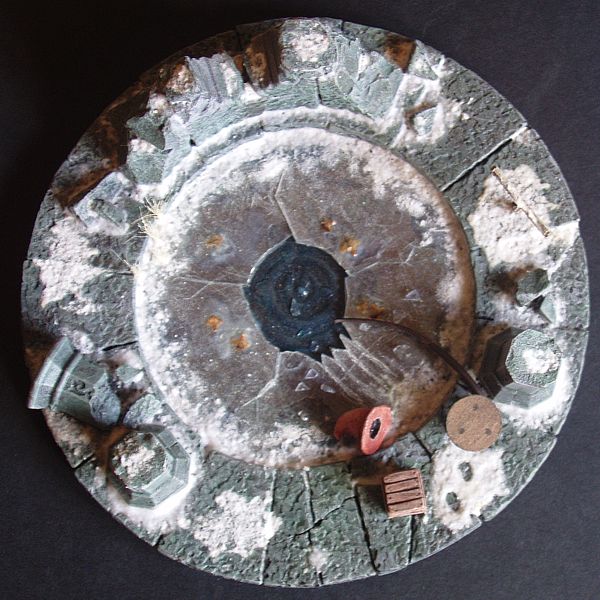
Front View The complete diorama seen from the front, with the claw marks in the ice clearly visible. |
 |
Right View The complete diorama seen from the right side, showing the sign. |
 |
Rear View The complete diorama seen from the back. |
|
The BLT (Bloody Large Telescope) (Click thumbnails for larger images) |
|||||
| I was challenged to make an observatory model, and thought I would start by building the telescope. You can probably tell that I was very much creating this on the fly, with no real plans, just a vague idea of how large I wanted it to be. As I created the model, I allowed the various pieces to "talk to me" - gaining inspiration from the details of the mouldings as to possible functions etc. Thus the model grew over the space of a few days in a very organic way. I have never made such a complex model in this manner before, but I did find it rewarding and very different from the meticulous planning I would usually do. It is also my first attempt at a steam-punk style piece. I hope you enjoy it as much as I did. | |||||
|
|
Materials & Tools: Craft Knife Razor Saw or Hacksaw Wire Cutters Hot Glue Gun Superglue 5 Minute Epoxy Glue Paint and Brushes Pin vice the photos are annotated showing the materials used |
|
Stage 1 Prepare the pieces shown and stick them together with superglue. |
|
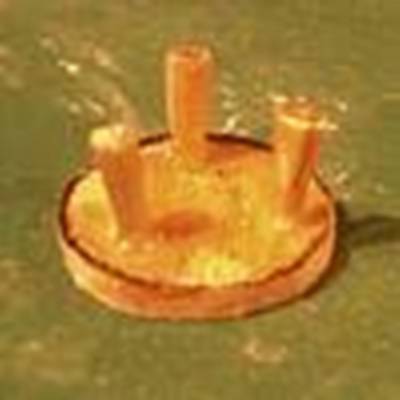
Stage 2 Cut an air-freshener cap into three sections with the razor saw, or hacksaw. |
 |
Stage 3 Superglue the half-washers either side of the nub of cocktail stick in the bead. Try to get it to stand up vertically. |
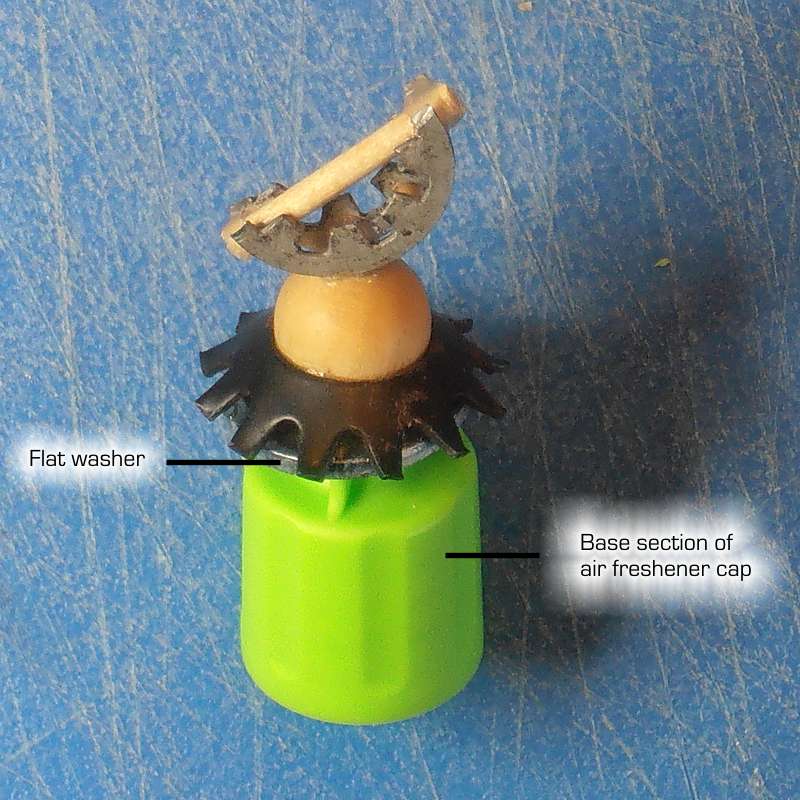 |
Stage 4 Hot glue the assembled piece to the bottom section of the air-freshener cap. |
 |
Stage 5 Superglue the top section of the air-freshener cap to the centre of the flat non-slip washer piece. |
 |
Stage 6 Superglue the washer to the base of the air-freshener cap, interlocking the teeth to resemble cog-wheels. |
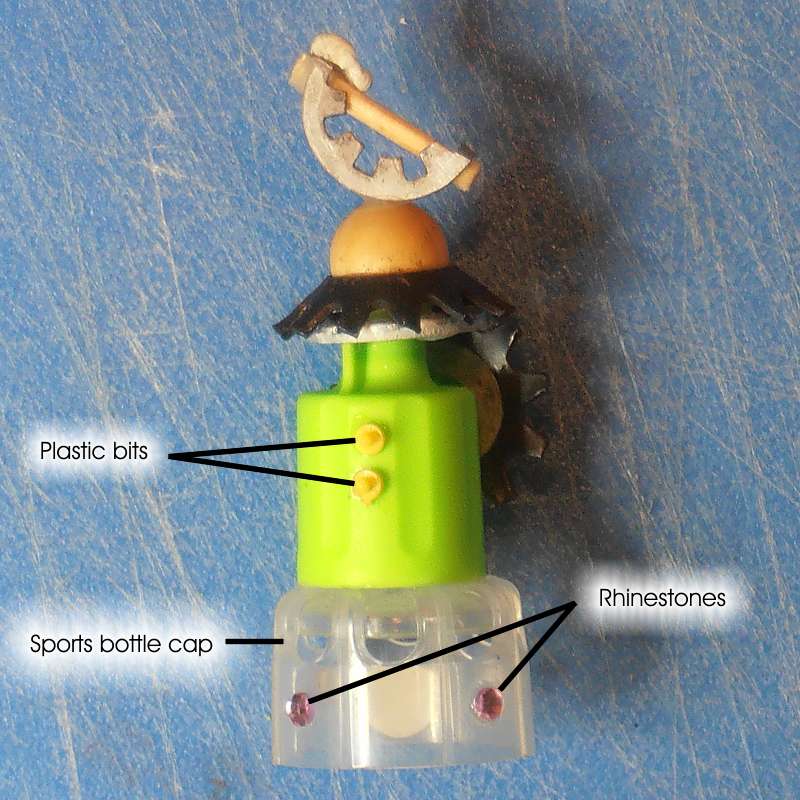 |
Stage 7 Hot glue a sports bottle cap to the base of the air-freshener cap. Superglue some rhinestones and plastic pieces in place to add visual interest. |
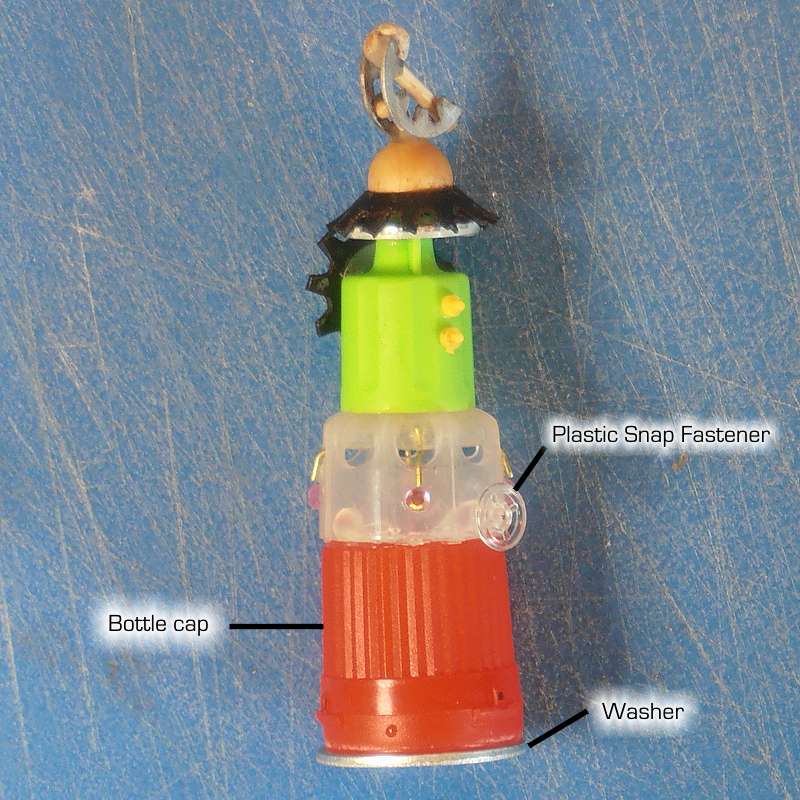 |
Stage 8 Next, hot glue a third bottle cap to the base of the assembly, and a metal washer to the base of that to improve stability. Add a plastic snap-fastener as a control valve, using superglue. |
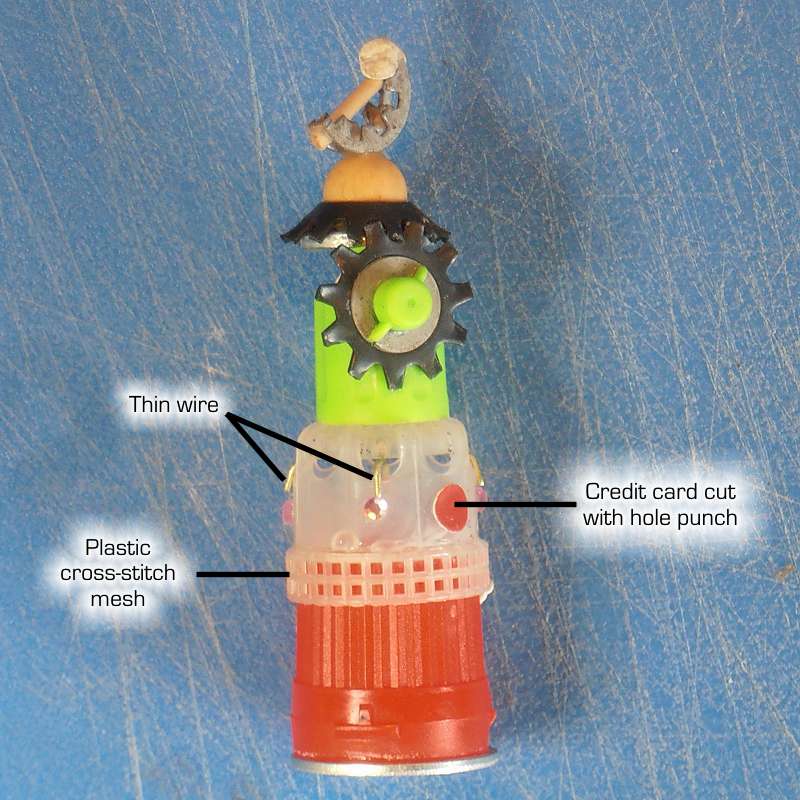 |
Stage 9 Next, superglue some short lengths of thin wire above the rhinestones and through the holes in the cap. Cut a circle from plastic (an old credit card works well) and superglue into place. Wrap plastic cross-stitch mesh around the top of the lowest cap to conceal the joint. Tie it tight with 3amp fuse-wire before securing it with superglue. |
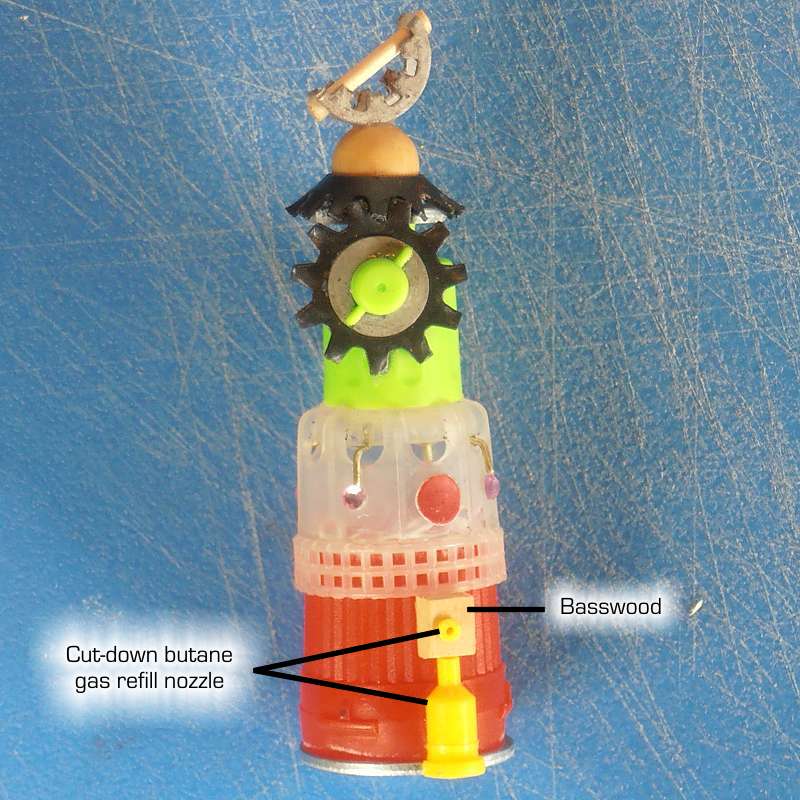 |
Stage 10 The yellow parts are an adapter nozzle from a can of butane gas, such as those used to refill lighters. Trim one side flat, and trim the top to a suitable height before attaching with superglue. Add a small block of basswood or balsa using hot glue, and attach some plastic "controls". I used the piece trimmed from the top of the nozzle. |
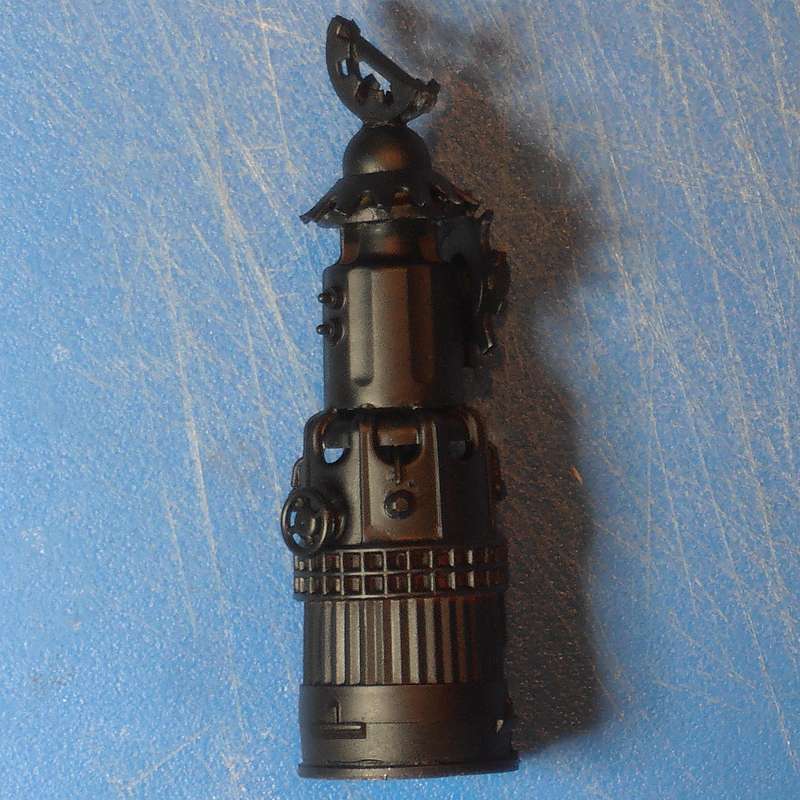 |
Stage 11 Spray paint the whole assembly with matt black primer - "black bomb". |
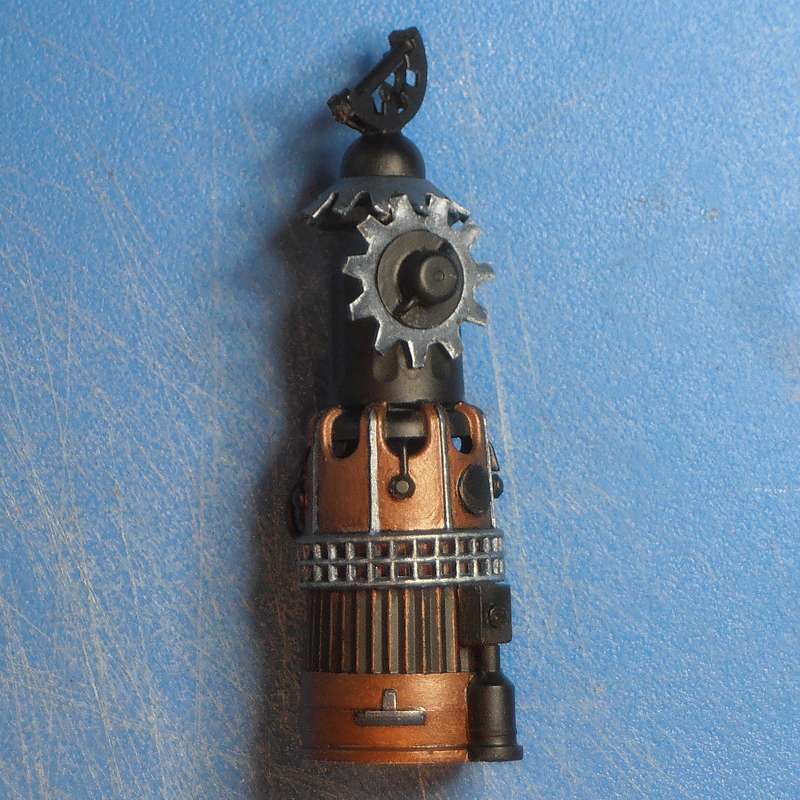 |
Stage 12 At this point I was "listening to the model" again - trying to decide how best to paint things to make them look functional. I started with bronze for most of the base, and a bluish silver for the gears.
|
 |
Stage 13 The nozzle was definitely a copper steam inlet, with controls above it and the circle then made sense as a pressure gauge. |
 |
Stage 14 I added a tiny plastic circle on the control box, and painted it green. I also painted a glowing green band around the middle and base coated the sphere at the top in a mix of light brown and gold. |
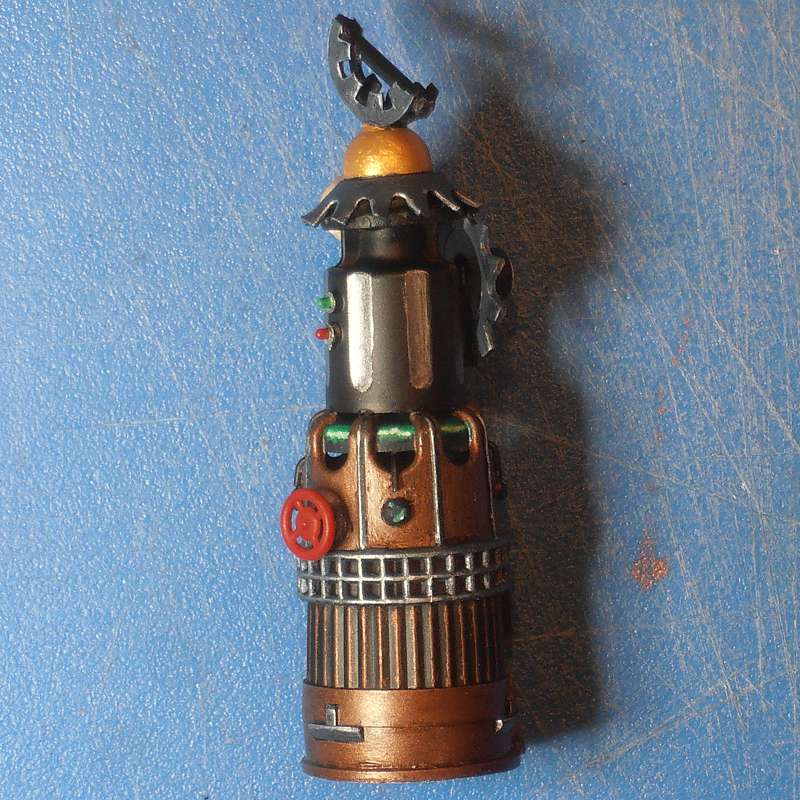 |
Stage 15 A neat gold layer was then added, and the snap fastener painted in red. I painted the hollows in the air-freshener cap in a pewter colour, then highlighted with silver. |
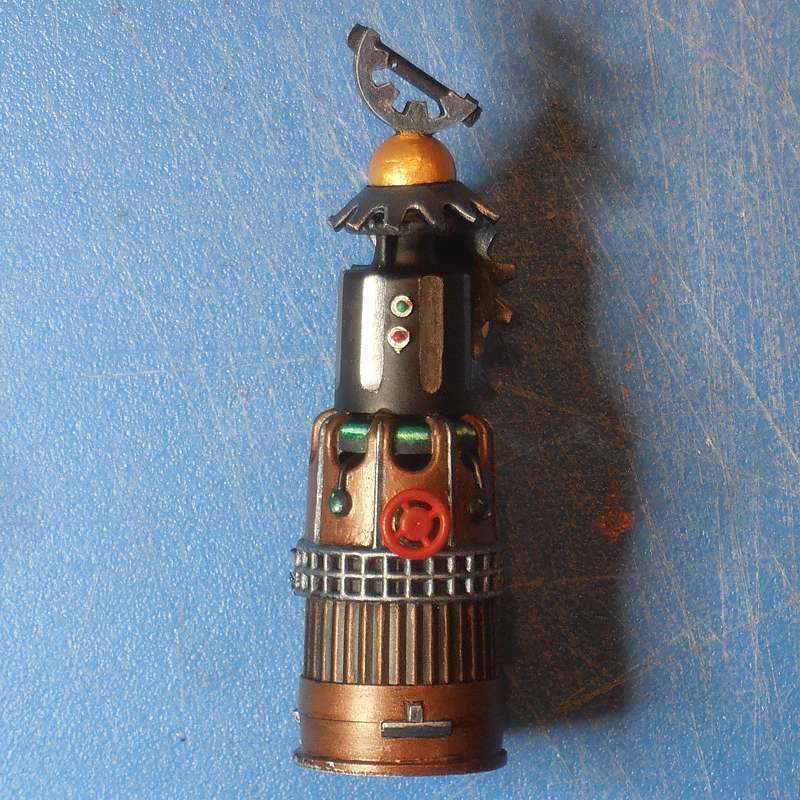 |
Stage 16 Finally, I painted the two tiny knobs in green and red, with white surrounds.
OK - that's the mount finished - now the telescope itself. |
||
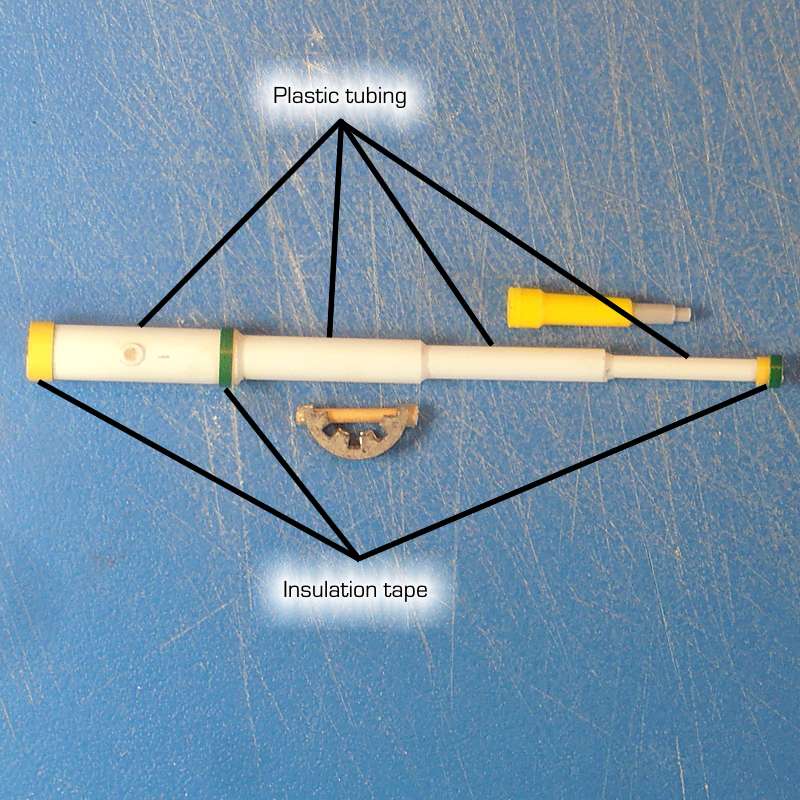 |
Stage 1 Cut four decreasing diameters of Plastruct plastic tubing to about 1" lengths, then assemble with superglue. Cut some electrical insulation tape into thin strips, and wrap around the tubing in places until you get the desired thickness. |
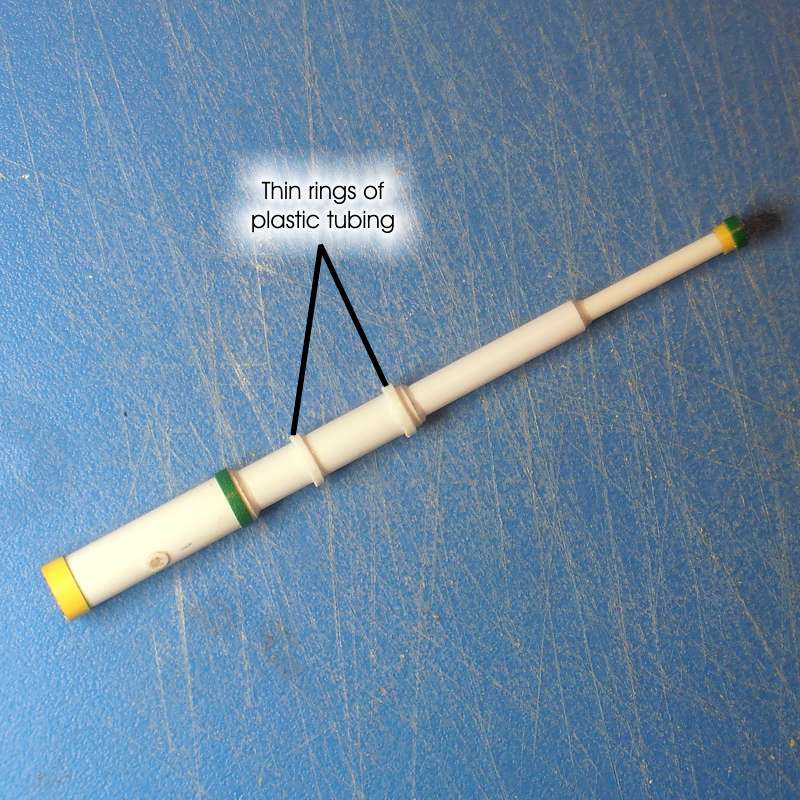 |
Stage 2 Add a couple of thin bands of the plastic tubing where the mount will attach to the telescope. I also added a thin slice to the largest part, and filled it with glue to resemble a maker's plaque. |
 |
Stage 3 The sighter scope is another of the adapter nozzles from a butane can with a section of round sprue glued to the end, with more insulation tape strips. Drill two small holes with the pin vice and attach the sighter scope to the main telescope - I used some spare plastic parts, but wire would work too. |
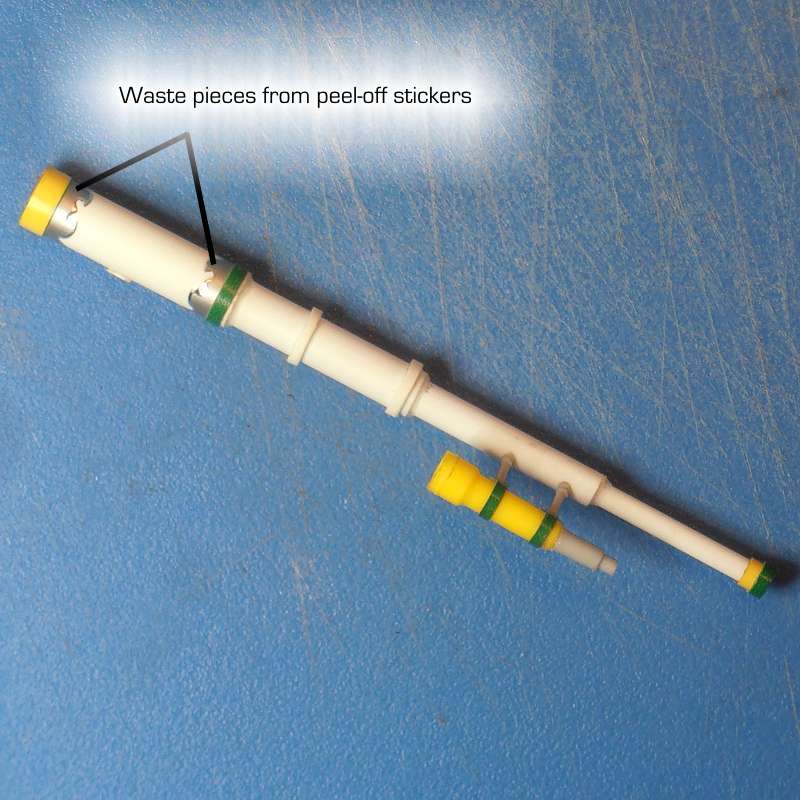 |
Stage 4 If you craft greetings cards, you may have used sheets of peel-off stickers. There is always a lot of wasted sticker left on these surrounding the actual words or icons. I cut a couple of thin strips from the waste sections and stuck them around the top of the scope to add some visual interest. |
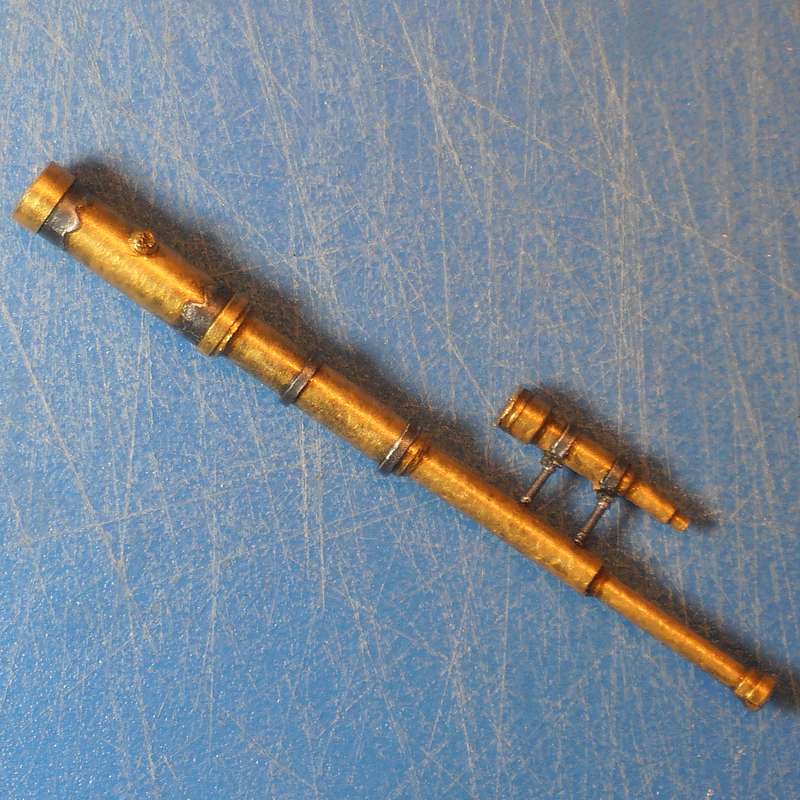 |
Stage 5 Spray with matt black primer, then paint. I went for a brassy look for the barrels of the two scopes, with bands of pewter highlighted in silver. |
|
Top tip: to get good coverage of metallic paint over large areas, first apply an undercoat of a similar non-metallic colour with a little of the metallic paint mixed in - browns for gold and copper, and greys for pewter and silver. Note that I forgot this step - hence the gold paint is a bit patchy in places. |
|
|
Stage 6 Mix a tiny amount of 5 minute epoxy resin and attach the telescope to the mount. Hot glue will work, but the joint won't be as strong or as neat.
Here's the finished model from the side with the pressure gauge. |
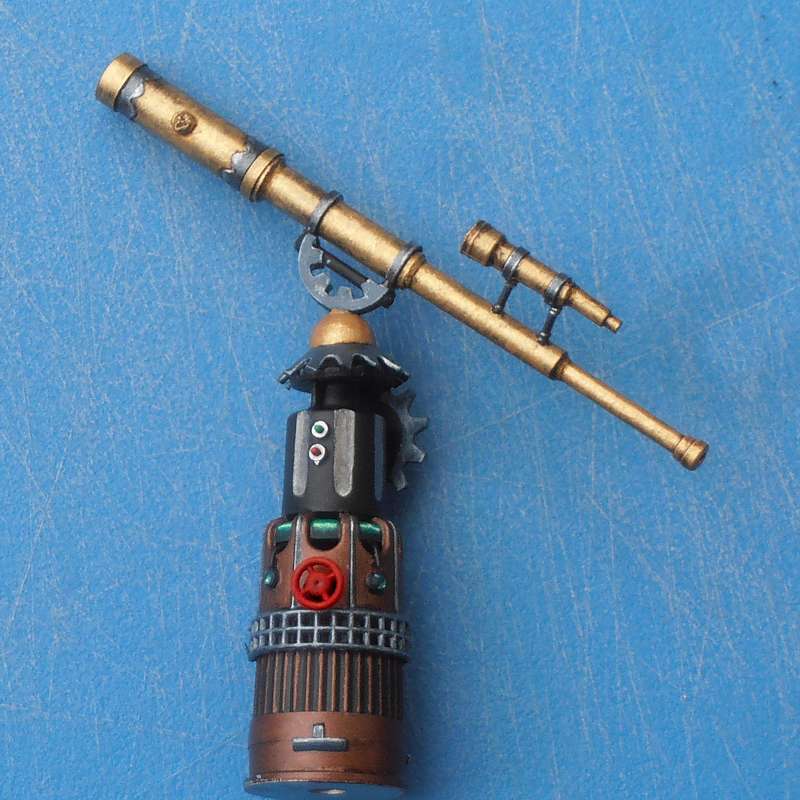 |
... and a view from the opposite side. |
Contact me with suggestions, comments or questions.
These articles are provided under this Creative Commons Licence:
![]()