|
Colourizing Fimo
(Click thumbnails for
larger images) |
|
 |
Materials:
Fimo SOFT
white modelling clay
(This
technique works equally well with white Sculpey clay)
Acrylic paint |
 |
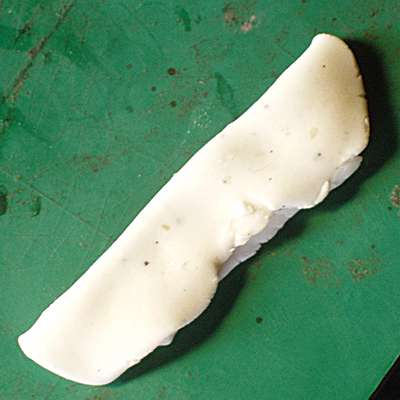
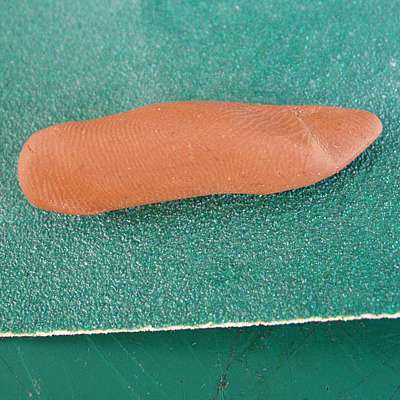
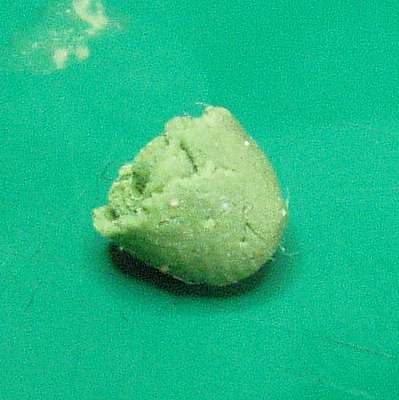
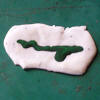
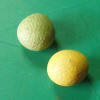
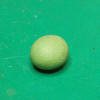
Stage 1
Ensure your hands are clean before starting. Remove
a small piece of clay from the pack, and work it around in your hands to
make it more pliable. |
 |
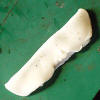
Stage 2
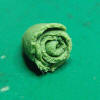
Flatten the clay by pressing or rolling it out, and add a
small amount of neat acrylic paint. |
|
 |
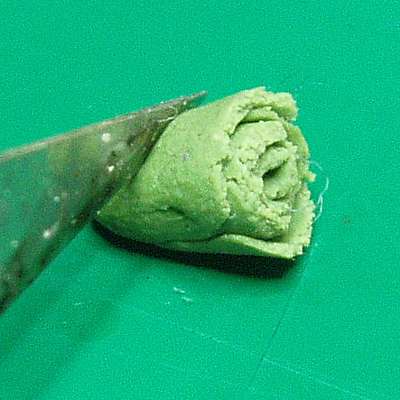
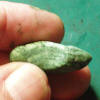
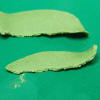
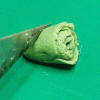
Stage 3
Fold the clay
over the paint, then squeeze and fold the clay repeatedly.
This will be a
little messy and you will end up with some of the paint on your hands. |
 |
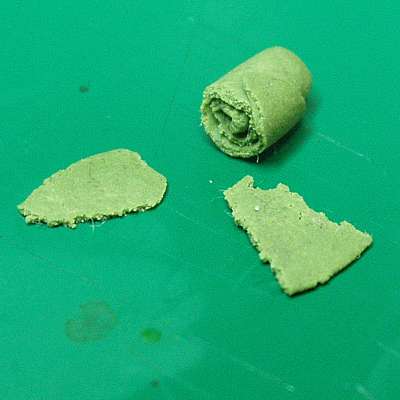
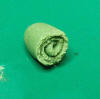
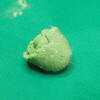
Stage 4
Continue to work the paint into the clay - rolling the
clay into a long sausage and then folding it back into a ball works
pretty well. |
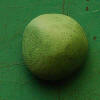 |
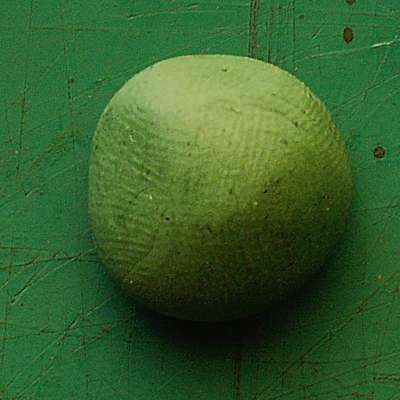
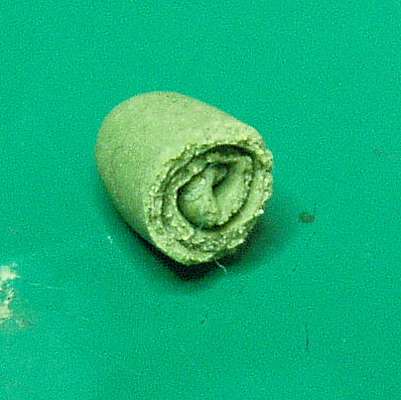
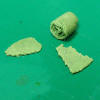
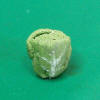
Stage 5
Keep going until you have achieved a fairly uniform
colour. At this point, if you require a darker shade you can add more paint
and repeat the process from Stage 2. |
|
The reasons for
colouring the clay in this way may not be immediately obvious, but here are a
few:
1) It saves having to
buy a complete block of Fimo for a small amount of a certain colour.
2) The pieces do not
need to be painted, although, if you want to add a few details they are already
"base-coated".
3) The colours can be
mixed just like normal Fimo. |
|
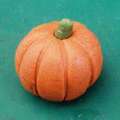
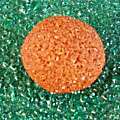
Fimo Pumpkins
(Click thumbnails for
larger images) |
|
 |
Materials:
Coloured Fimo
- orange and dark green
Modelling tool
or knife
Cocktail stick |
 |
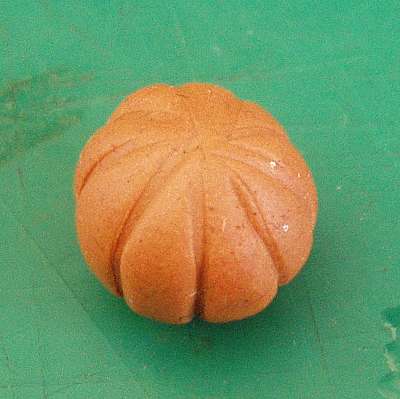
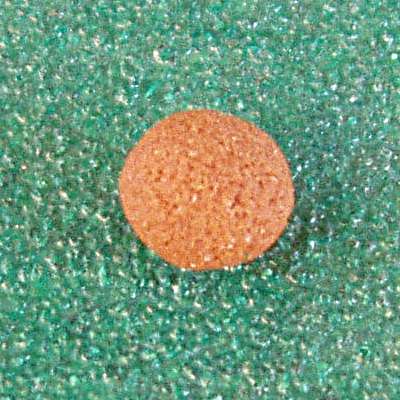
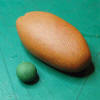
Stage 1
Remove a suitable piece of orange clay, and roll it into
a ball. Pumpkins vary a lot in size, so you have a lot of freedom to
experiment. This one is about 1 cm (0.4") across. |
 |
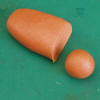
Stage 2
Using a modelling tool or the blade of a knife, make
small indentations in the clay. Start each line at the top, and finish
at the bottom of the pumpkin. |
|
 |
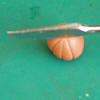
Stage 3
Continue to
make indentations all around the pumpkin. |
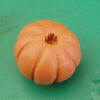 |
Stage 4
Using a cocktail stick, or other suitable tool, make a
small hole in the top of the pumpkin. |
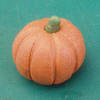 |
Stage 5
Add a small stalk from the dark green clay into the hole.
Cook the finished piece(s) as per the instructions on the clay. |
|
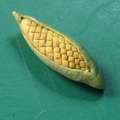
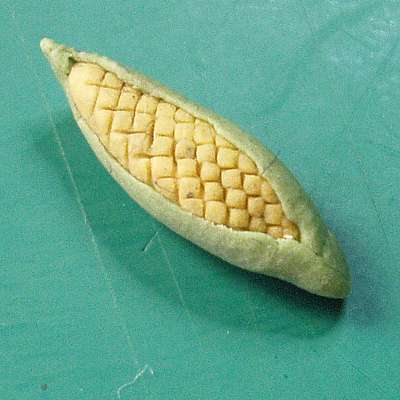
Fimo Sweetcorn
(Click thumbnails for
larger images) |
|
 |
Materials:
Coloured Fimo
- pale yellow and green
Fine sieve or
other mesh |
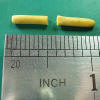 |
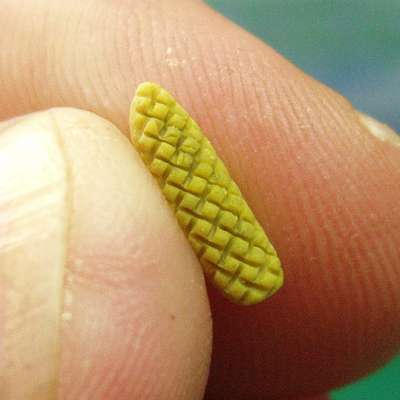
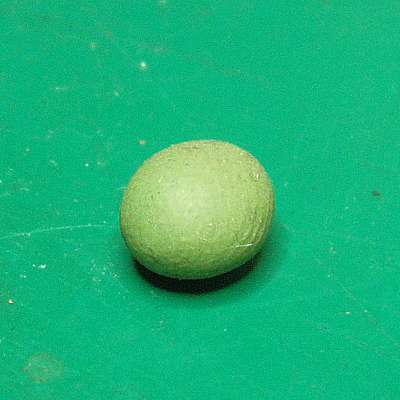
Stage 1
Roll the yellow clay into a sausage about 2-3mm (about
1/10"-1/8") in diameter. Cut a section about 12mm (1/2") long. |
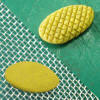 |
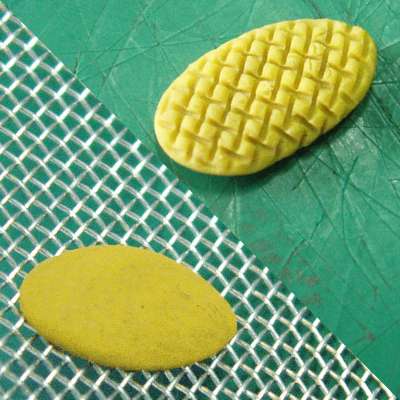
Stage 2
Press the clay firmly into the sieve mesh to produce the
texture, and remove carefully. |
 |
Stage 3
Gently squeeze the edges of piece, to form it into a
roughly cylindrical shape.
note that the back will not have any texture. Place
in the fridge or freezer to make the clay a bit less pliable. |
 |
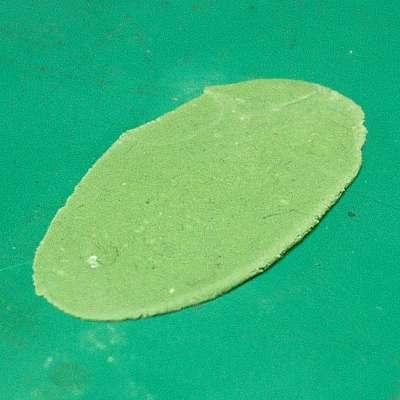
Stage 4
Roll the green clay into a similar-sized sausage as the
yellow, and then flatten it out with a suitable roller - a small jar or
paint bottle works well. |
 |
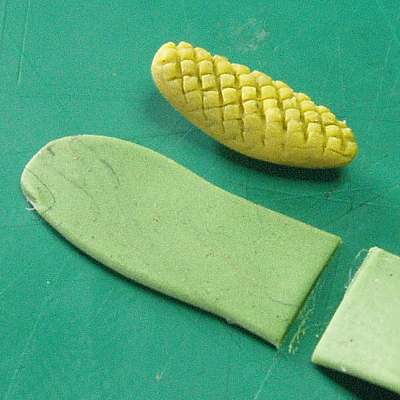
Stage 5
Wrap the yellow piece carefully inside the green,
covering the untextured portion of the cob. Cook the finished piece(s) as per the instructions on the clay. |
|
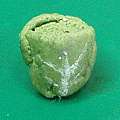
Fimo Cabbages
(Click thumbnails for
larger images) |
|
 |
Materials:
Coloured Fimo
- light green
|
 |
Stage 1
Roll the clay into a sausage about 6mm (1/4") in diameter.
Roll this flat with a suitable roller - a small jar works well. Try to
get it as thin as you can without it splitting up. |
 |
Stage 2
Tear a strip of clay about 6mm (1/4") wide, leaving a
jagged edge. |
 |
Stage 3
Roll up the
strip. The rough edge should now give you the central leaves of the
cabbage. Once the cabbage reaches a suitable size, tear off the end of
the strip. |
 |
Stage 4
Tear off a
couple more pieces from the flat clay piece - these will become the
outer leaves. A gentle curved edge is better, like the one on the left. |
 |
Stage 5
Wrap the outer leaves around the outside of the cabbage.
Try not to press on the upper edges, but make sure the lower parts are
securely adhered. |
 |
Stage 6
The cabbage
will probably be too "long" now. If it is, carefully trim
off the excess with a knife. |
 |
Stage 7
Gently round
off the sharp edges where you have cut. Cook the piece(s) as per the instructions on the clay. |
 |
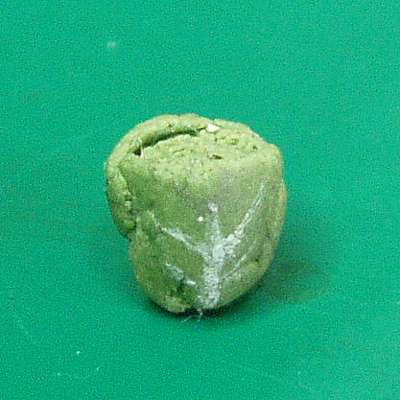
Stage 8
If you like,
you can add veins to the outside leaves, with a fine brush and some
thinned white paint. |
|
Onions
(Click thumbnails for
larger images) |
|
 |
Materials & Equipment
Beads
Raffia
Scissors
PVA
Craft Knife
Paint &
Brushes |
 |
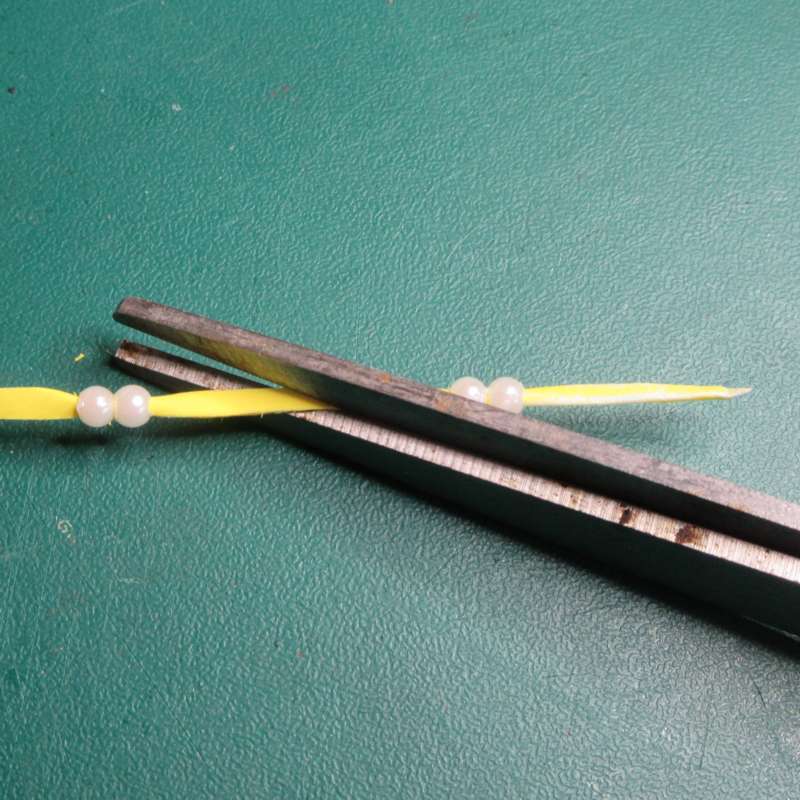
Stage 1
Thread pairs of beads onto a
piece of raffia, leaving twice the height of the foliage between the
pairs. This is a fiddly process as it was not possible to thread the
raffia with a needle. |
 |
Stage 2
Using a sharp pair of
scissors, cut the raffia between the beads on an angle. |
 |
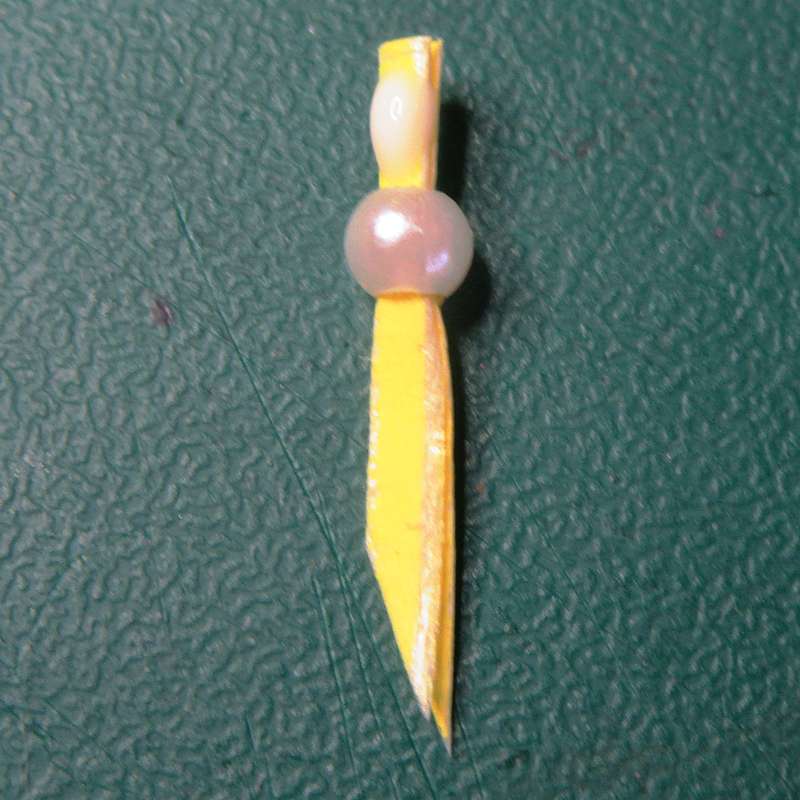
Stage 3
Slide the beads apart by a
few millimetres, and separate the two plants using
a sharp craft knife. Do NOT let the beads slide off the raffia, if you can help it. |
 |
Stage 4
Apply a small blob of PVA
glue to the end of the raffia, and slide the bead into place. Allow to
dry. |
 |
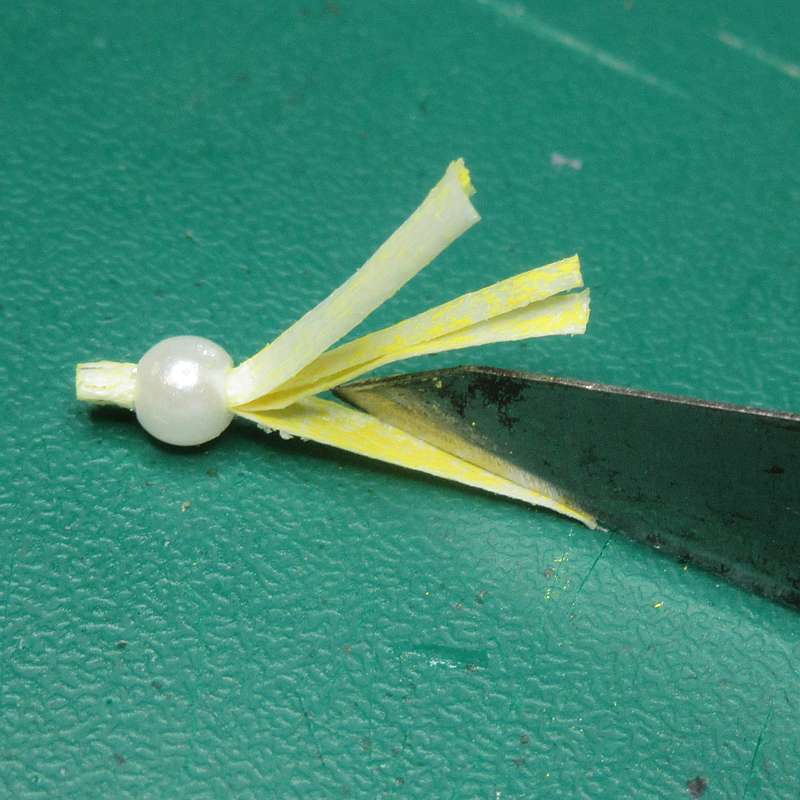
Stage 5
Cut the raffia into a number
of thin strips, and trim the top of each one to a gradual point. |
 |
Stage 6
Splay out the leaves, and
paint in your choice of colours. |
 |
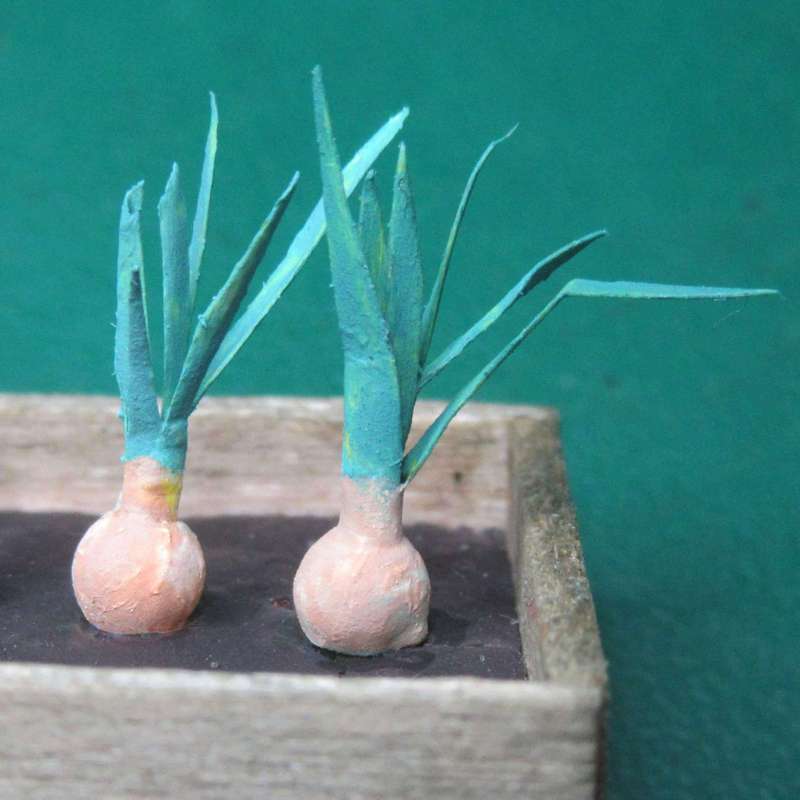
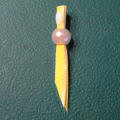
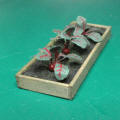
Example
A row of finished onions in a raised bed. |
 |
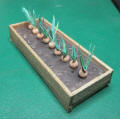
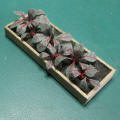
Example 2
The complete raised bed, full of onions.
|
|
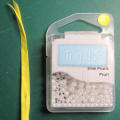
Beetroot
(Click thumbnails for
larger images) |
|
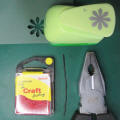 |
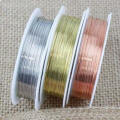
Materials & Equipment
Thin multi-core wire
Seed beads (about 2mm diameter)
Green paper or thin card
Flower punch (daisy)
Pliers, Tweezers, Craft knife
Scissors, Clothes pegs
PVA, Paint & paintbrushes |
 |
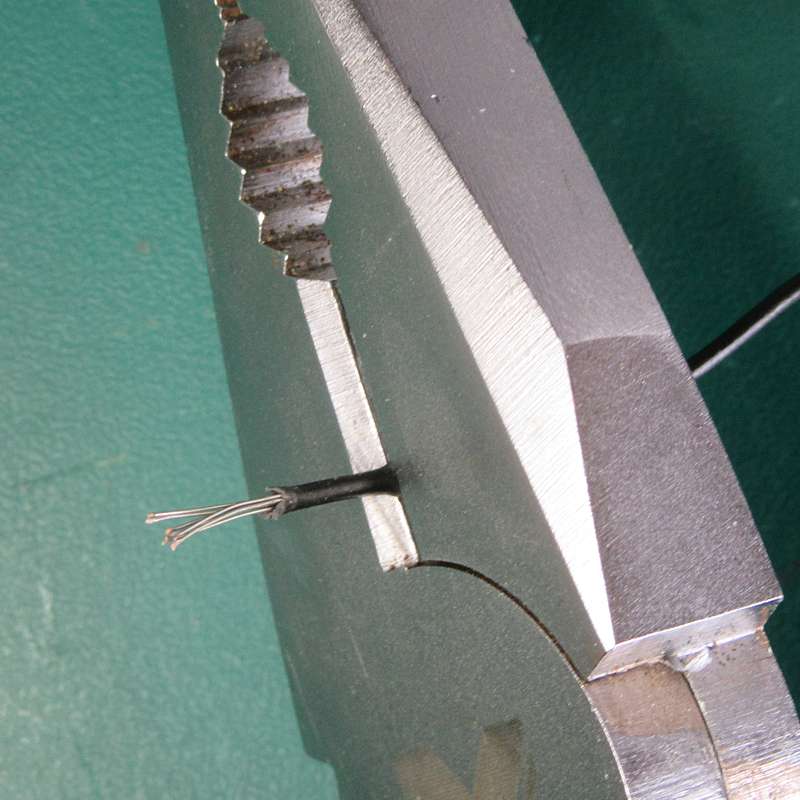
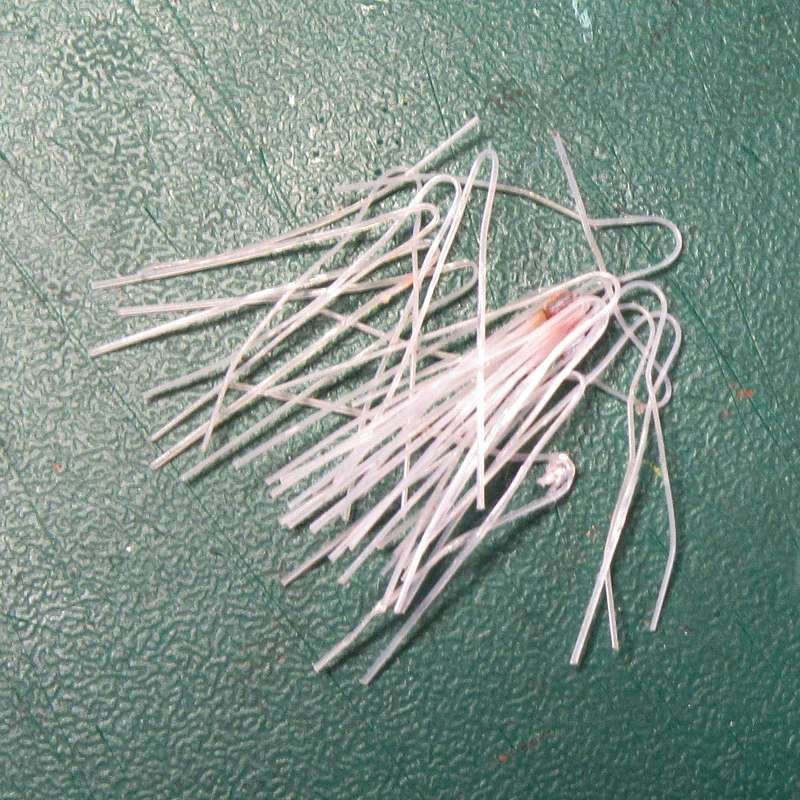
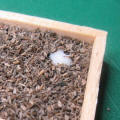
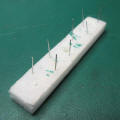
Stage 1
Strip the insulation from
about 8-10mm at one end of the wire. Cut the wire, leaving a short
length with the insulation still attached. This will allow you to hold
the piece as you work on it. |
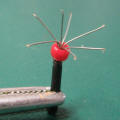 |
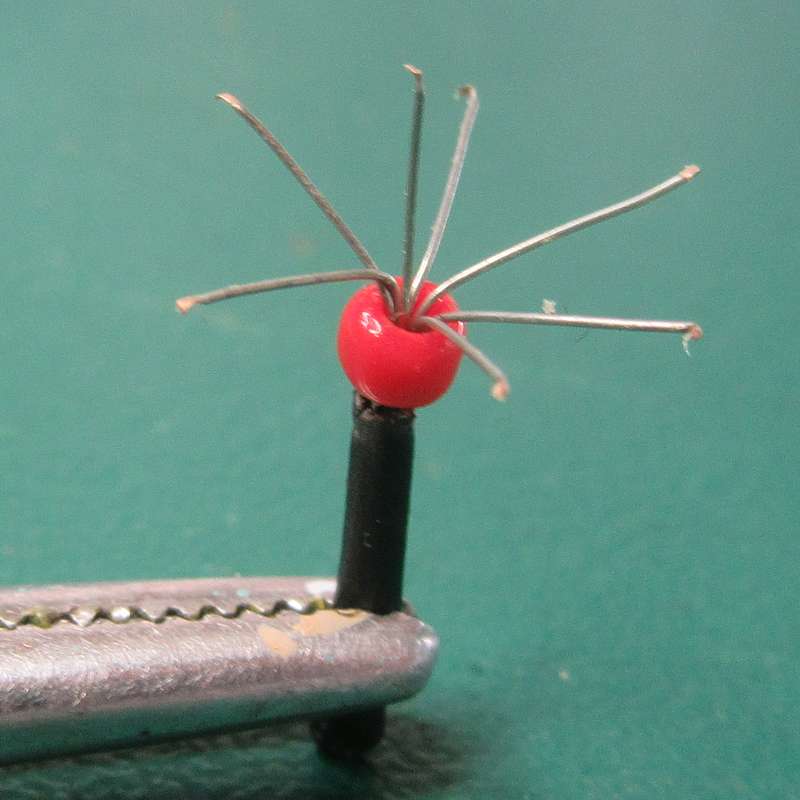
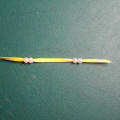
Stage 2
Thread a bead over the bare
wires, then splay out the individual strands. Clamp the bottom of the
wire with a clothes peg to allow easy handling. |
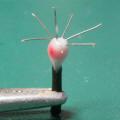 |
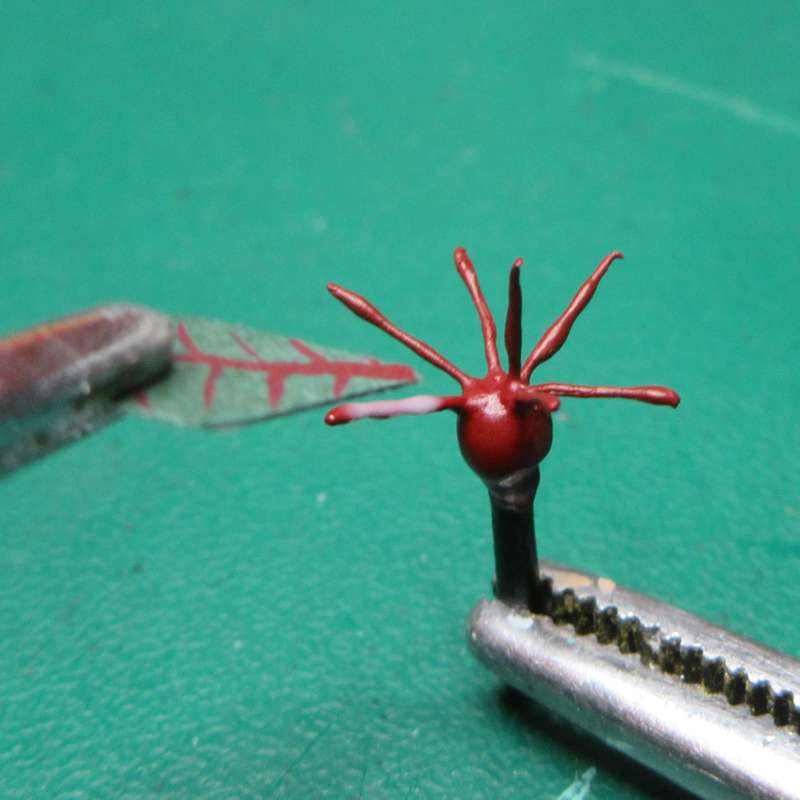
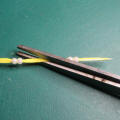
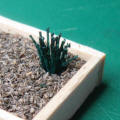
Stage 3
Liberally coat the bead with
neat PVA glue, ensuring you apply plenty of glue to the joints. The PVA
will secure the wire in place and also fill the hole in the bead.
Set aside to dry. |
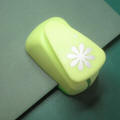 |
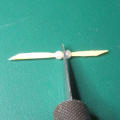
Stage 4
Whilst the PVA is drying, cut
a flower shape from a piece of green paper using the paper punch. This
will form the leaves of the plant very easily, though you can cut them
by hand if you wish. |
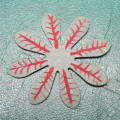 |
Stage 5
Paint some veins onto the
leaves in a burgundy red colour. You can paint veins on both sides if
you wish, but it will make attaching them (Stage 8) more fiddly. I did
this step later in the process (Stage 11). |
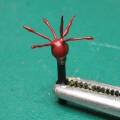 |
Stage 6
Liberally coat the bead and
wire with a thick coat of the same burgundy red colour.
Allow to dry. |
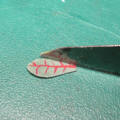 |
Stage 7
Trim the leaves to a point
with a sharp craft knife. You can vary the length of the leaves and the
angle of the cuts to add a little variety. |
 |
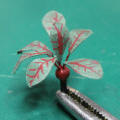
Stage 8
Apply a little PVA to one of
the wires and attach a leaf, leaving a short length of bare wire by the
bead.
If you painted both sides of the leaf, you will need to ensure the wire
aligns with the veins you painted. |
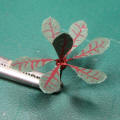 |
Stage 9
Continue around the model
adding the rest of the leaves.
Allow to dry. |
 |
Stage 10
Apply more PVA to the joints.
This will help to keep the leaves secure as you curl them in Stage 12.
Allow to dry. |
 |
Stage 11
Paint veins on
the second side of any leaves which will be visible. |
 |
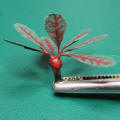
Stage 12
Hold the base
of a leaf with the tweezers and gently curl the leaf downwards.
This is the
most fiddly step - take your time. |
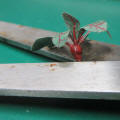 |
Stage 13
Trim the wire
"stem" to a suitable length to fit into your base. |
 |
Stage 14
Make a small
hole to accept the wire, and a slight indentation in the base to allow
the bead to sit slightly below the surface. Secure the plant in position
with a small blob of PVA. |
 |
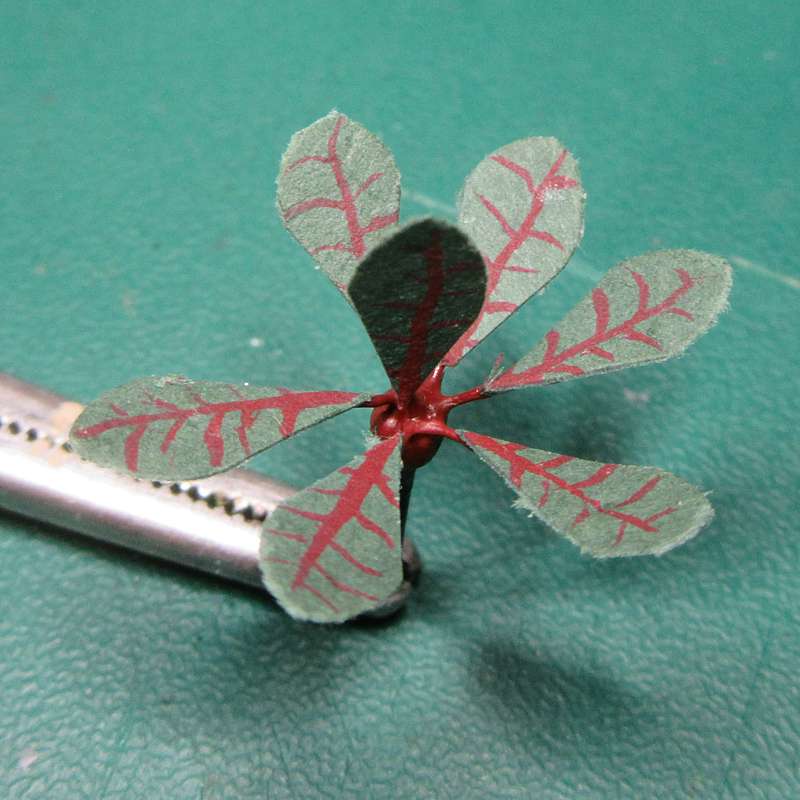
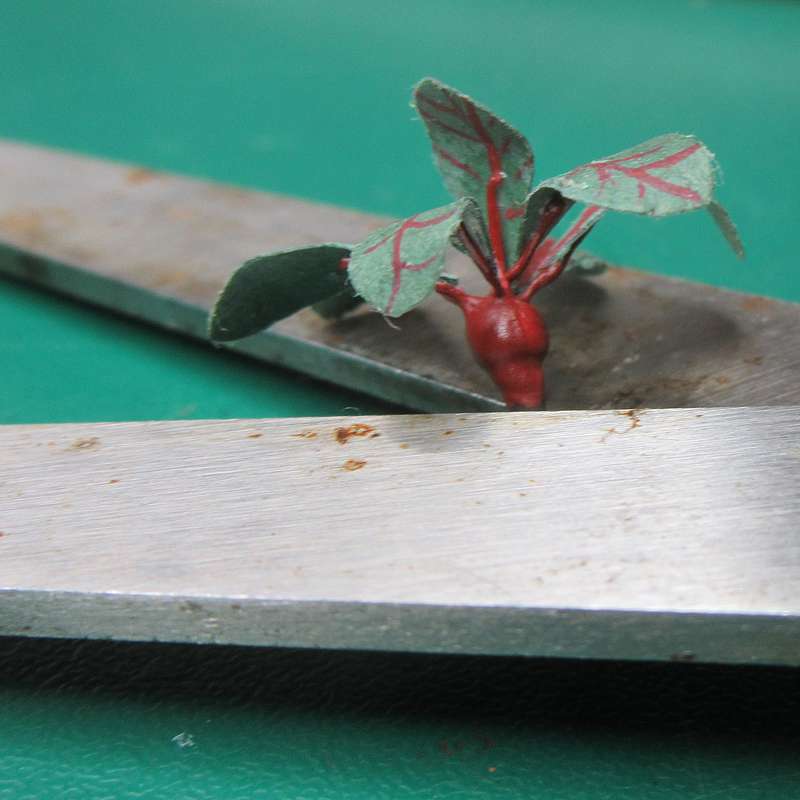
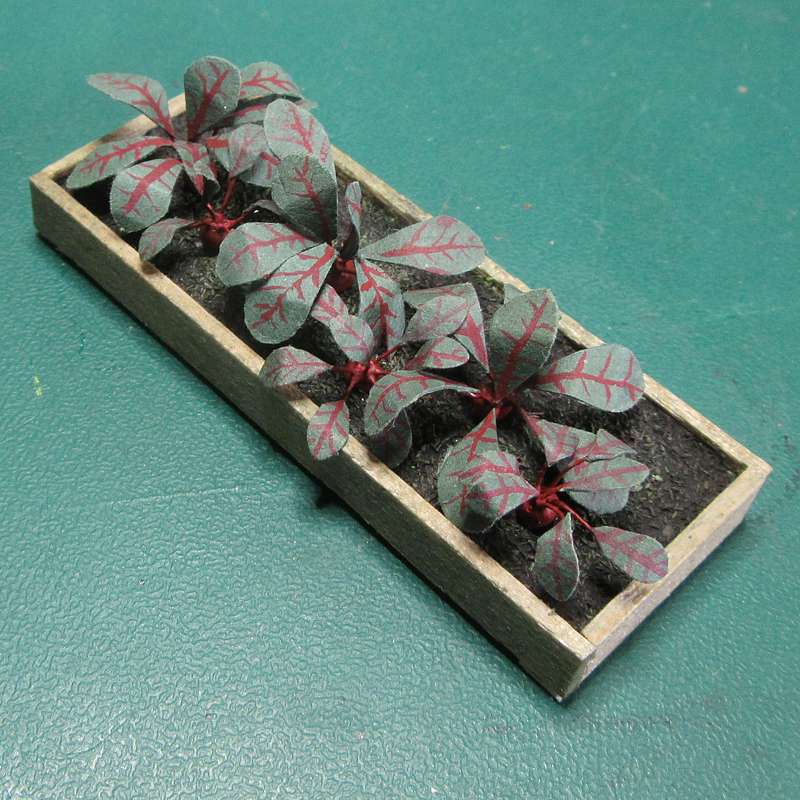
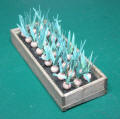
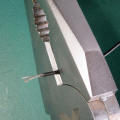
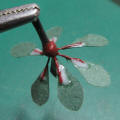
Example
A row of finished beetroot in a raised bed and a second row made in the
same way, but using a smaller craft punch. |
|
|
|
|
|
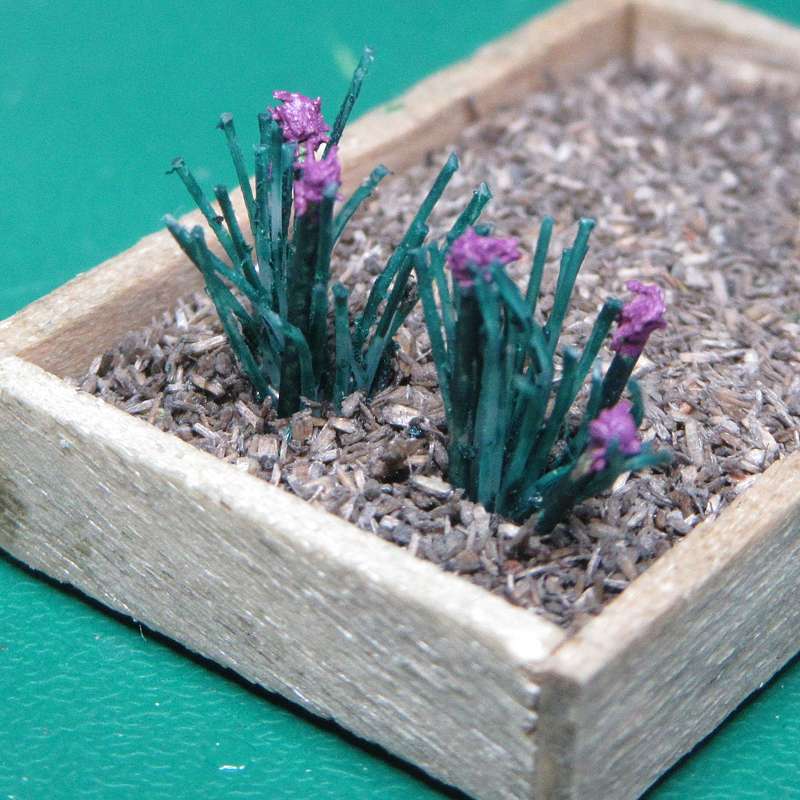
Chives Part 1 - Leaves
(Click thumbnails for
larger images) |
|
 |
Materials & Equipment
Nail brush
Cotton, Thin
wire
Pliers
Tweezers
Scissors
PVA
Paint & paintbrushes |
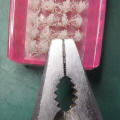 |
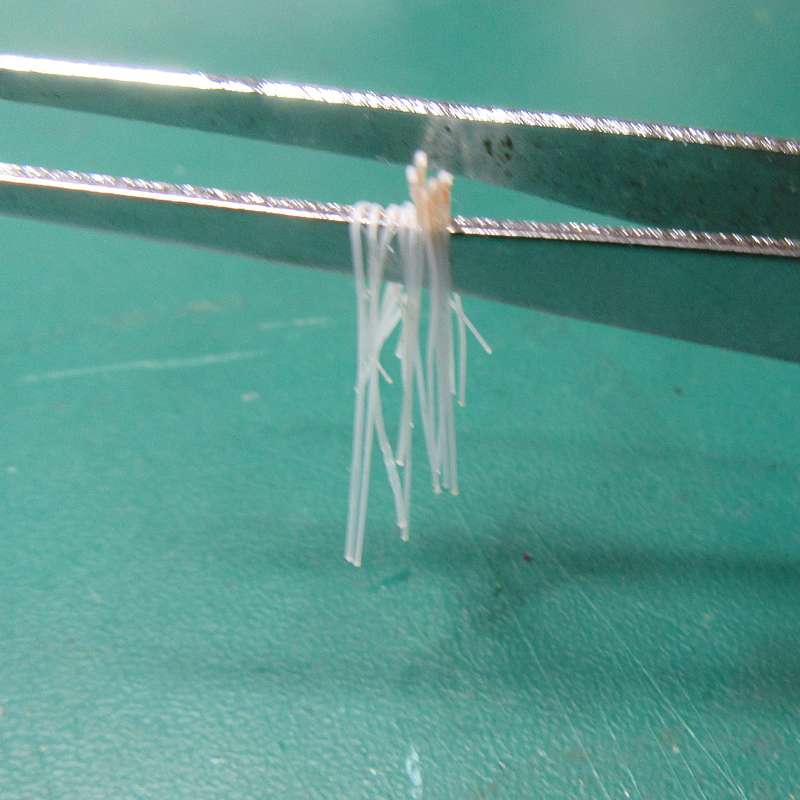
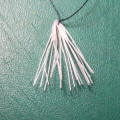
Stage 1
Grasp a single tuft of
bristles tightly with the pliers and twist the pliers to remove the
bristles from the brush. |
 |
Stage 2
The bristles were held in
position by a tiny strip of metal and fell apart when I let go with the
pliers. |
 |
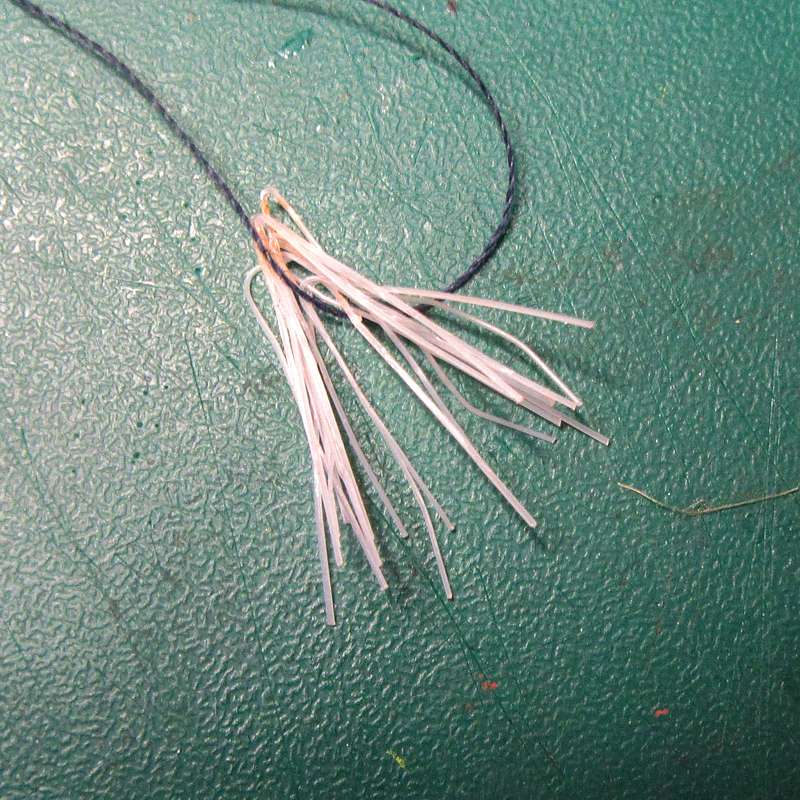
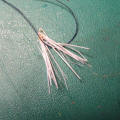
Stage 3
Place about half of the
pieces of nylon over a pair of tweezers as shown. |
 |
Stage 4
Whist the pieces are still
resting on the tweezers, thread a piece of cotton through them. |
 |
Stage 5
Tie a knot to secure the
bristles back into a bundle. If you want to make them even more secure,
thread a piece of thin wire through, and twist it tight. |
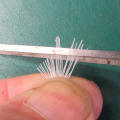 |
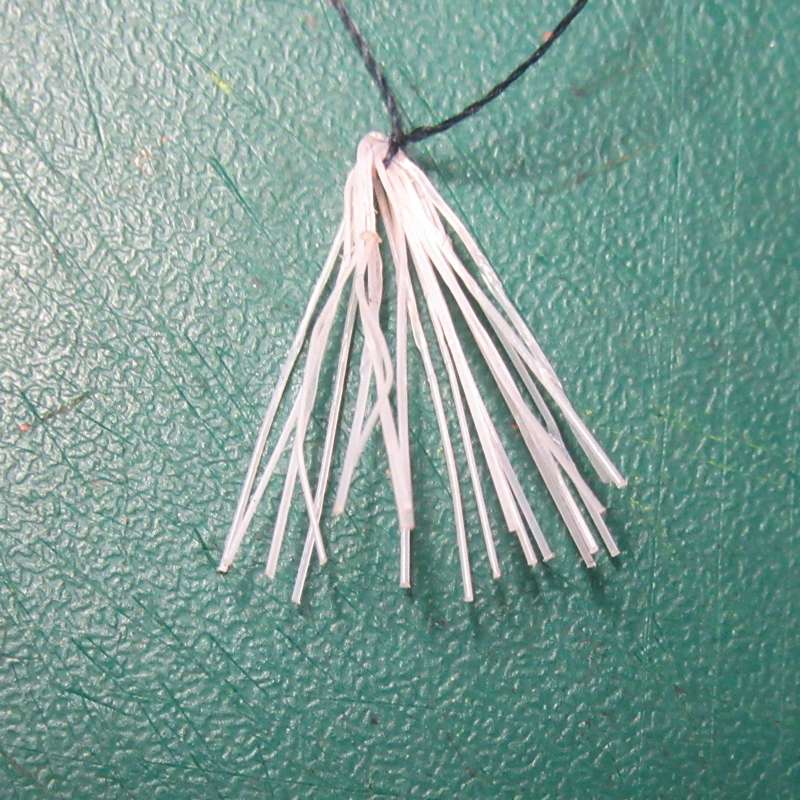
Stage 6
Trim the bristles to the
length you require using a pair of scissors. Spread the bristles as
shown and slope your cuts to vary the lengths. Remember that you will
lose a couple of millimetres when you insert the piece into your base.
. |
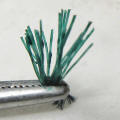 |
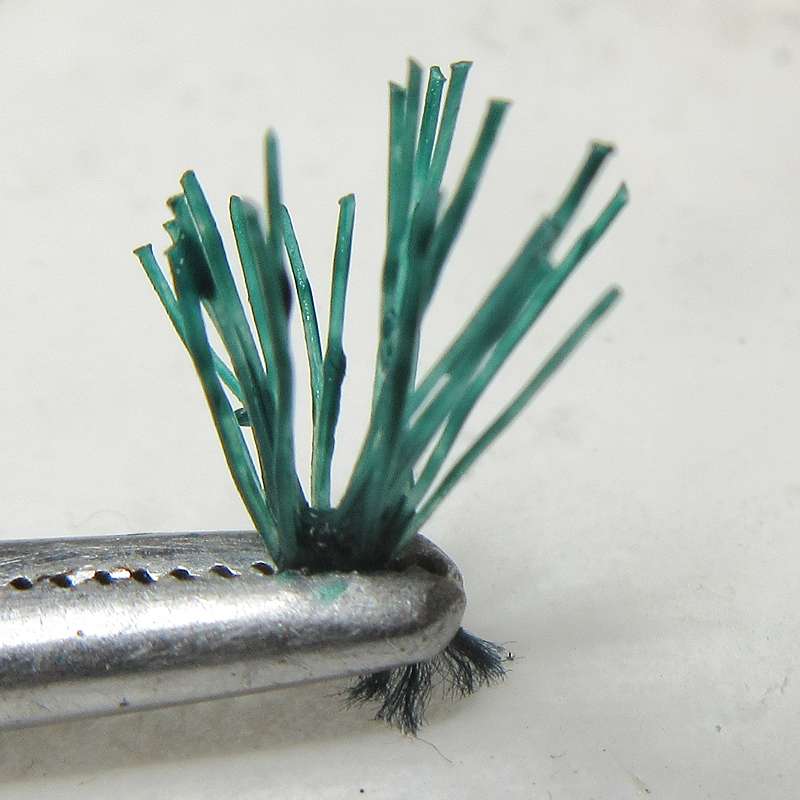
Stage 7
Paint the bristles in a
suitable shade of green. It might take a couple of coats to get
reasonable coverage. |
 |
Stage 8
Make a suitable hole in your
base. Since mine is foam, I used a cocktail stick, but you will need a
drill for more solid materials. |
 |
Stage 9
Apply a drop of PVA into the
hole.
. |
 |
Stage 10
Insert the bristles into the
hole. Use a cocktail stick to push them down, if necessary. |
 |
Stage 11
For a
finishing touch, make and insert some flower spikes as shown below. |
|
Chives Part 2 - Flower
Spikes
(Click thumbnails for
larger images) |
|
 |
Materials & Equipment
Thin wire
Flock
Offcut of foam
Tweezers
Scissors or wire cutters
PVA
Spray primer
Paint & paintbrushes |
 |
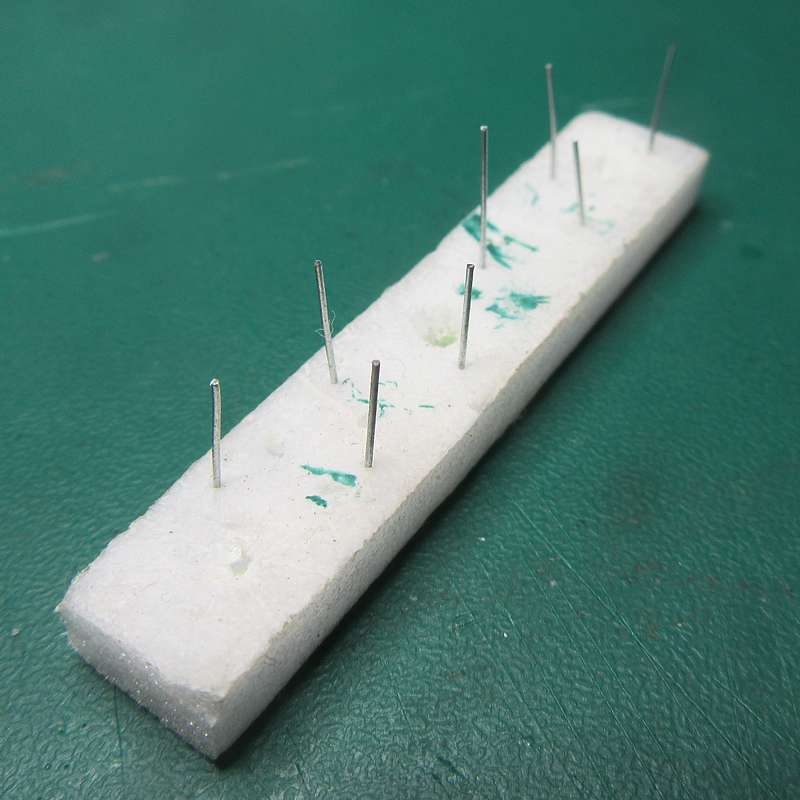
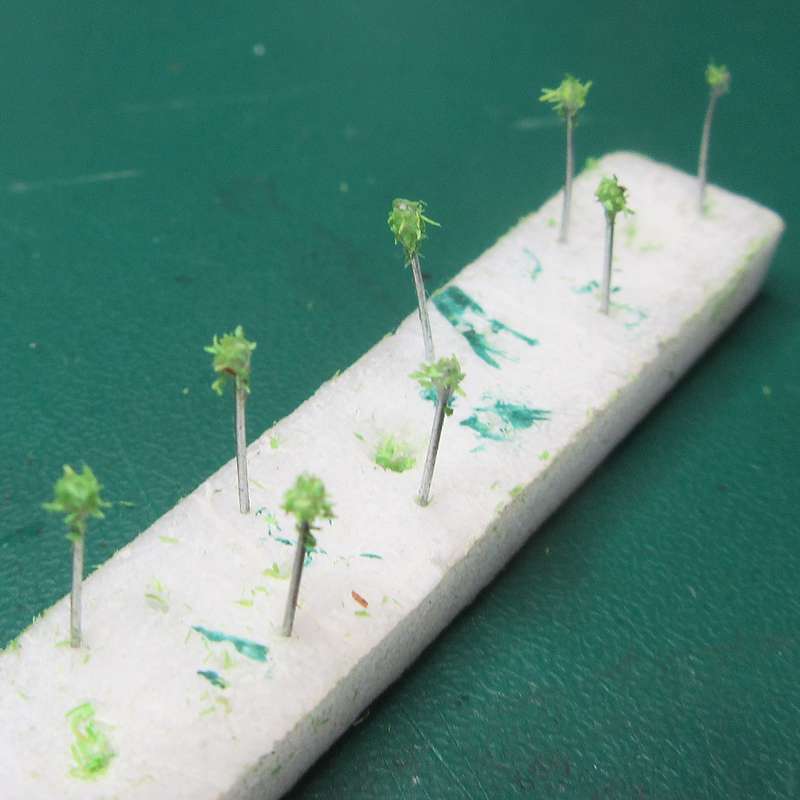
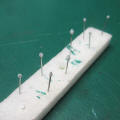
Stage 1
Cut a number of pieces of
wire to about 12mm (1/2") in length. Insert the wires into an offcut of
foam, to make handling much easier. |
 |
Stage 2
Apply a small blob of neat
PVA onto the end of each wire and allow to dry. |
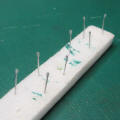 |
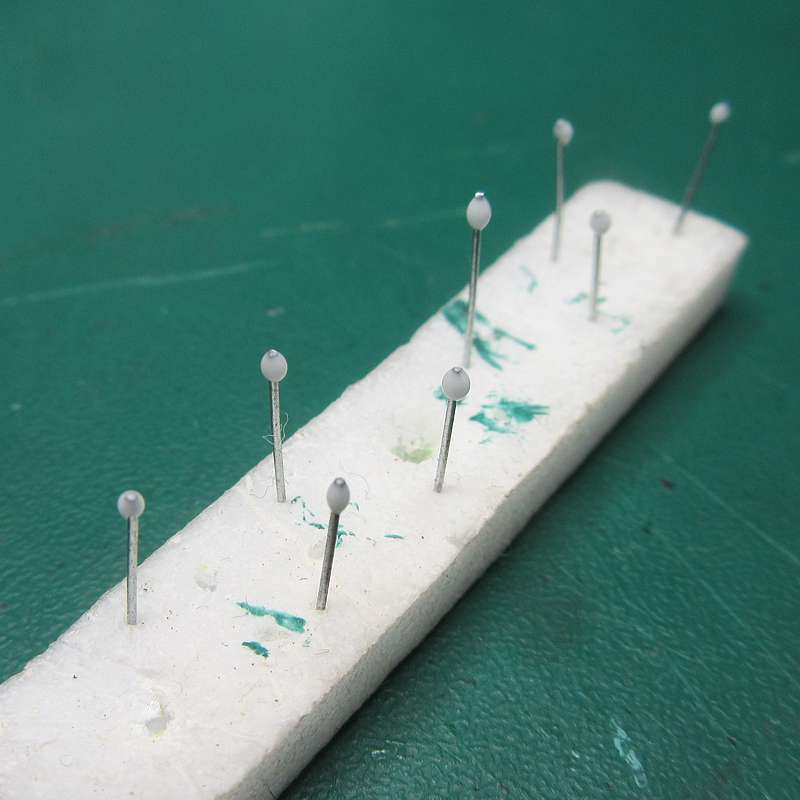
Stage 3
Depending on how dilute your
PVA is, you may need to repeat Stage 2 to build up the size of blob you
require. |
 |
Stage 4
Once dry, apply a final coat
of PVA to each wire. |
 |
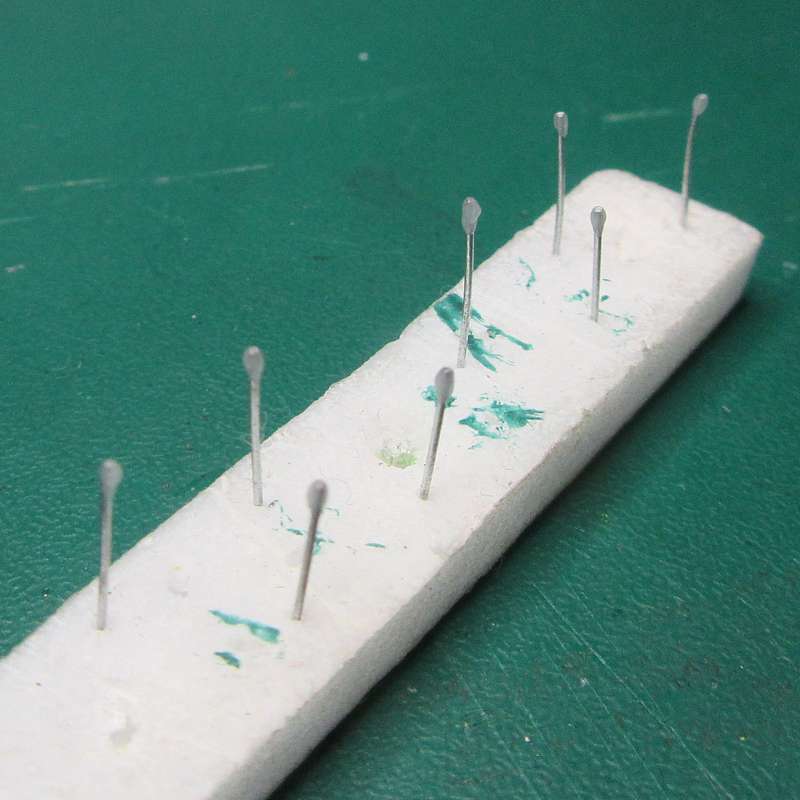
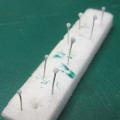
Stage 5
Liberally sprinkle flock onto
the glue blobs. Be sure to turn the foam in different directions to get
good coverage.
Allow to dry. |
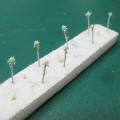 |
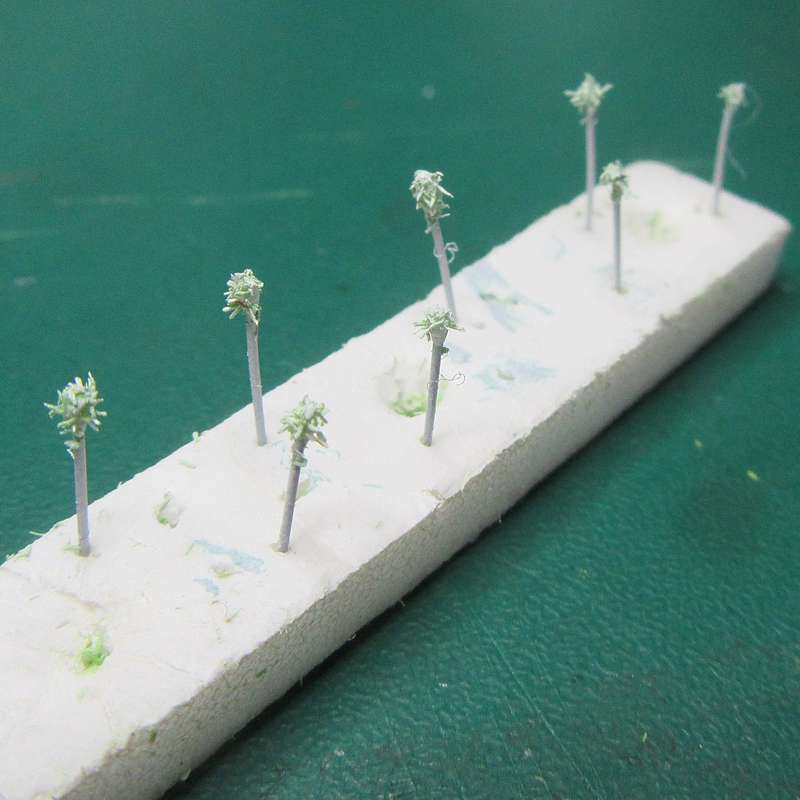
Stage 6
Apply a coat of spray primer
onto the pieces and allow this to dry. |
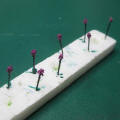 |
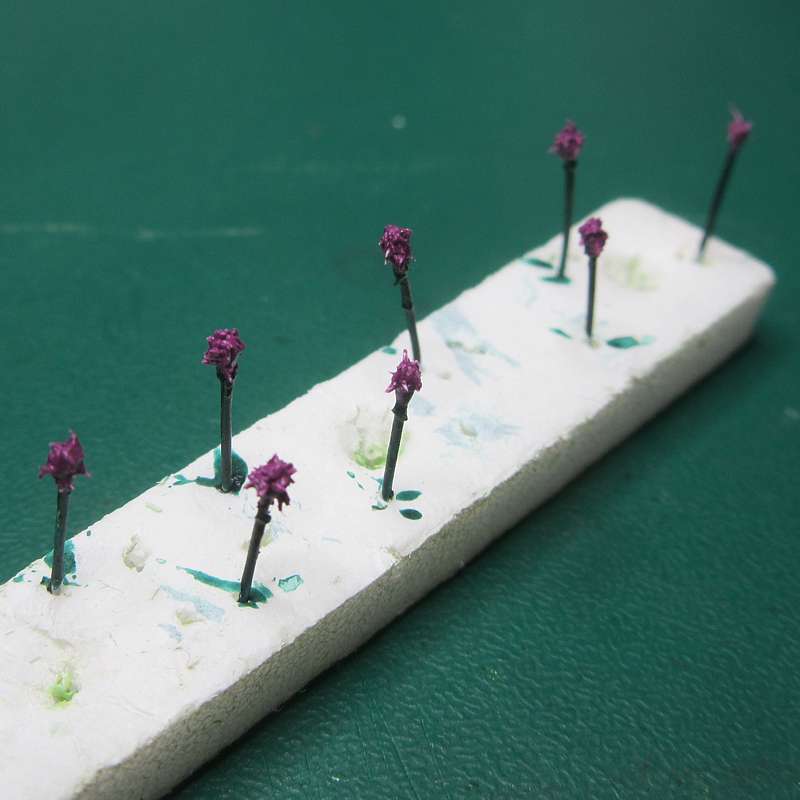
Stage 7
Paint the stems green and the
flowers in your choice of colours - for chives I opted for a red/violet
colour. |
|
Stage 8
If necessary, trim the bottom
of the wire to length, then inset the flower spikes into the pre-made
bunches of leaves. |