|
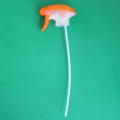
Milk-bottle Scenics Applicator
(Click thumbnails for
larger images) |
|
 |
Materials & Tools:
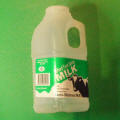
Empty plastic
milk bottle
Sharp scissors
or craft knife
Marker
(optional) |
|
Stage 1
Thoroughly
wash and dry the milk bottle, and remove the label if you wish. |
 |
Stage 2
(Optional)
Draw a line around the section of the bottle going through the hole of
the handle. Draw another line at an angle across the handle just before
it begins to curve. |
 |
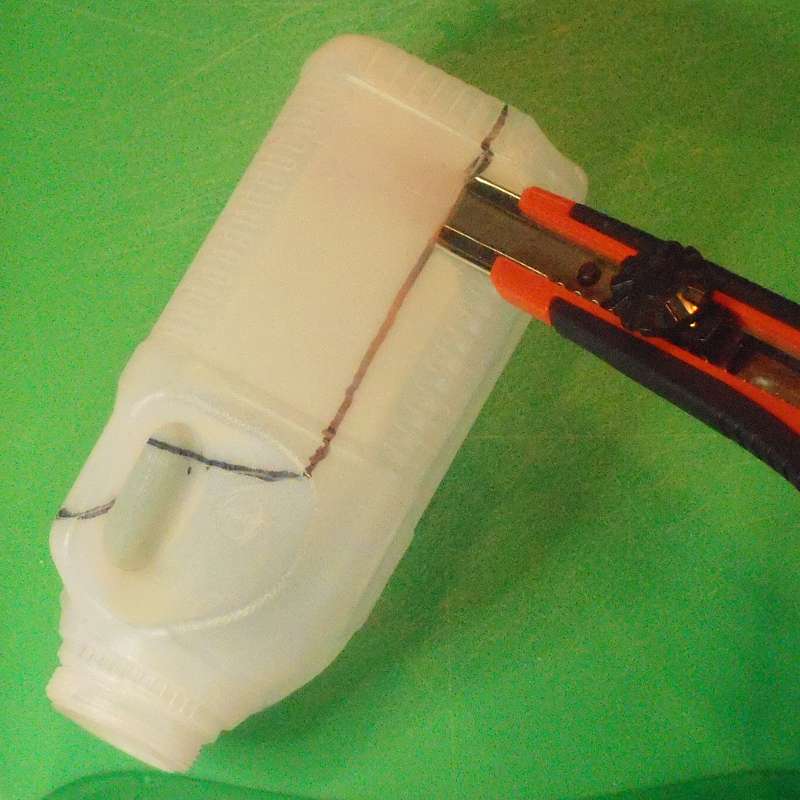
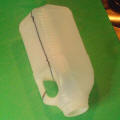
Stage 3
Carefully cut
along the lines with a sharp craft knife or scissors. |
 |
Stage 4
Trim any rough
edges or jaggies to leave a nice smooth edge. |
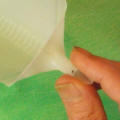 |
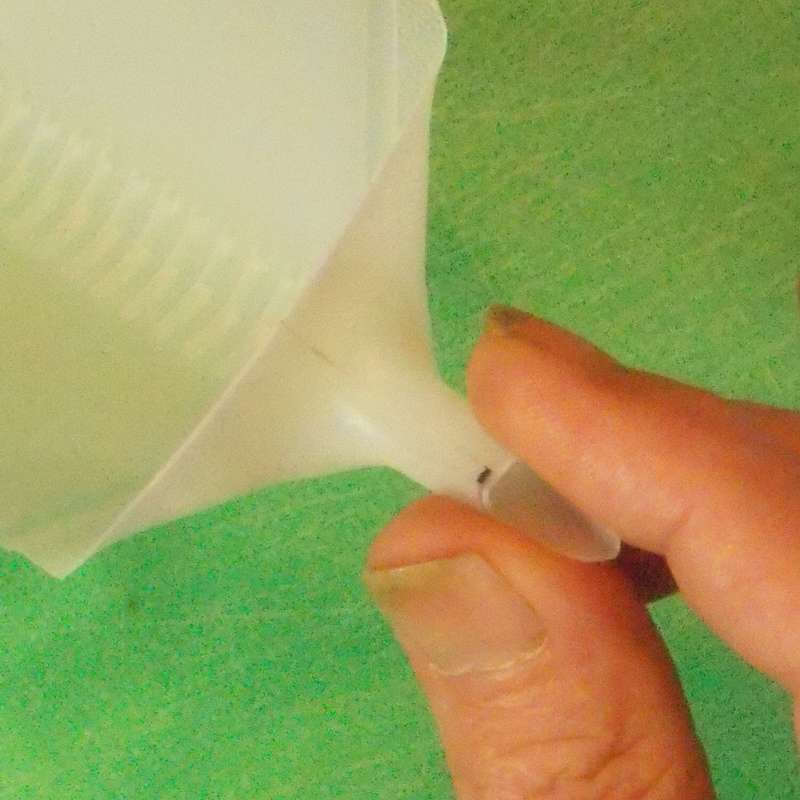
Stage 5
Pinch the end
of the projecting section of the bottle's handle - this forms the spout
of the applicator. |
|
|
|
|
To use the applicator, place some scenic material (flock,
static grass, etc.) into the "hopper". Point it where you want the
scenics to go, and gently tilt and tap the applicator until material
comes out of the spout. |
|
|
|
Brush Protectors
(Click thumbnails for
larger images) |
|
 |
Materials & Equipment
Empty shower spray bottle or similar
Sharpie
Craft knife
Paint brushes |
 |
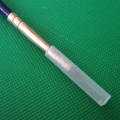
Stage 1
Part fill the bottle with
clean water and keep pulling the trigger for a minute or so, to
thoroughly clean out the tube. Then remove the top, and pull or cut the
tube from the trigger mechanism. |
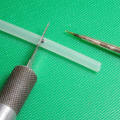 |
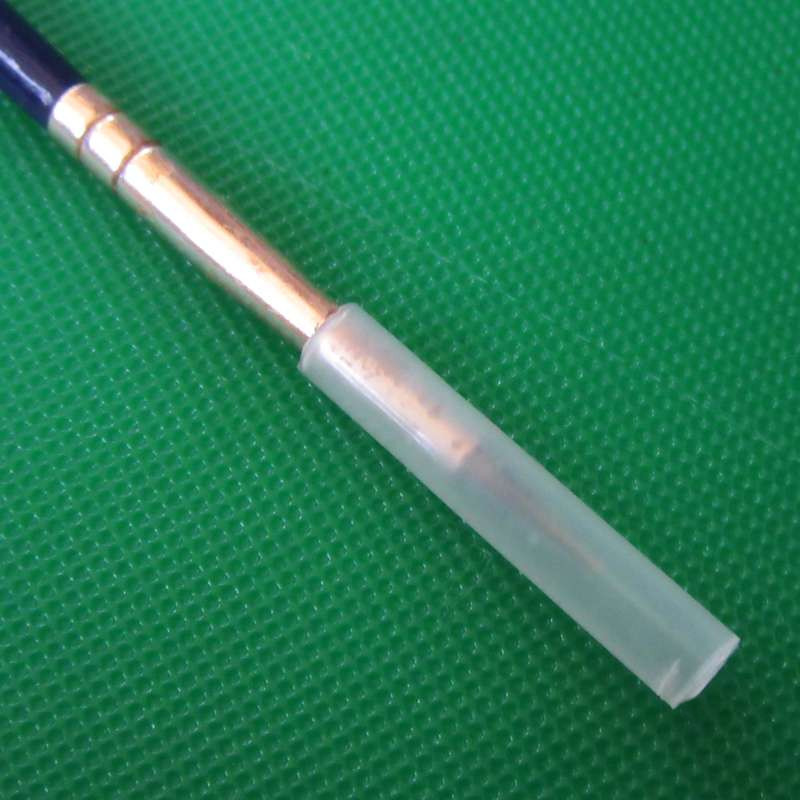
Stage 2
Insert a paintbrush into one
end, and mark a length of tube about 12mm (1/2") longer than the end
of the bristles. Remove the brush and cut the tube with the craft knife. |
 |
Stage 3
The tubing varies from brand
to brand, but the one I used is a good fit for brushes up to a No. 2 or
No. 3 round. It is much stronger material than what usually comes with
the brushes, and can be pushed to get a tight fit without splitting. |
|
|
|
|
|
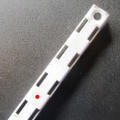
Cleaver Guillotine
(Click thumbnails for
larger images) |
|
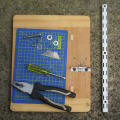 |
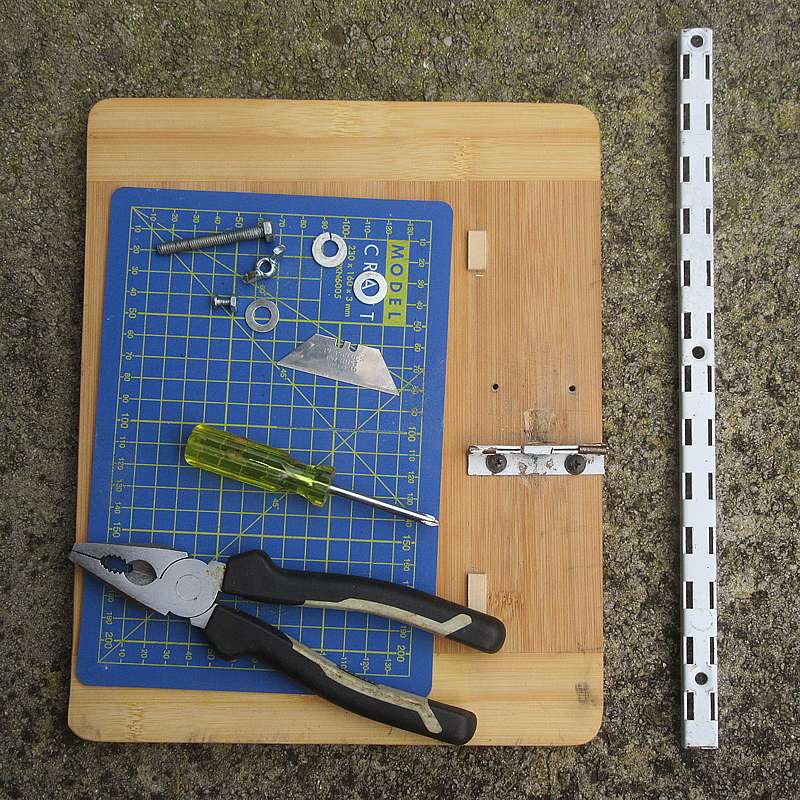
Materials
Wood chopping
board
Metal shelf
mounting strip
A5 Cutting mat
Dome-headed
wood screws x 2
Washers, flat
metal x 2, nylon x 1
Nuts & bolts
6mm x 1, 3mm x 1
Stanley knife
blade
Small wood
strips, PVA |
 |
Tools
Hacksaw
(Power) Drill & drill bits
Screwdriver
Pliers / spanner Tape measure
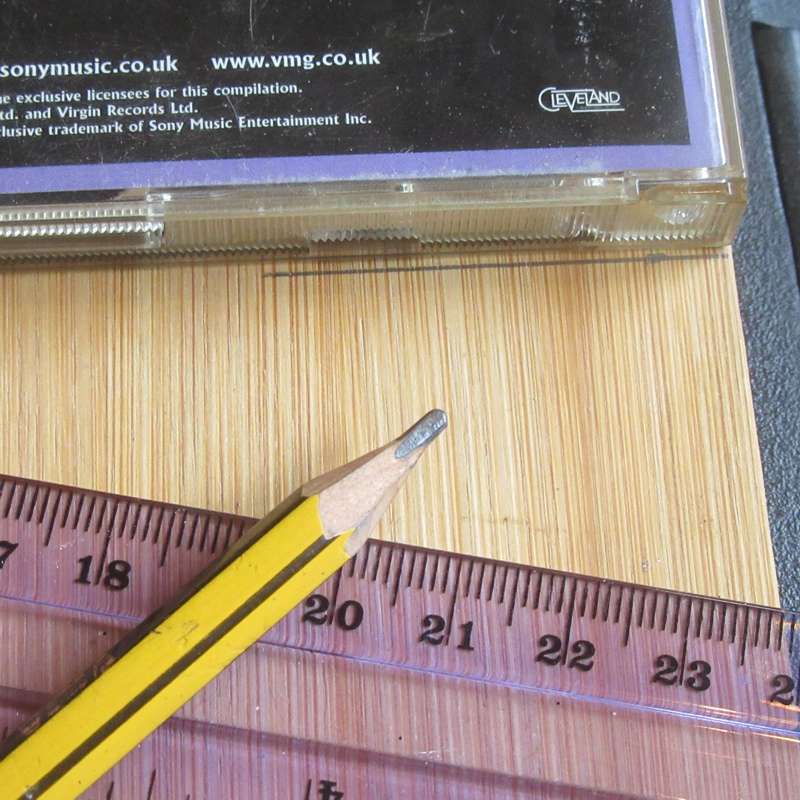
/ ruler Pencil, Set square /
CD case Wood chisel |
 |
Stage 1
Measure and mark the middle
of the long edge of the chopping board. Use a set square (a CD case
works well) to draw a line perpendicular to the edge of the board. |
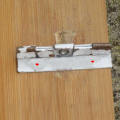 |
Stage 2
Cut a length of the shelf
mounting strip as shown, to around 62mm / 2.5" long. Bend one side down
to create an "L" section. Drill two holes in the single thickness to
allow it to be screwed to the base. Drill one hole to accept the bolt
through the middle of the double thickness. |
 |
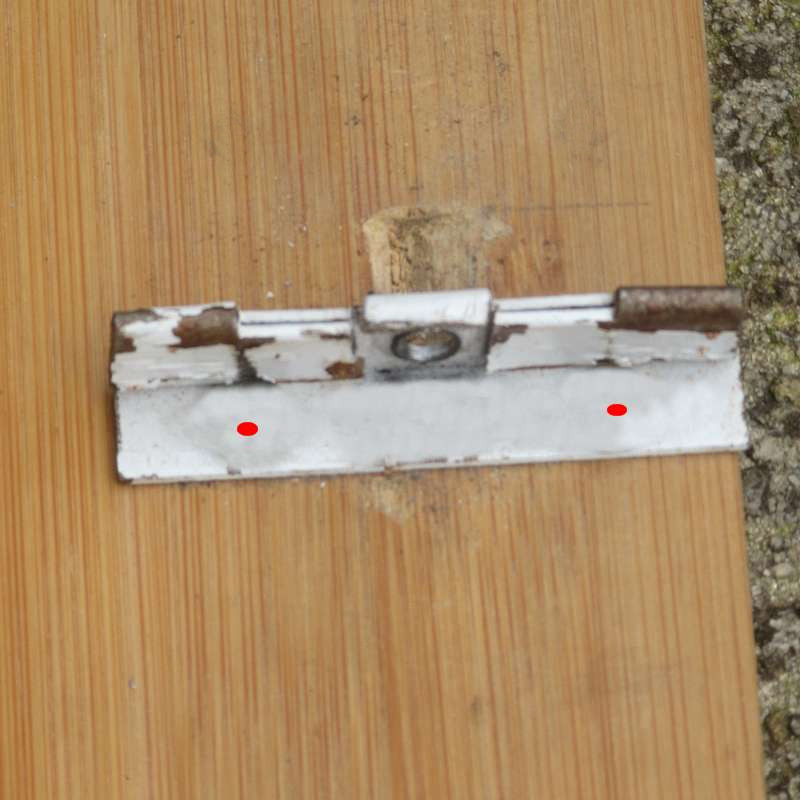
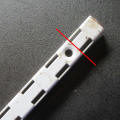
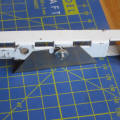
Stage 3
Align the metal with the
centreline you drew and mark the position of the screws. Drill pilot
holes, then screw the metal to the chopping board. |
 |
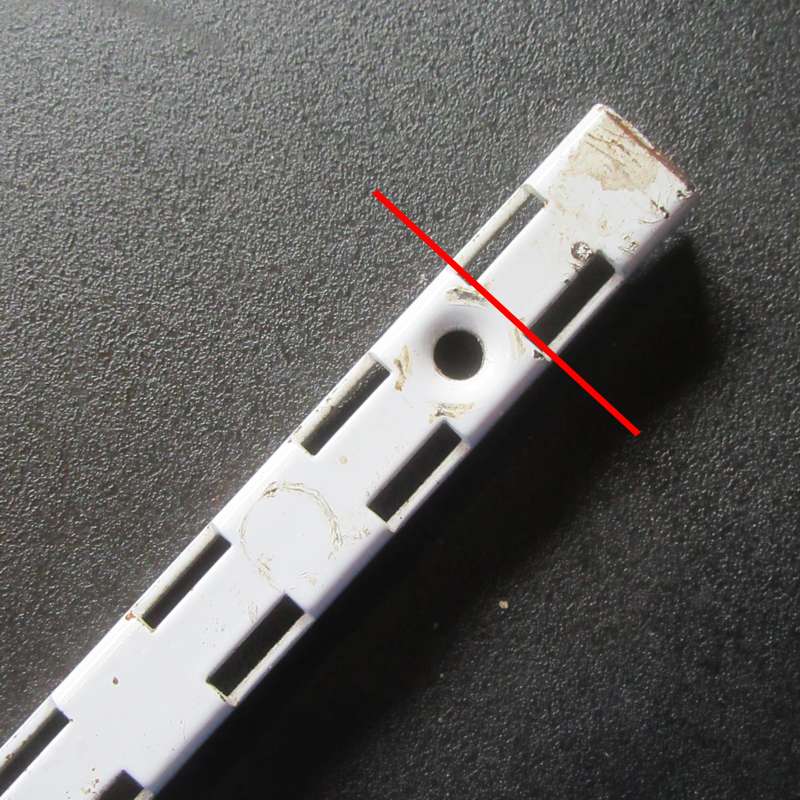
Stage 4
The mounting strip comes with
pre-drilled holes. Cut one end of the strip next to the end hole and
drill the hole wider to accept the 6mm bolt. Cut the strip to a suitable
length - I opted for 340mm / 13.5". |
 |
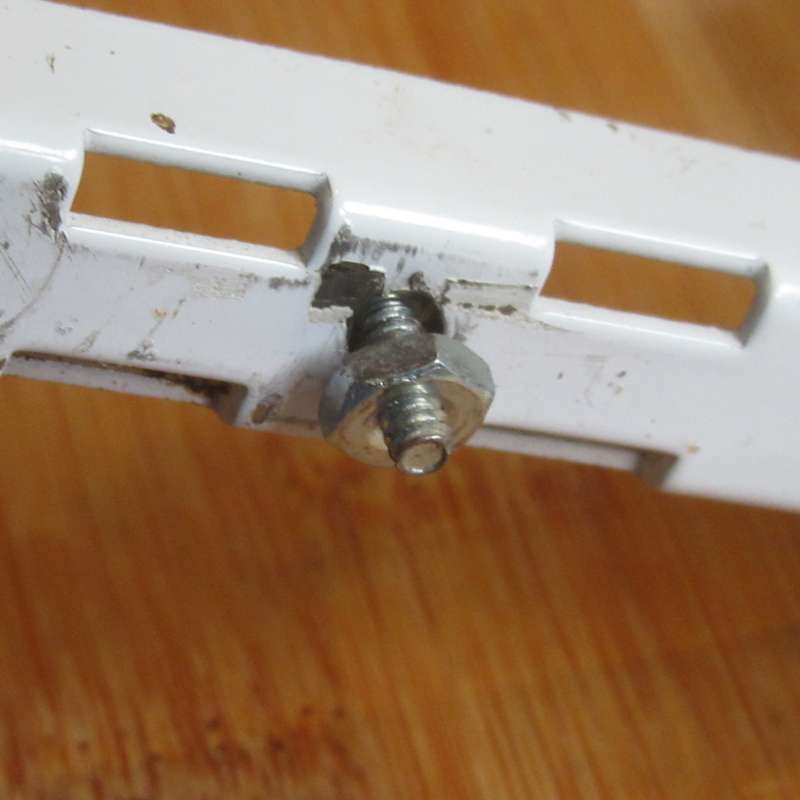
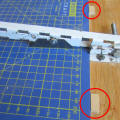
Stage 5
Starting from the
pivot-point, mark the centre of the third bar along, and drill this to
accept the smaller bolt. This will hold the blade in position. |
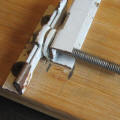 |
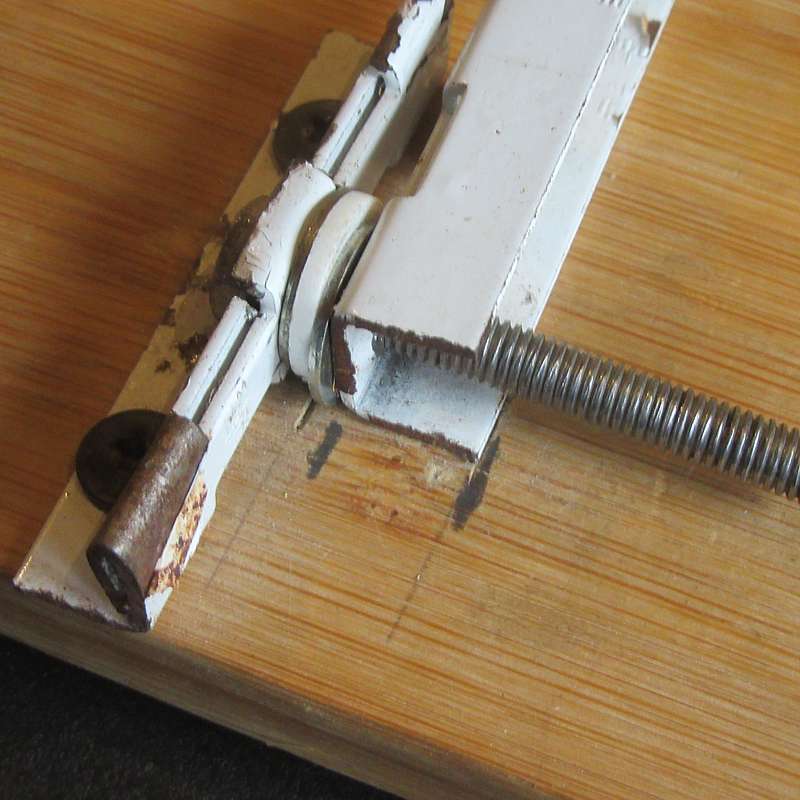
Stage 6
Insert the bolt through the
support bracket, add all three washers and the cutting arm. Mark the
position of the cutting arm on the chopping board. |
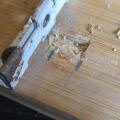 |
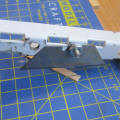
Stage 7
Remove some material forming
a small channel in the board, using a sharp chisel. This will allow the
arm to pivot. Attach the arm again and test - remove more material if
required. |
 |
Stage 8
Reinsert the bolt, the three
washers with the nylon washer between the metal ones, and the arm.
Attach a nut to the bolt and tighten the assembly. |
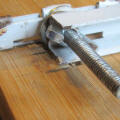
 |
Stage 9
Attach the small nut and bolt
through the hole you made at Stage 5. |
 |
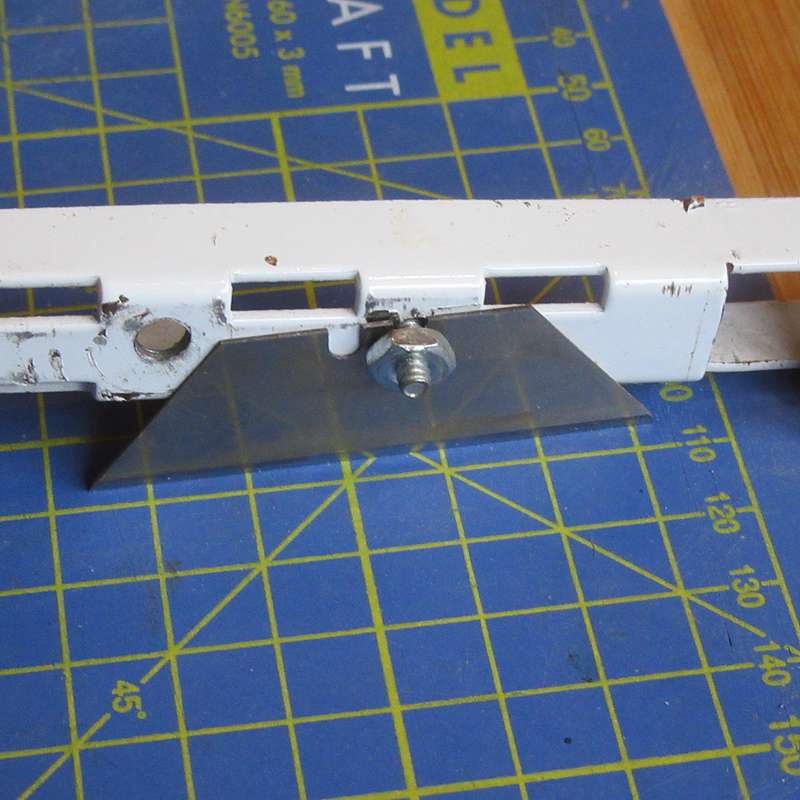
Stage 10
Fit the bolt into one of the
slots in a Stanley knife blade. Place the cutting mat onto the chopping
board. Lower the arm until the blade sits on the cutting mat and then
tighten the nut. |
 |
Stage 11
Align the
chopping mat so that the blade lies along one of the grid-lines, then
glue two small strips of wood into position using PVA. Allow to dry. |
 |
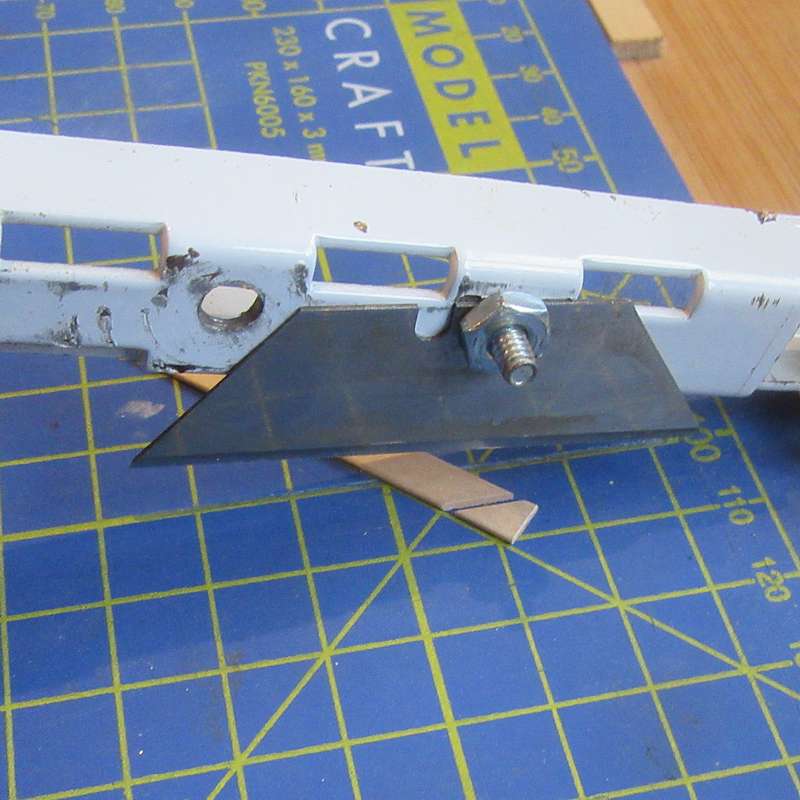
Stage 12
The machine is
great for thin strips of basswood and coffee stirrers. I can align the
wood with the angled lines on the cutting mat to make accurate angles. |
 |
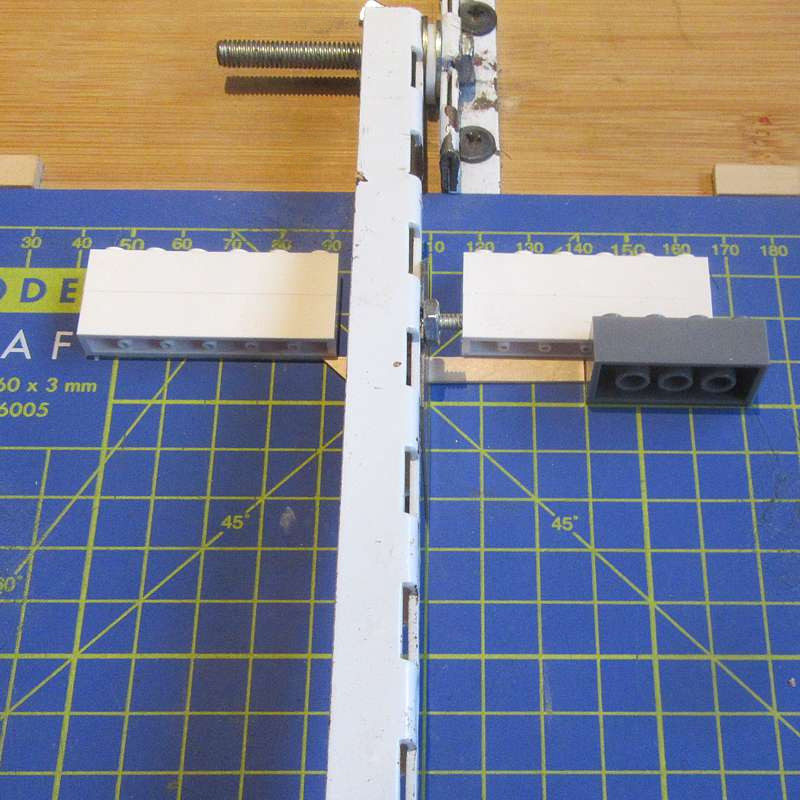
Stage 13
For cutting
multiple pieces to the same size, I attach a couple of Lego guides with
double-sided tape. |
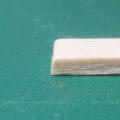 |
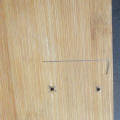
Example
On very close
inspection, you can see that the cut end of the wood has a slight
chamfer, which is simple to sand off. |
|
|
|
|
|
Quilling Tools
(Click thumbnails for
larger images) |
|
 |
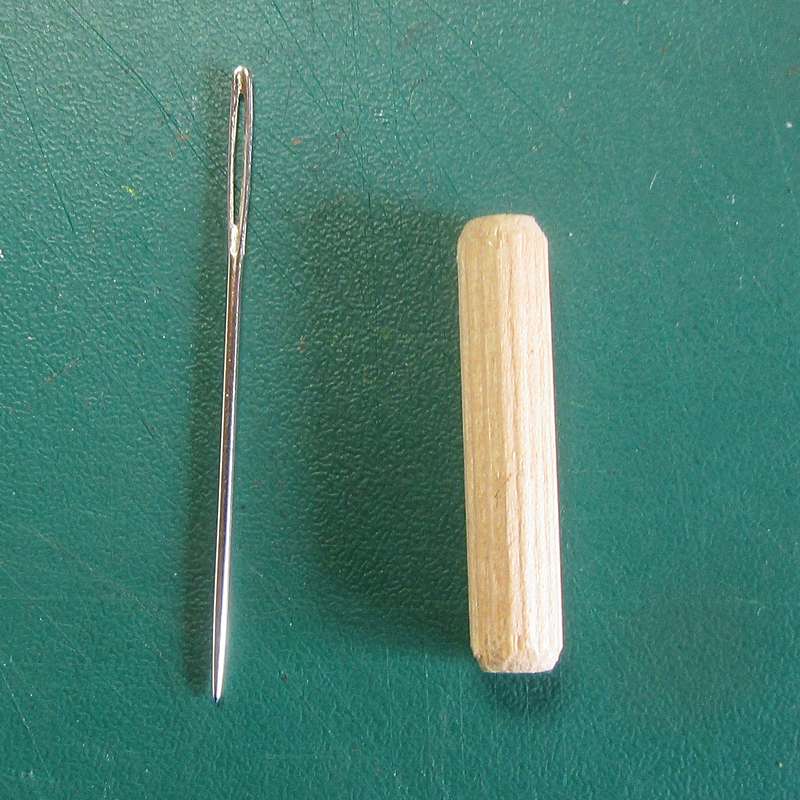
Materials & Equipment
Sewing needles
Wood dowels
Pin vice &
drill bits
Pliers or wire cutters
Fine file or emery cloth |
 |
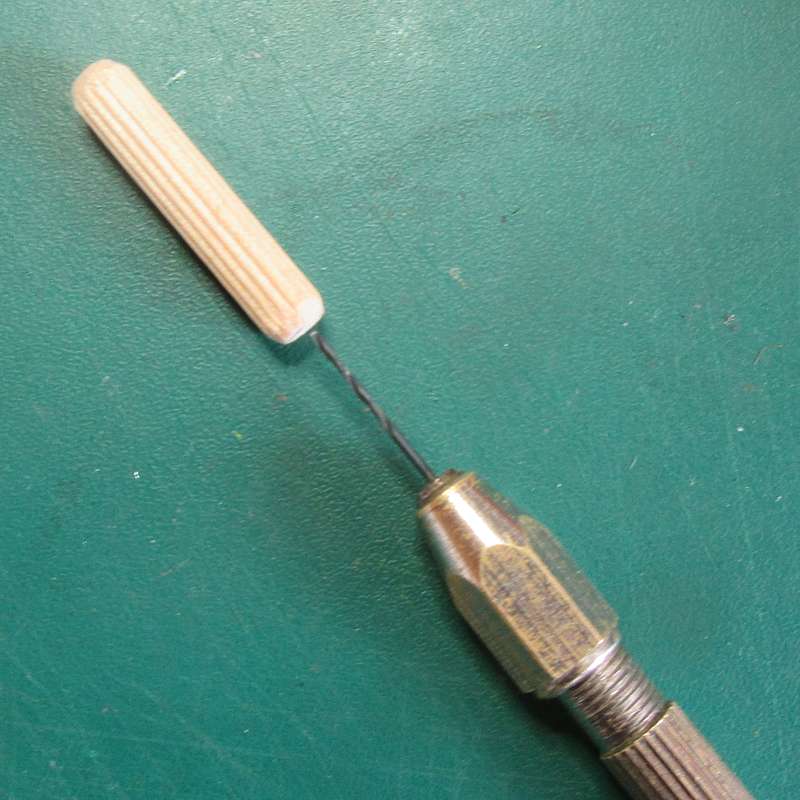
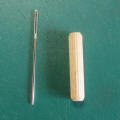
Stage 1
Drill a hole about 12mm
(1/2") deep, in the centre of one end of the dowel. The hole should be a
fraction smaller than the needle to ensure a tight fit. |
 |
Stage 2
Carefully insert the needle.
If you made the hole too large and the needle slips, try adding a drop
of superglue to the needle prior to inserting it. |
 |
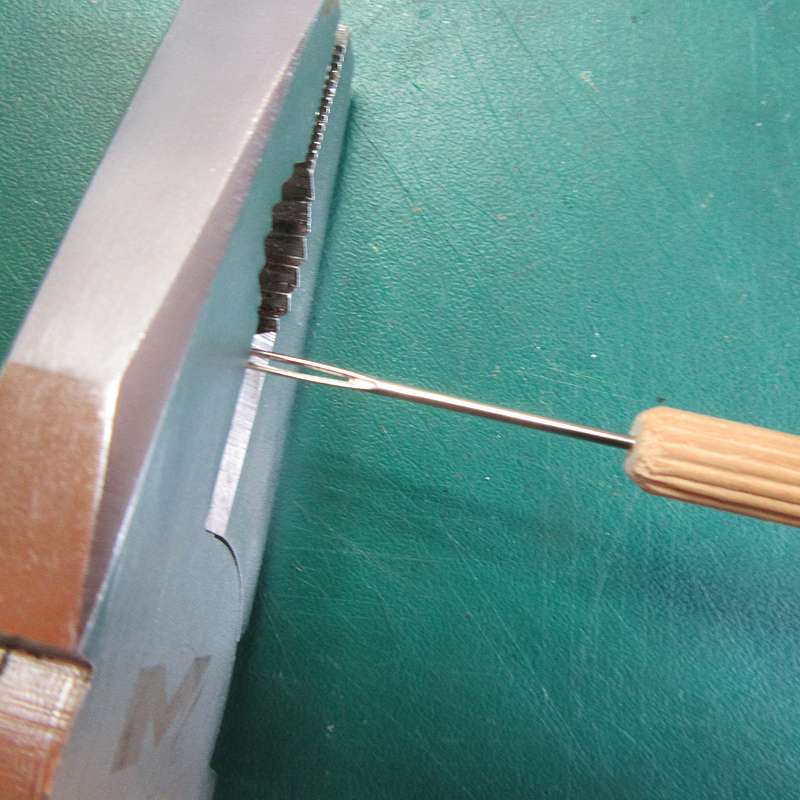
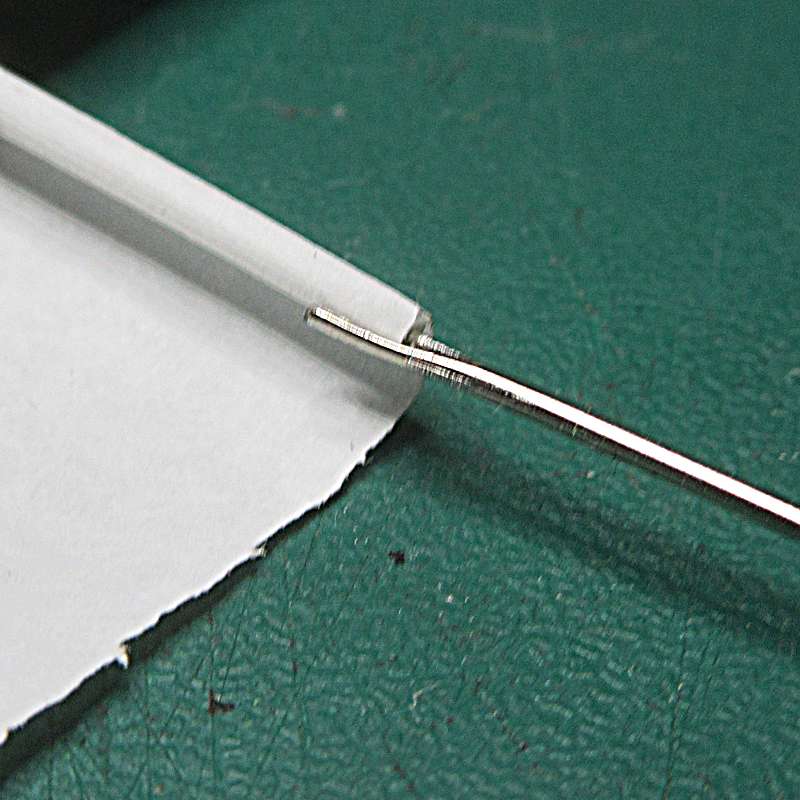
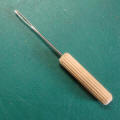
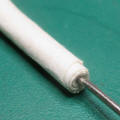
Stage 3
Carefully trim off the very
end of the needle to leave two prongs as shown. |
 |
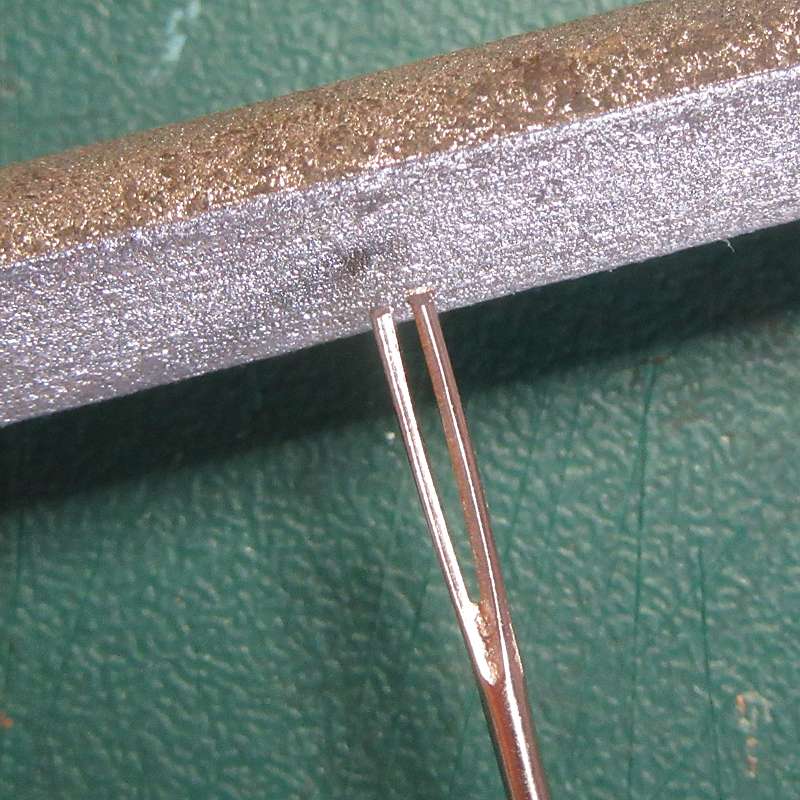
Stage 4
Use a fine file to remove any
burrs left by the cutters. |
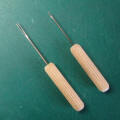 |
Stage 5
Here is the finished tool,
alongside a second one made with a finer needle. |
 |
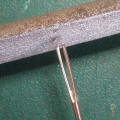
Example 1
The prongs can be used to
grip the edge of a piece of paper or thin card, and roll it up. |
 |
Example 2 This
results in a tight roll of paper, which is ideal for scrolls. |
|
|