| Contents | |||||||
 |
Texturing Wood Adding texture to craft sticks, basswood or balsa. |
 |
Weapon Racks Making a variety of racks to hold weapons and shields. |
||||

|
Texturing Wood, in collaboration with Jeremy "Mug" Bretsch (Click thumbnails for larger images) |
|||||
|
|
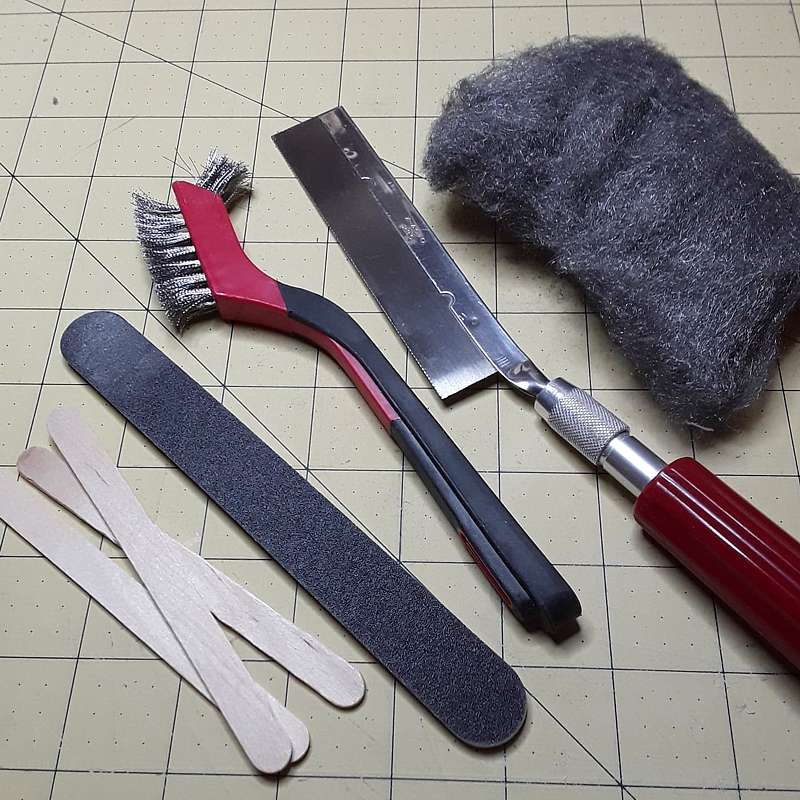
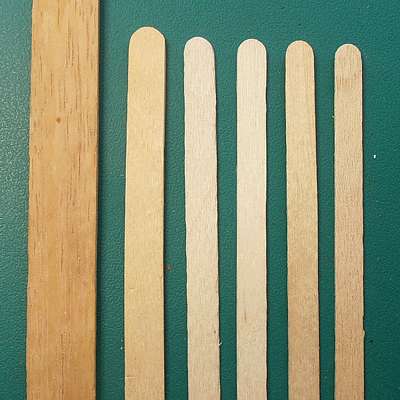
Materials & Tools: Craft sticks / basswood / balsa Razor saw Emery board (or sand paper) Steel wire brush and steel wool Note: Different woods have different densities and will affect how much pressure is needed to achieve the graining effect |
|
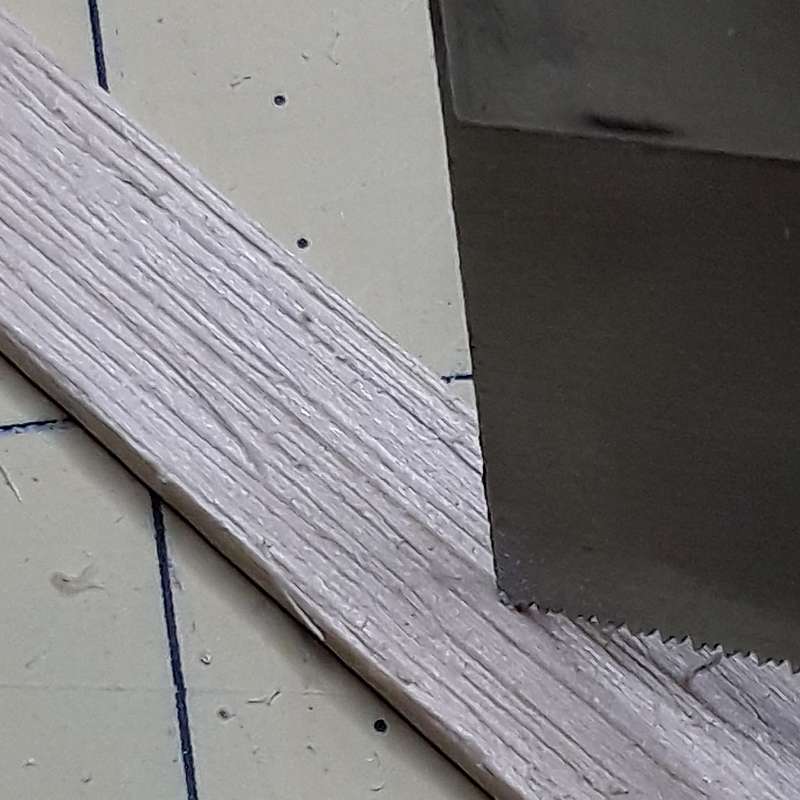
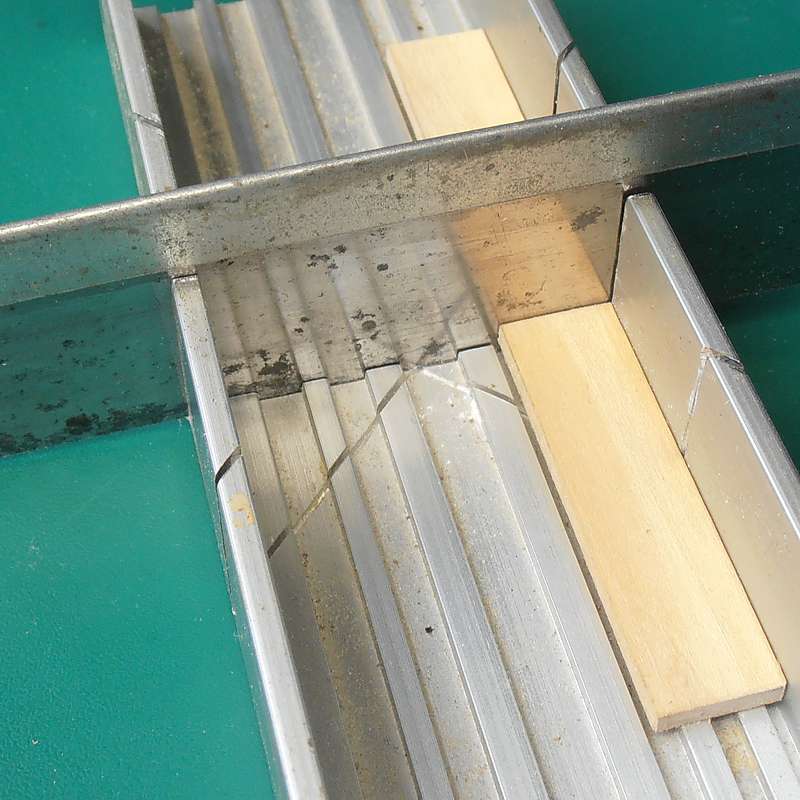
Stage 1 Scrape the edge of your material with the serrated edge of the razor saw. This helps loosen up the fibres of harder woods and adds texture to the whole of the surface. Do the same on the other side of the wood, if both sides will be on view. |
|
Stage 2 Use the same technique on the edges of the wood, especially if they may be on view. Note: planning ahead is beneficial. Texturing your material now, prior to cutting and assembling, will save you time and effort later on. |
 |
Stage 3 Use the end of the razor saw to engrave a more prominent wood-like texture. Allow the natural wood grain to guide the end of the saw when possible, giving you a more natural pattern. Notice the results of Step 1 filling in the spaces between the deeper lines. |
 |
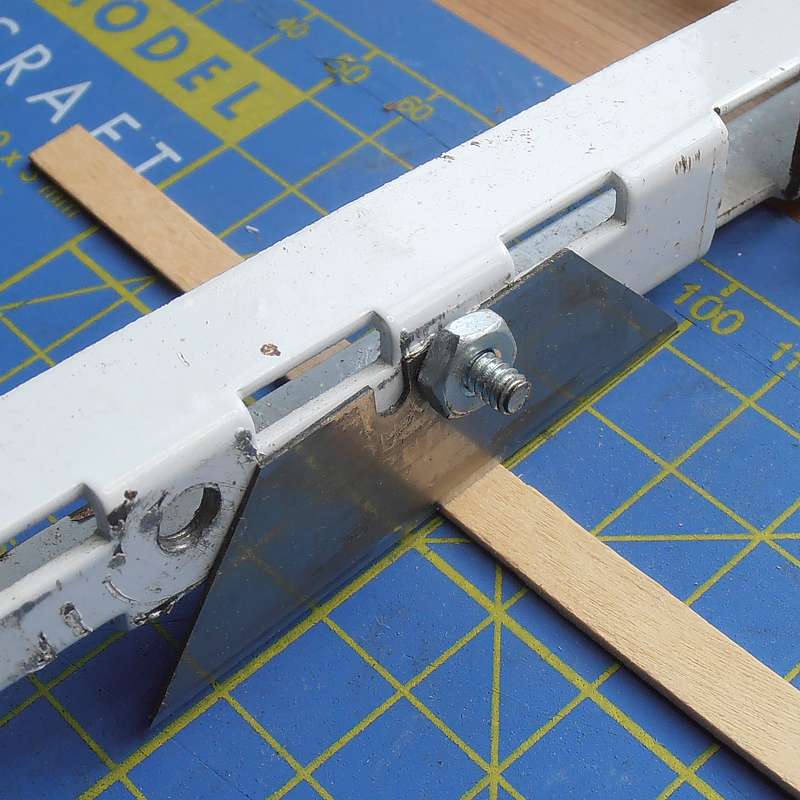
Stage 4 Lightly sand your material to help remove stray bits of wood and fibres that occur during texturing and carving. I recommend using a circular motion allowing the file to hit the material from all directions. |
 |
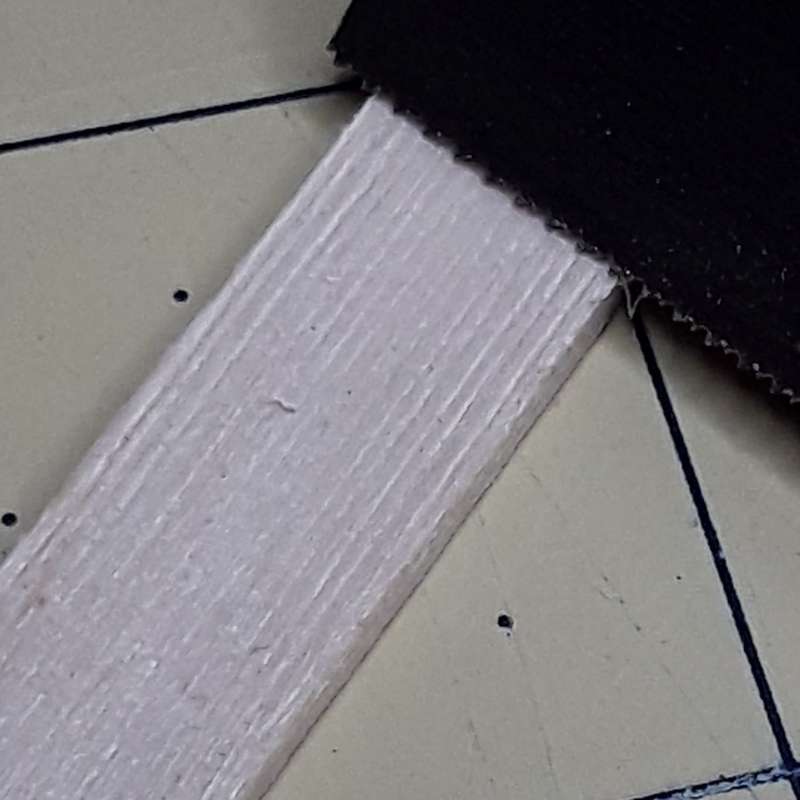
Stage 5 Scour the surface of your material with a steel brush, following the grain lines. The density of your material with determine how aggressive you have to be. This will add a subtle texture, especially to softer woods. It will also help clean out the sawdust from sanding. |
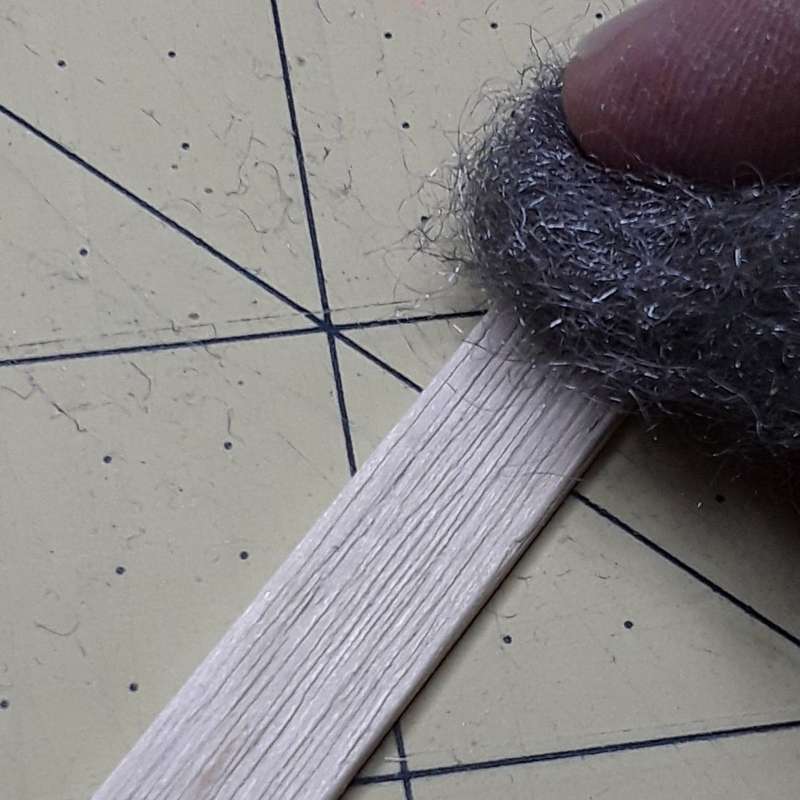 |
Stage 6 The wire brush will leave stray wood fibres attached to the piece. A gentle rub with some fine steel wool will remove most of those very easily.
|
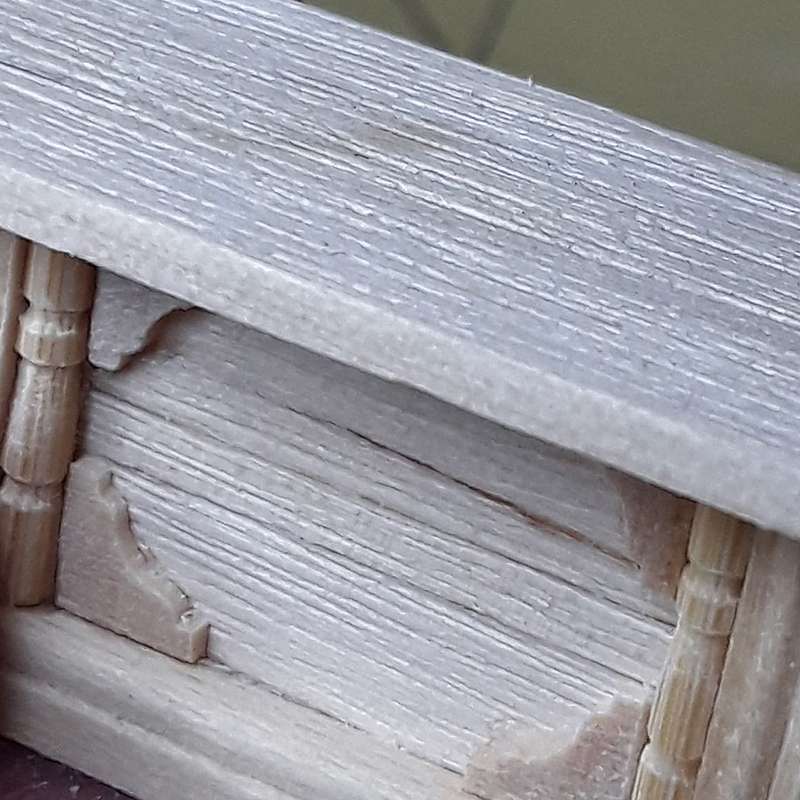 |
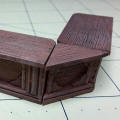
Example 1 Part of a tavern bar showing the graining effect. |
 |
Example 2 More sections of the tavern bar painted in a dark brown colour, with a black wash to bring out the texture. |

|
Weapon & Shield Racks (Click thumbnails for larger images) |
|||||
|
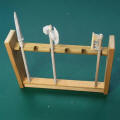
|
Materials & Tools: Basswood or Balsa Coffee stirrers Razor saw and Mitre block Guillotine PVA Sandpaper / Emery Board Brown ink wash |
|
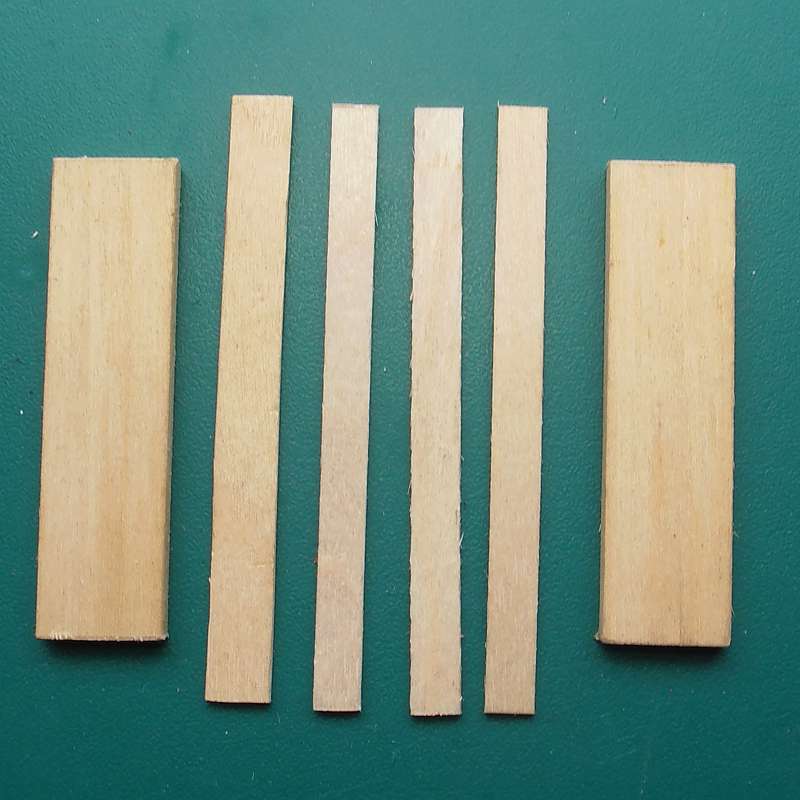
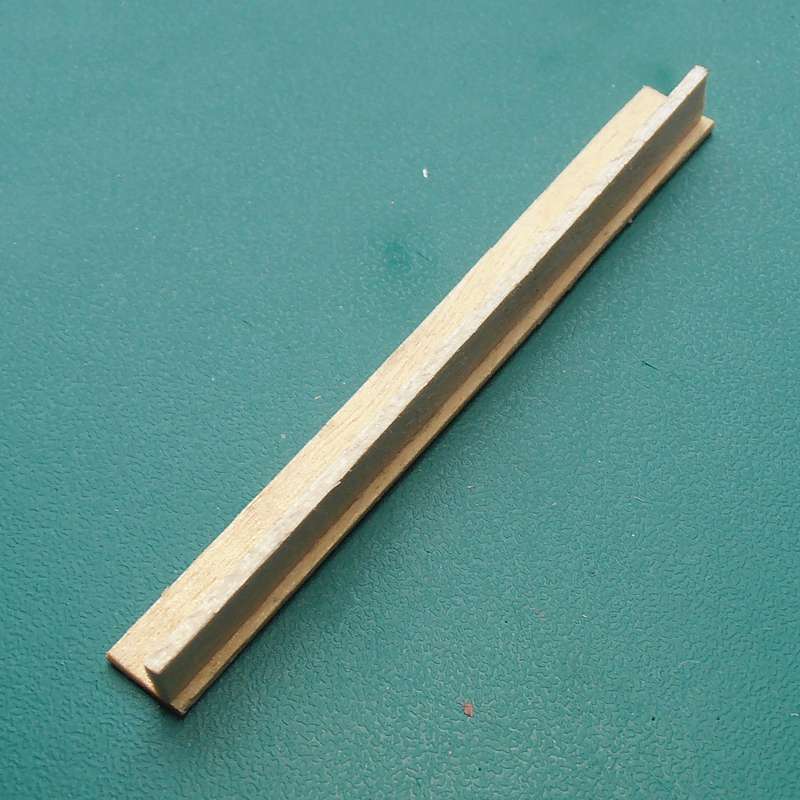
Stage 1 Cut two side supports for the rack using the razor saw and mitre box. I made mine 50mm (2 inches) tall from 12mm x 3mm (1/2" x 1/8") basswood strip. |
|
Stage 2 Cut four pieces of coffee stirrer to the width of your rack. I opted for 64mm (2.5"). I used a home-made guillotine to cut the strips to length, but you can use the razor saw instead. |
 |
Stage 3 Lightly sand the pieces with sandpaper or an emery board. |
 |
Stage 4 Apply a small amount of PVA glue to one side of one of the coffee stirrer pieces, and attach it near one edge of a second piece. Allow to dry for a few minutes. |
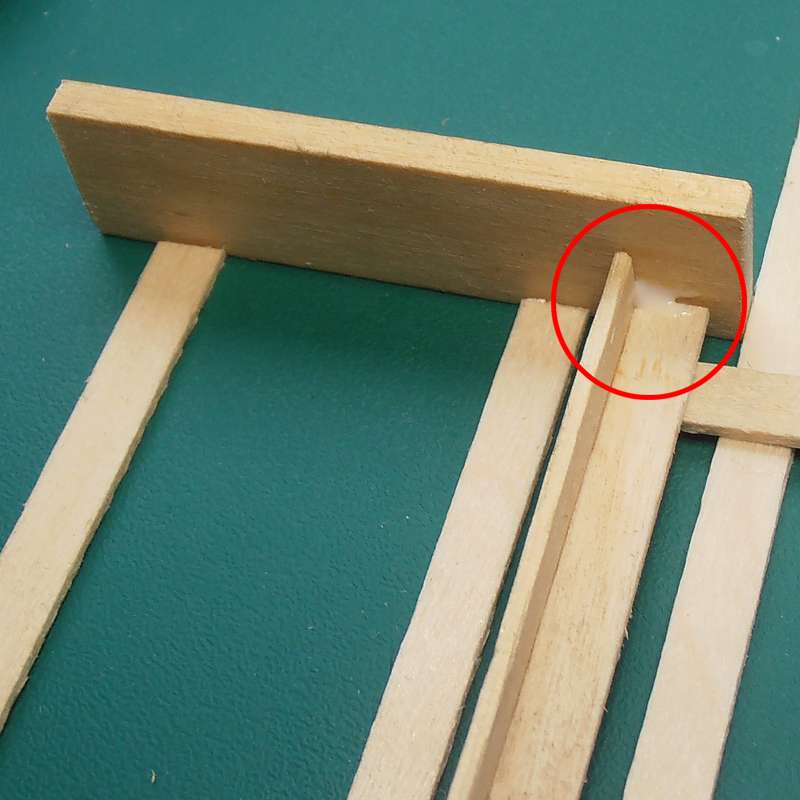 |
Stage 5 Glue the piece to each of the side supports near the bottom front edge. Use the other cut strips to keep the spacing correct, and spare pieces of wood or plastic as supports. Allow to dry for a few minutes. |
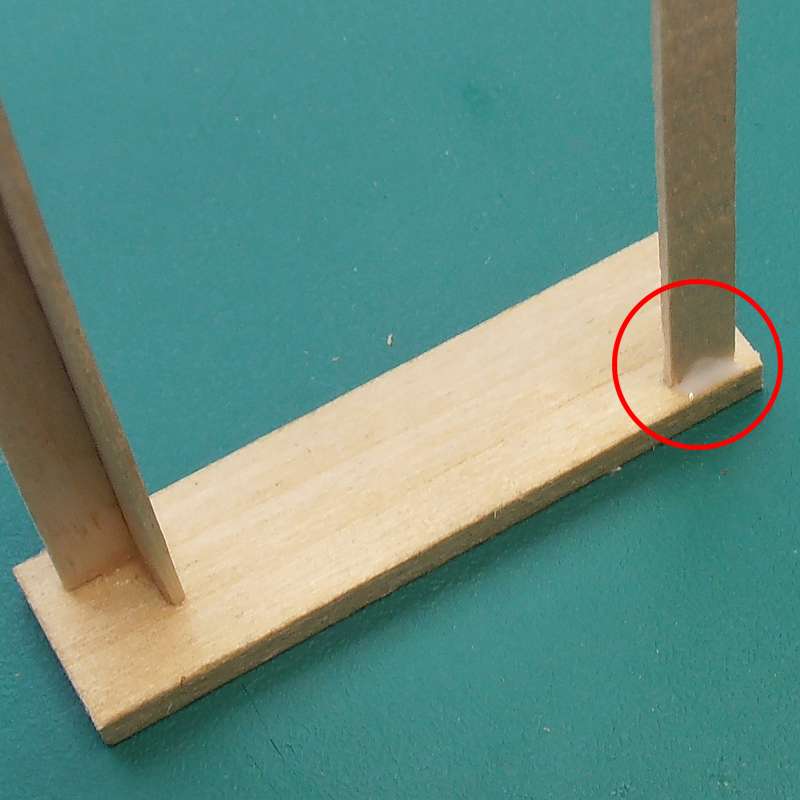 |
Stage 6 Attach another coffee stirrer near the upper-back corner of the side supports with a drop of PVA. Allow to dry for a few minutes. |
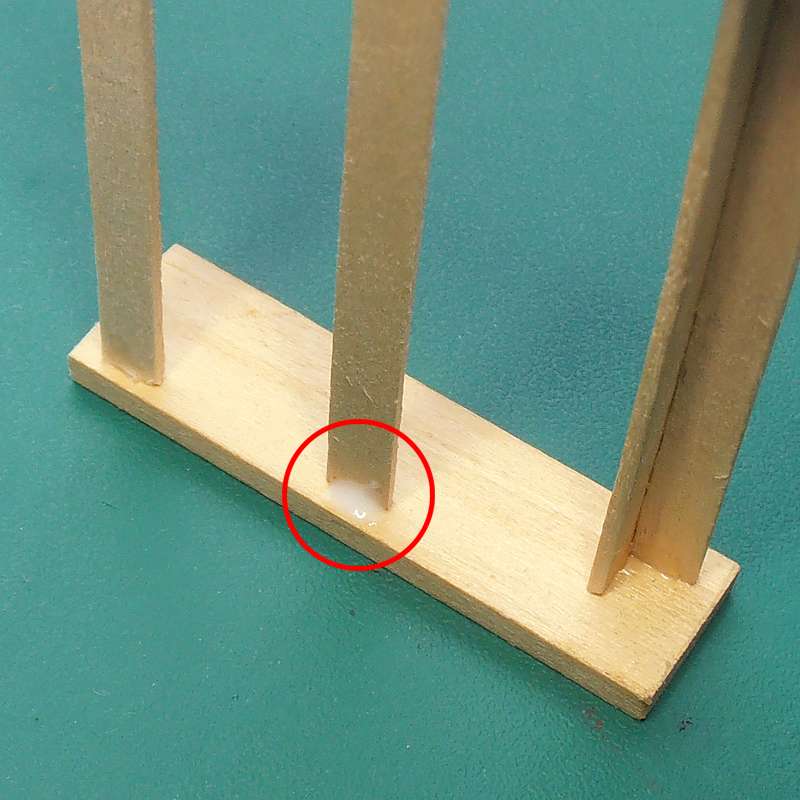 |
Stage 7 Using PVA, attach the fourth strip about halfway up the rack as shown. Make sure the rack is square and allow the glue to dry thoroughly for at least an hour. |
 |
Stage 8 Apply an ink wash to the wood to stain it to a suitable brown colour. If you prefer, you can paint it, but I like to preserve the natural wood-grain.
|
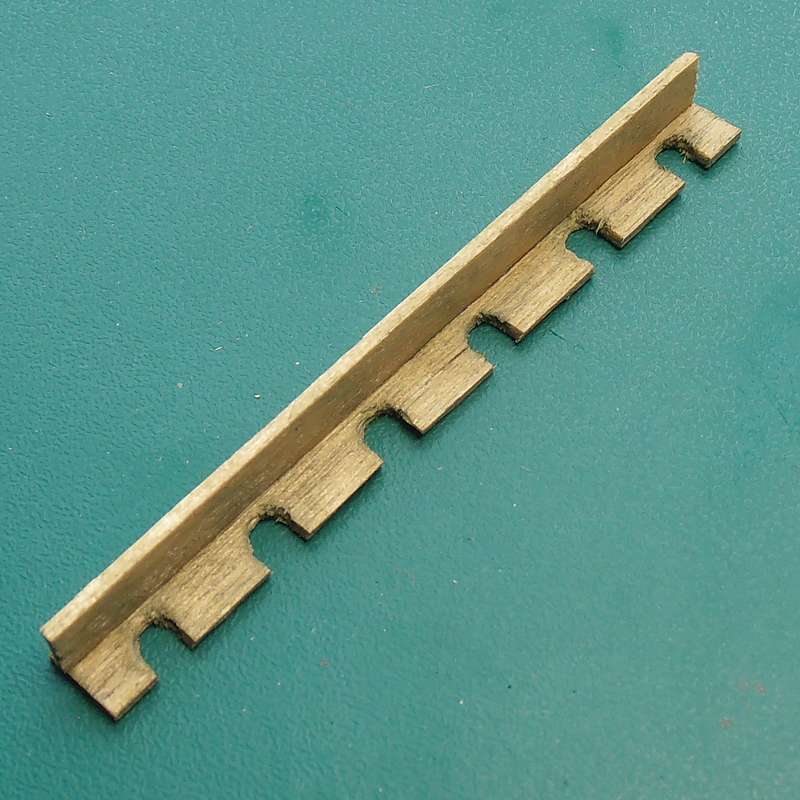 |
Option A To make a rack to hold pole-arms or spears, you can drill holes and cut slots to form the upper cross-piece.
|
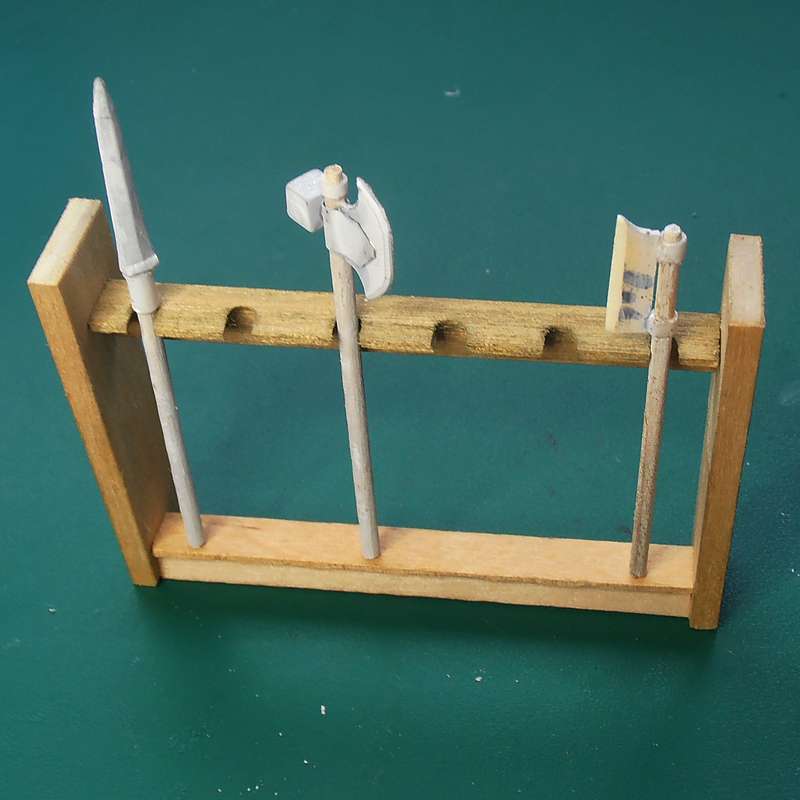 |
Example A A rack for pole-arms or spears.
|
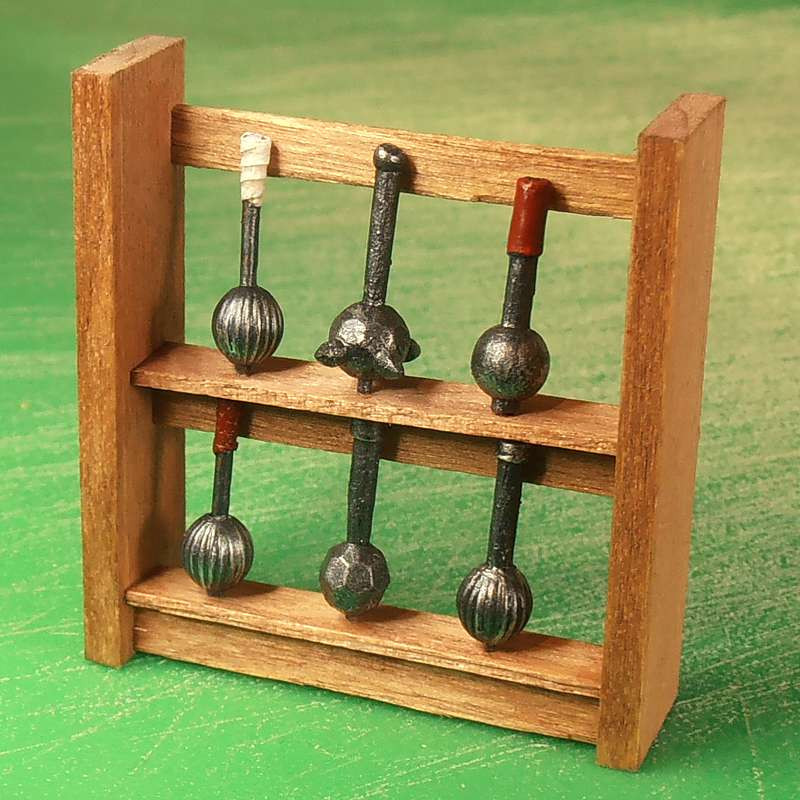 |
Option B For shorter weapons or shields, you can have two layers. The middle shelf is made in the same manner as Stage 5, but is glued with the vertical strip at the back, to support the lower layer.
|
Contact me with suggestions, comments or questions.
These articles are provided under this Creative Commons Licence:
![]()