Squaring the Hexagon
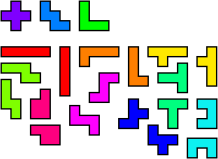
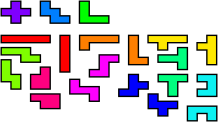
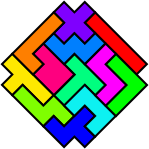
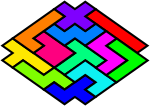
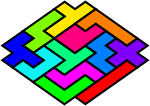
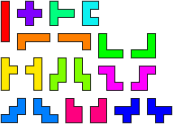
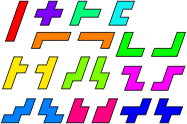
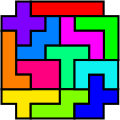
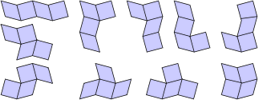
An investigation into similarities and equivalence between different types of polyform. Polyforms have two properties which distinguish them from each other: the shape of the pieces and the grid or lattice in which they are constructed. Is it possible to transform one set of polyforms into a set with a different appearance, but which can solve the same problems? The answer is "yes". Possibly the simplest example is to take a set of pentominoes, and construct a square with missing corners (Fig. 1). If the puzzle is observed from an oblique angle and the effects of perspective are ignored, then the result is shown in Fig. 2. A 90° rotation results in Fig.3. We have just created the polyrects from the polyominoes. The pentominoes with diagonal symmetry, L, W and X, are the same in both images, whilst all the other pieces have two different polyrect equivalents: a long and a short version. The difference between the polyominoes and polyrects is therefore one of perspective. Polyrects are equivalent to polyominoes if every long and short pair of polyrects is regarded as different rotations of the same piece. Conversely, polyominoes allowing reflections but regarding rotations as different pieces, are equivalent to polyrects.
 |
 |
 |
| Figure 1 | Figure 2 | Figure 3 |
| Polyomino Rects | Polyrect Ominoes |
|
All pieces different. Reflections allowed, no rotations. |
Pieces of the same colour are treated as rotations of a single piece. Reflections allowed, no rotations. |
|
|
|
We can repeat this simple trick with the pentominoes rotated by 45°, resulting with the polyrhombs (Figs.4-6). This time we have wide and narrow versions of those pentominoes without mirror symmetry parallel to the grid, and a single copy of I, T, U and X. If we regard each pair as different rotations of a single piece, then the polyrhombs are equivalent to the polyomines. To get the polyomino equivalent of the polyrhombs, we regard reflections as different pieces, but allow rotations.
Figure 4 Figure 5 Figure 6
Polyomino Rhombs Polyrhomb Ominoes All pieces different.
Rotations allowed, no reflections.
Pieces of the same colour are treated as reflections of a single piece.
Rotations allowed, no reflections.
Triangle to Hexagon
Another fairly easy equivalence to find is that between polyhexes and polyiamonds. If the sides of the hexagon are regarded as being elastic, alternate midpoints can be stretched outward until a triangle is formed. The inscribed circle touches the perimeter of each shape where adjoining pieces can be placed.
 |
 |
|
| Hexagon with circle inscribed. | Stretch out alternate midpoints... | to get a triangle. |
The circles also make it much easier to see the shape of the polyhex equivalents. It should also be clear from the images below, that there are no polyiamond equivalents for polyhexes which do not fit into the grid.
Figure tiled by the 12 hexiamonds. The equivalent hexahex pieces. The hex grid for polyiamond equivalents.
Square to Hexagon
A slightly different procedure can be used to convert polyhex pieces into polyomino equivalents. Begin with a square grid as shown in Fig. 7. This is the grid used by the polyominoes. Offset alternate rows by half the width of the square, to get the grid used by the polyhops in Fig. 8. Each of the single squares in the polyhop grid can be replaced by a square tetromino to conform with the polyomino grid. Note that the circles must now be distorted outside the top and bottom of the squares, in order to make contact. Squashing this new grid by half in the vertical dimension results in the polybricks grid, shown in Fig. 9, with each brick represented by a domino in the polyomino grid. We now take the midpoints of the long sides of each brick, and pull them out vertically until the ellipse is once again contained. The result, shown in Fig. 10, is a grid of non-regular hexagons. It only remains to stretch this new grid so that the hexagons are regular, and the ellipses are restored to circles, Fig. 11.
 |
 |
|
 |
 |
| Figure 7 | Figure 8 | Figure 9 | Figure 10 | Figure 11 |
The propeller tetrahex piece is shown below in all of these equivalent forms, along with the polyiamond equivalent.
 |
 |
|
 |
 |
 |
| Polyominoes | Polyhops | Polybricks | Squashed Polyhexes | Polyhexes | Polyiamonds |
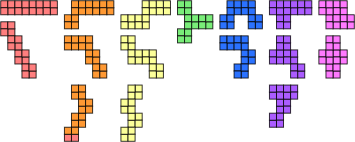
Now we can construct a set of polyominoes which can emulate all of these pieces.
| Polyomino Hexes | |
|
Pieces of the same colour are treated as rotations of a single piece. Reflections allowed, no rotations. |
The equivalent polyhex pieces. |
 |
|
Hexagon Back to Square
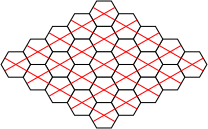
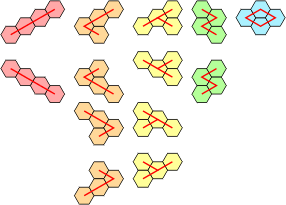
Polyhex equivalents of polyomino pieces can also be made. First, we need to "remove" one of the axes from the hexagonal grid. Fig. 12 shows such a grid where adjacent cells in the vertical axis are not regarded as connected. Polyhex versions of the five tetrominoes can be constructed on this grid, as shown in Fig. 13. These pieces may be reflected horizontally and vertically, but not rotated, since the same tetrahex in different rotations represents two different tetrominoes. This makes it a little more difficult to see the equivalence between the two sets, especially when the red connection lines are absent.
|
|
|
| Figure 12 | Figure 13 |
| Polyhex Ominoes | |
|
Pieces of the same colour are treated as rotations of a single piece. No reflections or rotations allowed. |
The equivalent polyomino pieces. |
 |
|
Square to Pentagon
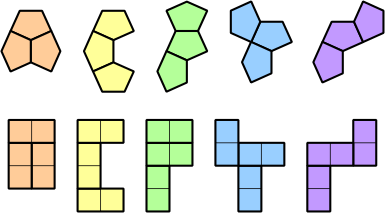
A piece as small as a domino can be used as a generating shape to make polyomino equivalents of polycairos, provided that the puzzle does not contain any monocairo pieces, in which case an octomino will work. Figs. 14 and 15 show the polycairo grid and the equivalent domino grid. Four octomino versions of monocairos are shown in Fig 16.
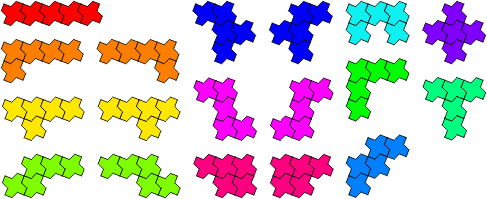
The reverse procedure uses a tetracairo as a generator. These pieces cannot be reflected in the grid, so we need to add mirrored versions of the F, L, N, P, Y and Z pentominoes.
 |
 |
 |
| Figure 14 | Figure 15 | Figure 16 |
| Polyomino Cairos | Polycairo Ominoes | |
|
The five tricairo pieces shown with polyomino equivalents. Rotations and reflections allowed. |
Pieces of the same colour are treated as reflections of a single piece. Reflections impossible, rotations allowed. |
|
 |
 |
|
Adding Colour
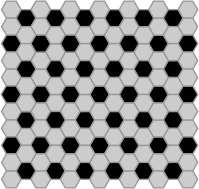
We can even use the shape of the pieces to simulate different coloured segments. Two colours can be represented using 9-unit squares to generate the pieces, with the central square in each block used to represent the colour. The pieces can be constrained to follow a chequerboard pattern by blocking corresponding unit squares on the grid. More than two colours can be simulated using a larger square as the generating piece, with different symmetric patterns of holes representing the colours.
| Chequered Polyminoes | ||
|
Each omino is formed from 3 x 3 squares, with the central square indicating the colour. |
The equivalent chequered pieces. |
Chequered grid. |
 |
 |
 |
Squares to SquareRhombi
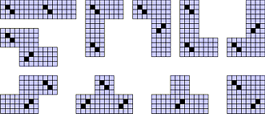
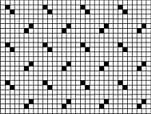
Holes can also be used to differentiate between different shapes. The polySquareRhombi use both squares and rhombi as generators. In this case, each piece is represented by a 4 x 4 block of polyominoes. The square pieces are left complete, whilst the ones representing rhombi have two ominoes removed. In the central image below, the diagonal lines of holes follow the direction of tilt of the corresponding rhombi. For a minimal set of equivalent pieces, we can do better: we only actually need the central four squares of each block. However, using this form makes it more difficult to see the relationship between the different sets.
| PolySquareRhombi | Polyomino SquareRhombi |
Grid for polyomino SquareRhombi.
|
 |
 |
 |
Kites to Hexes
A grid of polykites is shown below, each with an inscribed circle. As was demonstrated earlier, the circles touch where there is a joint between adjacent pieces. Note that there are triangular arrangements of three circles, square arrangements of four and hexagonal arrangements of six. We can construct equivalent grids of hexagons in two ways. The first keeps the triangles together, and the second, the hexagons. The red lines show the possible joints between adjacent polykite pieces. Using the first grid, extra hexes may be inserted to prevent individual polykites becoming disjointed, the drawback being that polykites of the same order would consist of unequal numbers of hexes. This process is not possible using the second, more compact grid.
Polykites Polyhex Grid Alternative Polyhex Grid
Pons to Hexes
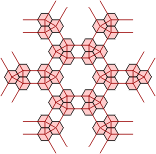
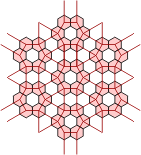
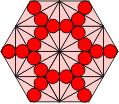
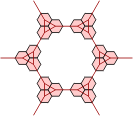
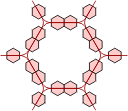
We now perform the same trick with a grid of polypons. Here there are triangular arrangements of three circles and dodecagonal arrangements of twelve. Again, equivalent grids of hexagons can be made in two ways. Extra hexes can be inserted into either grid to keep the polypon pieces contiguous.
| Polypons | Polyhex Grid |
Alternative Polyhex Grid
|
 |
 |
 |
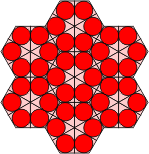
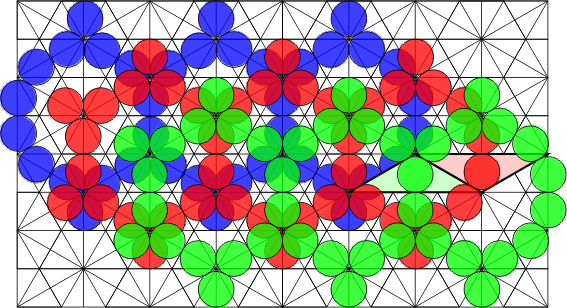
When we look at the extended polypons, things get more complicated. The grid for these pieces consists of three copies of the one above, which overlap as shown below. If we imagine these as three separate grids, then adjacent grids are connected by each parallelogram of two polypons, although the circles within these pieces do not touch. Such a pair joining the red and green grids is highlighted. In the next picture, three copies of the alternative polyhex grid above are overlaid in equivalent positions.
| Extended Polypons | Polyhex Grid Without Cross-Links |
 |
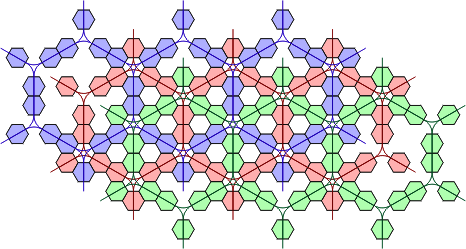 |
Next, the cross-links between the three grids have been added. The purple lines connect cells which are considered to be adjacent in the blue and red grids, the yellow lines join red and green, and the cyan lines join blue and green cells. The points where these lines cross are not relevant, just those at the centre of a hex cell.
| Cross-Linked Polyhex Grid |
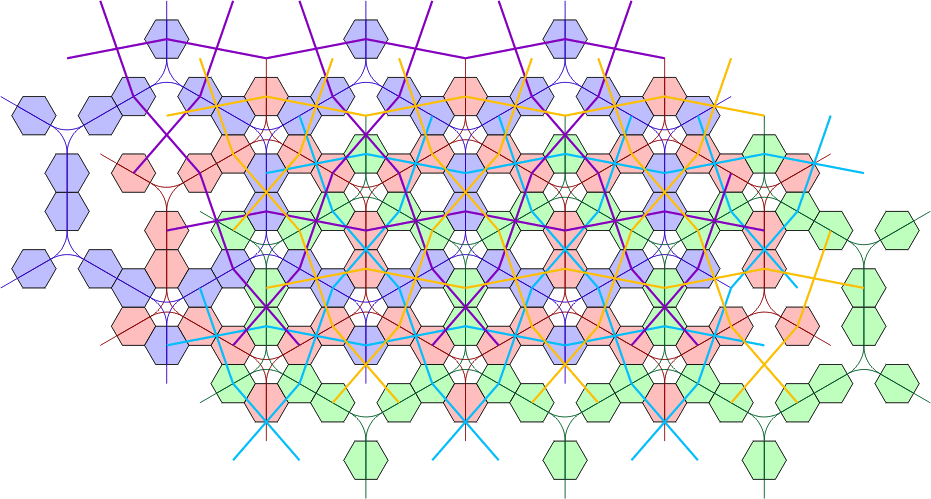 |
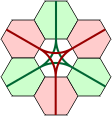
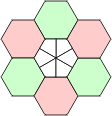
There are positions on the first grid where pieces overlap which coincide with hexes containing a star in the hex grid. There can be one to three cells of a single colour adjoining these cells, or two opposing cells of different colours. As shown below, adding two polykites to the end of each adjoining hex will emulate these conditions. Fig. 21 shows one of these cells replaced by six polykites, meaning that each single hex in the cross-linked grid above must be replaced by a ring of six, or patch of seven hexes.
Figure 17 Figure 18 Figure 19 Figure 20 Figure 21
