|
© Abaroth 2019. Permission is given to reproduce for non-profit
purposes only.
Home
Historic Sites
Models
Heraldry
Puzzles
Garden
Links
Why grow potatoes in shopping
bags?
Here are a few reasons:
1. No hard digging
Traditionally, potatoes are grown in
trenches, which are then earthed up. Especially in heavy clay
soil, this can be backbreaking.
2. Optimising growing space
The bags take up a lot less room than the
traditional rows of spuds. Until the plants break the surface,
they can be placed cheek-by-jowl, then moved apart so the plants
do not compete for light.
3. Easy harvesting
Once the potatoes are ready to harvest, you
simply empty the whole bag out onto a tarpaulin and pick out the
potatoes. There is no need for a second spell of heavy digging,
no chance of spearing potatoes with a fork and no bed of potato
plants growing next year, from the tubers you missed.
4. Cost
Heavy-duty shopping bags are cheaper than
"proper" potato bags and probably more durable than most.
5. Versatility
Should you wish, you could start growing your
potatoes early in a greenhouse or polytunnel, then move them
outdoors once the weather allows. You can also put them back
under cover if late frosts are forecast.
6. Better yields
I grew potatoes in 15 bags in 2020, and also in a
6 x 4 metre bed on a neighbouring allotment. The bags took less
than half the space, but yielded about 60% more potatoes. |
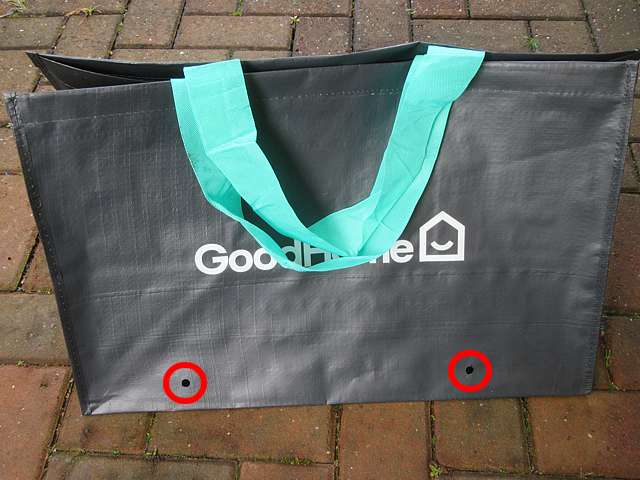
Preparing the bags
| I bought these heavy-duty
shopping bags from B&Q for £1 each, but they needed drainage holes. If
you are standing them on gravel or well-drained soil, then you
can put the holes in the base. If not, I have found the holes in
the base can get clogged up, so holes around the sides work
better. |
Click thumbnails for larger images
|
Materials & Tools
Heavy-duty shopping bags
Soldering or pyrography iron
|
 |
Step 1
Open out the bag. |
 |
Step 2
Melt holes near the base of the
bag with a hot soldering iron. Do this outdoors or in a
well-ventilated space. |
 |
|
Step 3
Make two holes on each side of
the bag as shown in the photo. |
 |
|
|
|
|
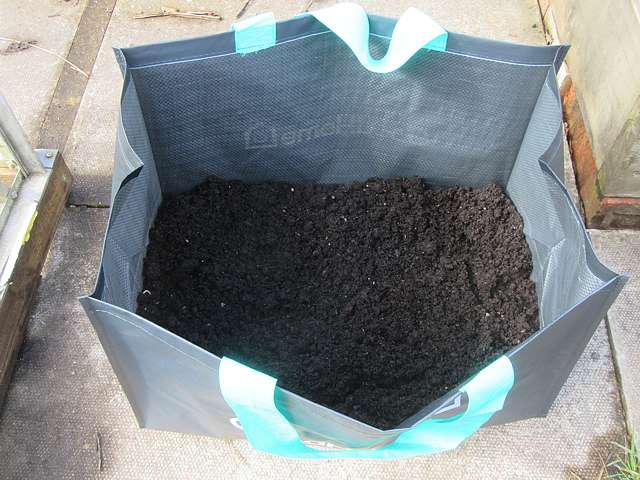
Growing potatoes in bags
|
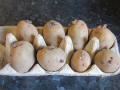
Step 1
First, chit the potatoes. Place
the potatoes in an egg box and stand them in a warm, light
place, but not in direct sunlight. A north-facing windowsill is
an ideal spot. They should produce "chits" as shown.
|
 |
Step 2
Sieve your soil or compost to
remove any stones, twigs or large clods of clay. If you are
using good-quality fresh compost you may not need to sieve it. |
|
Step 3
Fill the bags to a depth of about
5cm / 2" with sieved soil or compost. |
 |
|
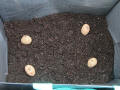
Step 4
Push your potatoes gently into
the soil with the chits facing upward. |
 |
Step 5
Cover with another 5-8cm / 2-3"
of sieved soil or compost. Water well. |
 |
Step 6
You can fill the bags close to
the top now, or wait for the first shoots to appear first, then
earth them up. |
|
Home
Historic Sites
Models
Heraldry
Puzzles
Garden
Links
Contact me with suggestions, comments or questions.
 |