|
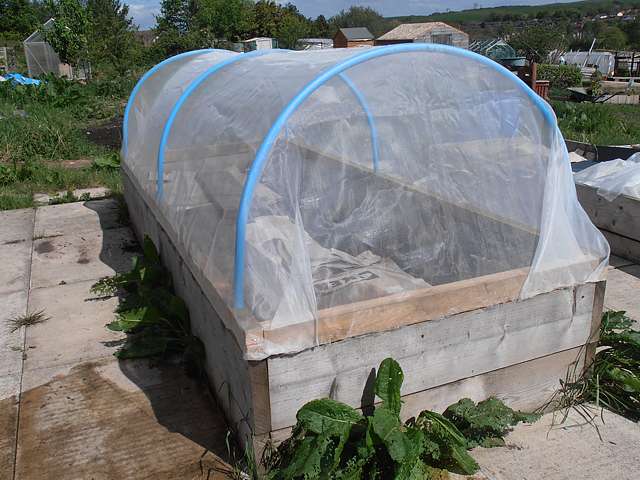
These cloches are
designed to fit over raised beds. The hinges make it very simple
to open them for weeding, watering and cropping, then close them
again. The required gauge of timber will vary for different
sizes of bed, and the structure can be covered with bird netting,
insect mesh or polythene sheeting. If you make your beds the
same size, the cloches can be easily moved from bed to bed,
allowing for rotation of crops. |
|
Materials & Tools
Timber, Metal tubing, Alkathene
pipe, Wood Screws, Mesh and/or polythene sheet, Chain or webbing
strap, Hinges.
Measuring tape, Wood saw, Hacksaw, Drill and bits, Staple gun
|
|
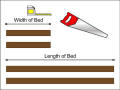
Step 1
Measure the length and width of
your raised bed. Cut two pieces of timber to fit each
measurement, as shown. |
 |
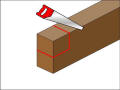
Step 2
Cut half-lap joints on each end
of all four pieces. These make the joints considerably stronger.
|
 |
|
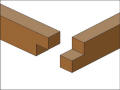
Step 3
This is how the joints should
look, once finished. |
 |
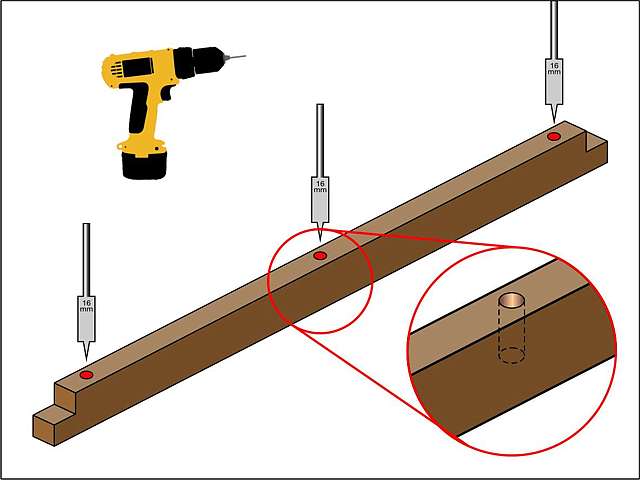
Step 4
Drill holes in the top of each of
the long lengths to accommodate a length of metal tubing. Drill
about halfway through the timber. Holes should be evenly spaced,
and no more than about 1.5 metres / 5 feet apart.
|
 |
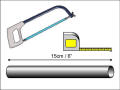
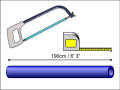
Step 5
With a hacksaw, cut a 15cm length
of metal tubing for each hole.
|
 |
|
Step 6
For each pair of holes, cut a
piece of alkathene pipe to a length of 1.9 metres / 6' 2".
This assumes your mesh or polythene is 2 metres wide, leaving
enough material to fix to the frame.
|
 |
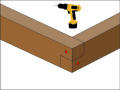
Step 7
Fit one of the corner joints
together, and drill two pilot holes, as shown. Repeat for all
four corners.
|
 |
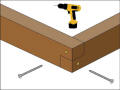
Step 8
Secure the joint with long
screws. Repeat for all four corners. |
 |
|
Step 9
Place the frame in position on
the raised bed. |
 |
Step 10
Insert a length of metal tubing
into each of the holes from Step 4. |
 |
Step 11
Slide a length of alkathene pipe
over the metal tubing. Bend the top over, and slide it onto the
metal tubing at the other side. Repeat for the other pipes.
|
 |
|
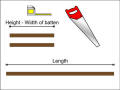
Step 12
Measure the distance from the
outer edge of the two outermost pipes, and the height from the
bed to the top of the hoop, as shown.
|
 |
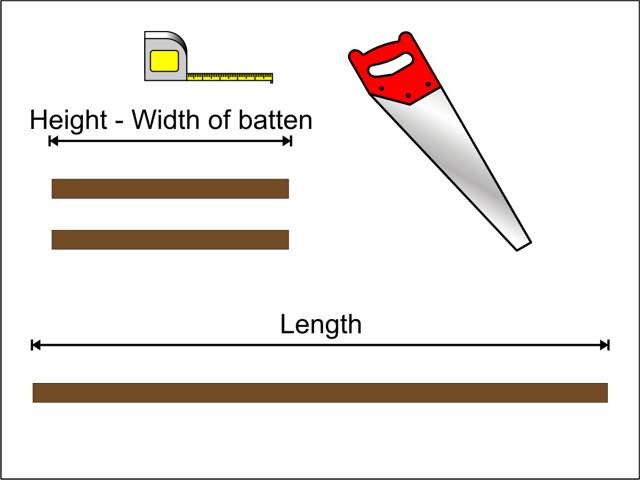
Step 13
Cut two pieces of batten to match
the height, less the width of the batten. Cut one piece to the
length. |
 |
Step 14
Drill pilot holes through the top
of each hoop. Screw the end battens to the base-frame, then
screw the top batten to the pipes and end battens. |
 |
|
Step 15
Fit your choice of cover, and
secure it to the base-frame all around using a staple gun. |
 |
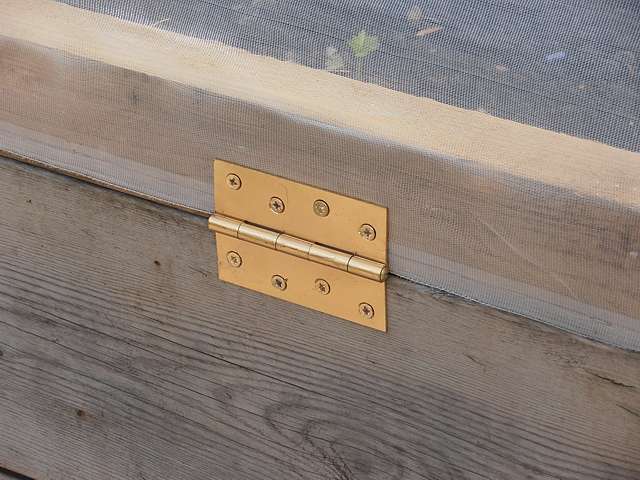
Step 16
Fit the hinges. |
 |
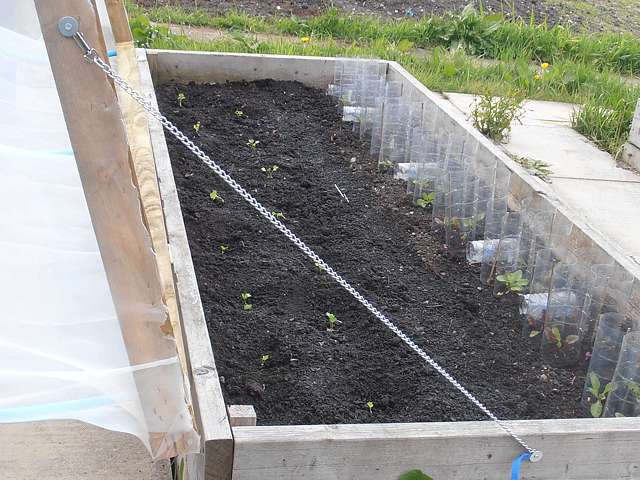
Step 17
Fit a length of webbing or chain
to allow the cloche to be left open. |
 |
|
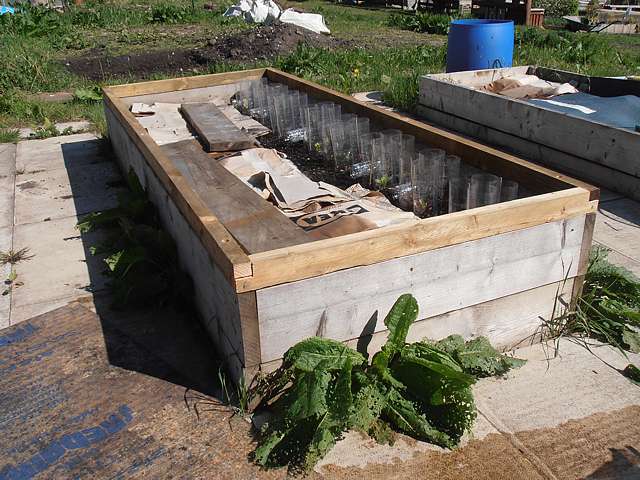
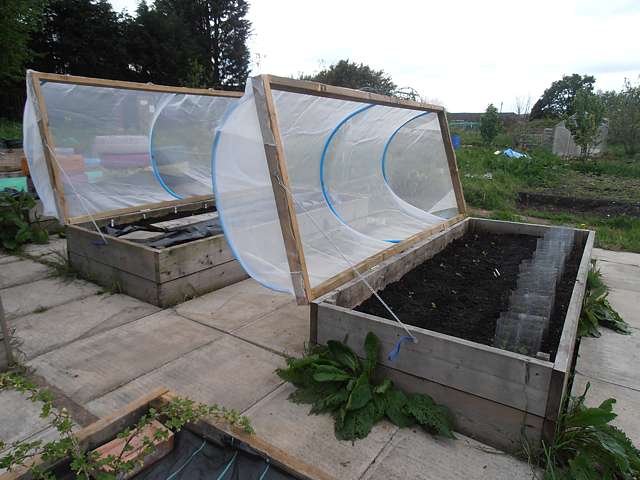
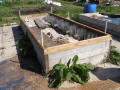
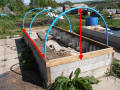
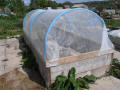
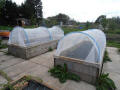
Example 1
Two raised beds with cloches
fitted. |
 |
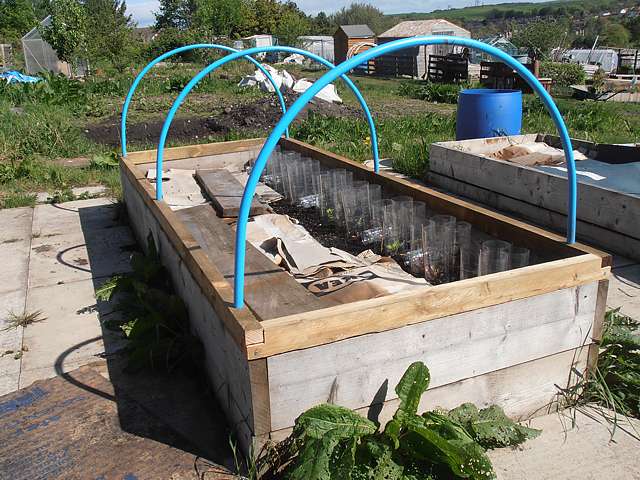
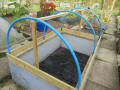
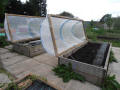
Example 2
The beds, with the cloches open.
|
 |
|
|
|